Anti-Theft, included in AVG AntiVirus for Android, requires initial setup before you can track and control your device remotely.
To enable Anti-Theft, follow the steps in the sections below in order:
Run Anti-Theft setup
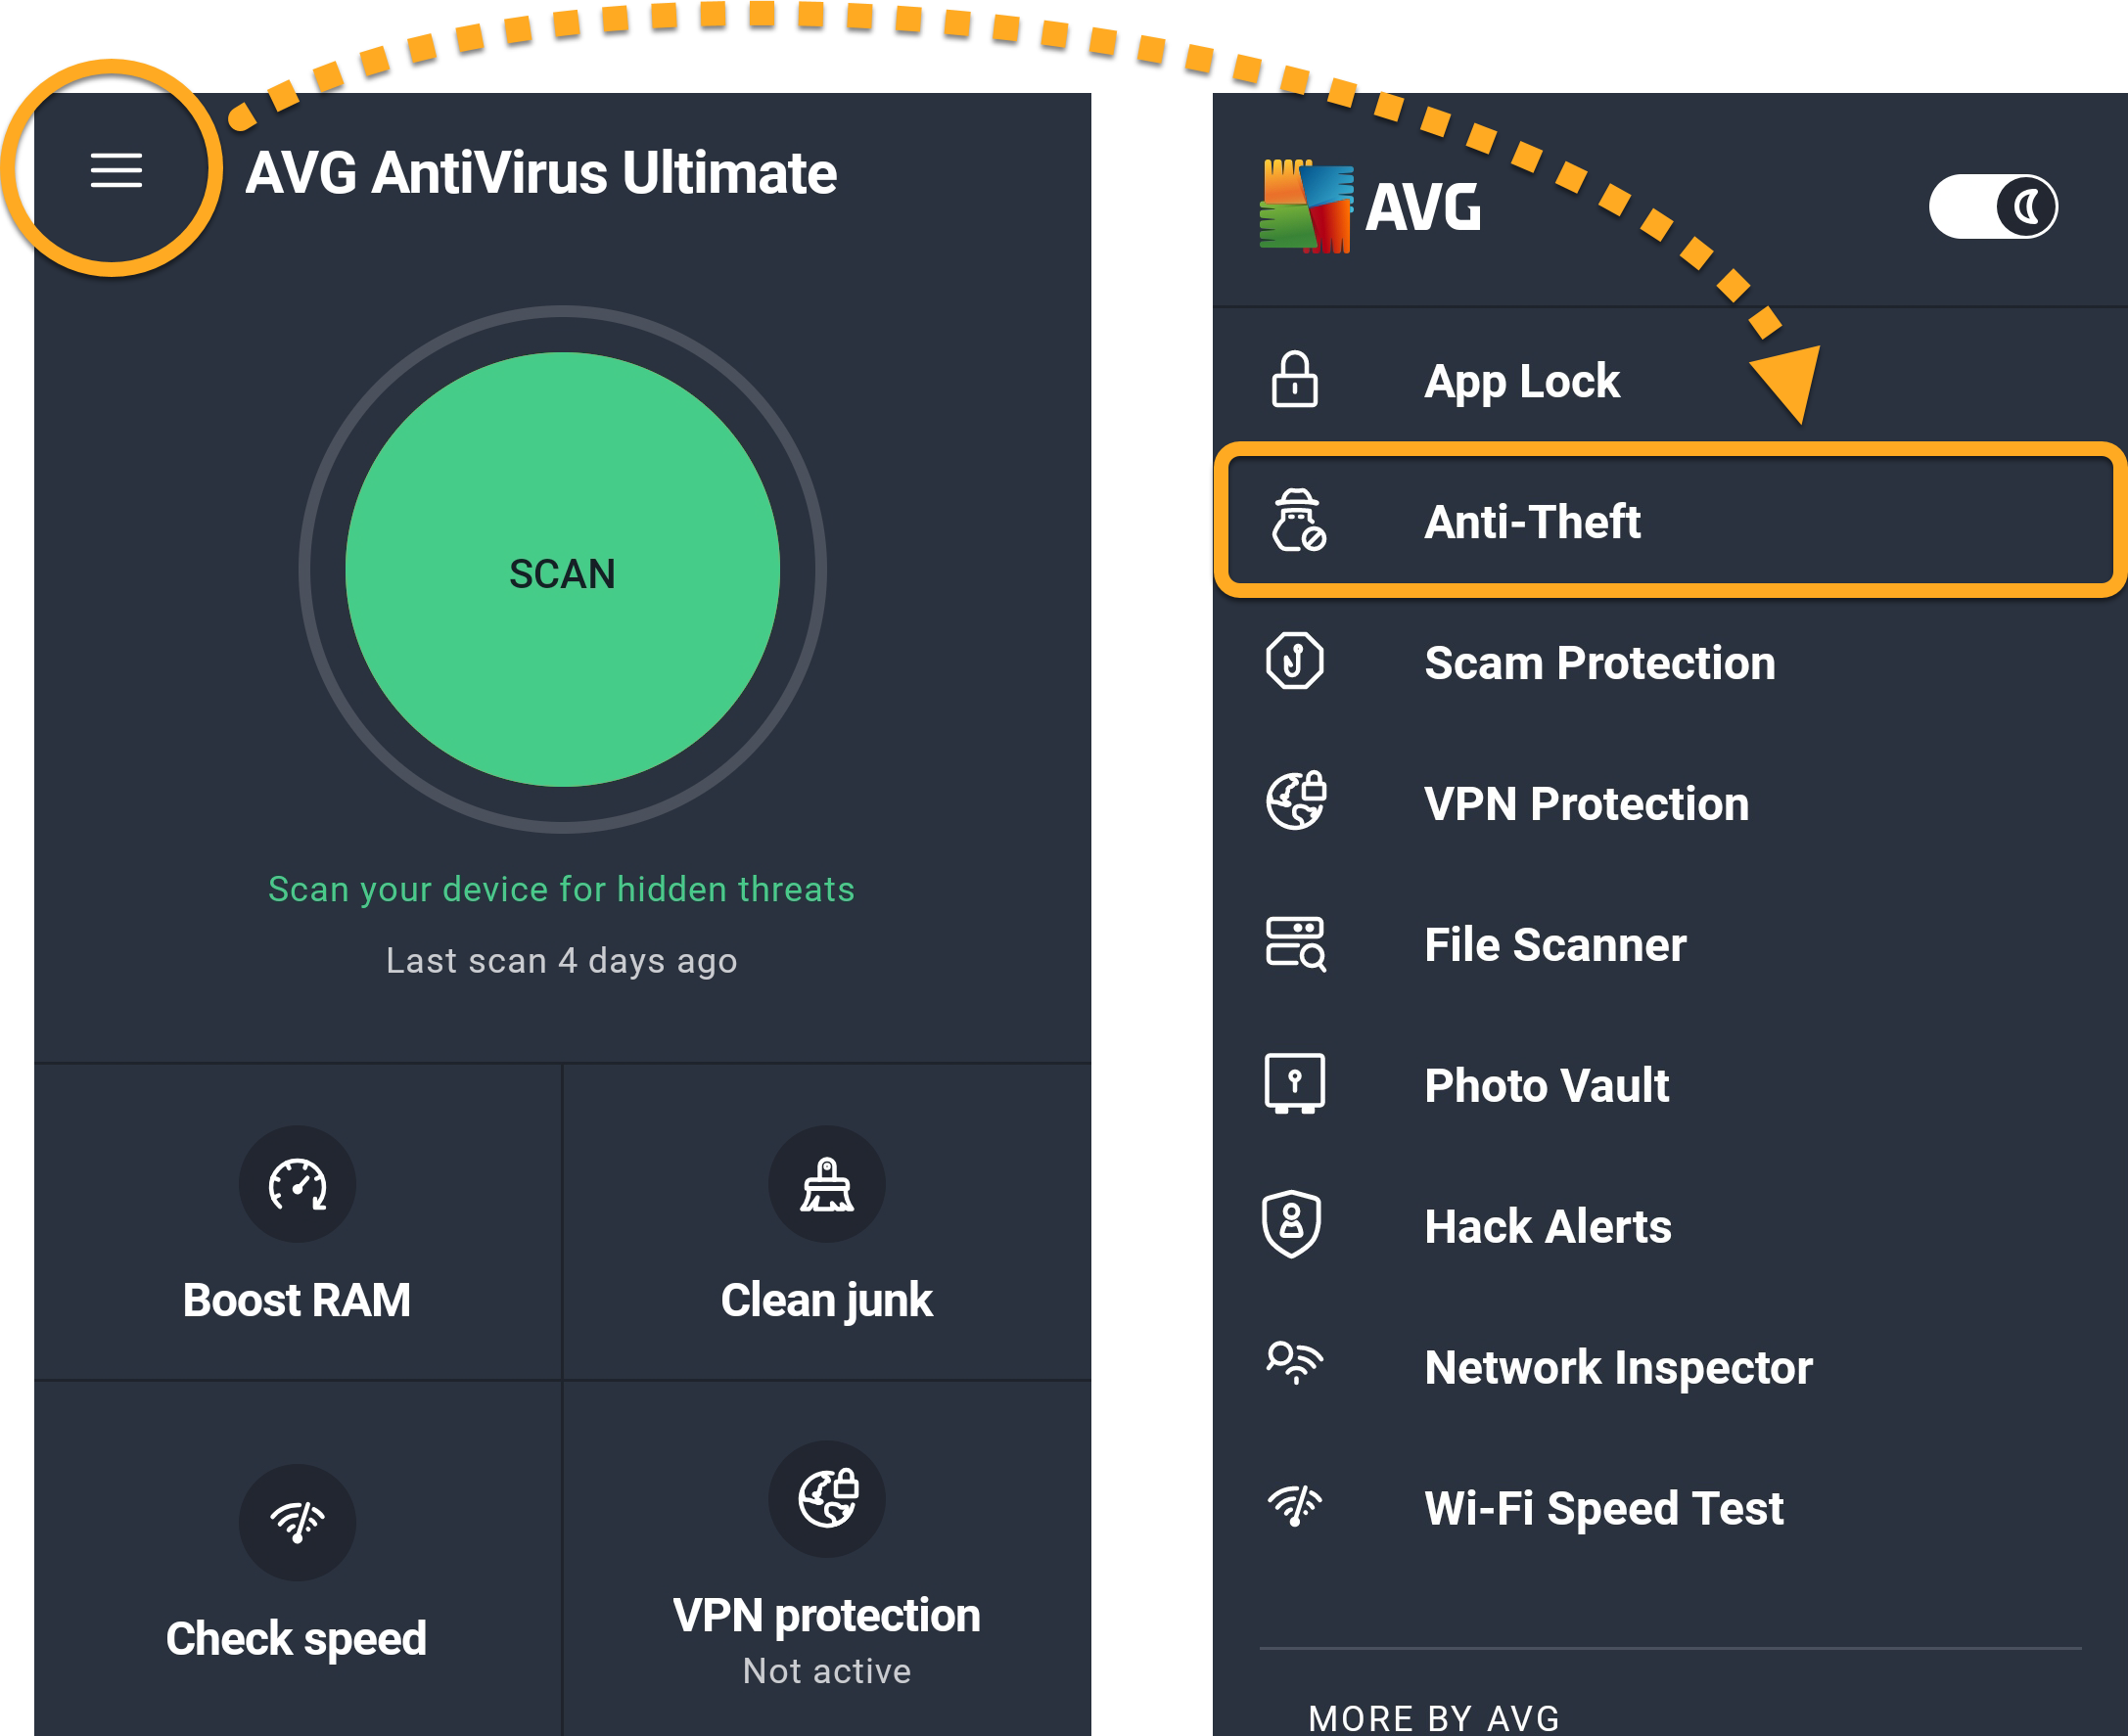
- Open AVG AntiVirus, then tap
☰Menu (three lines) ▸ Anti-Theft.
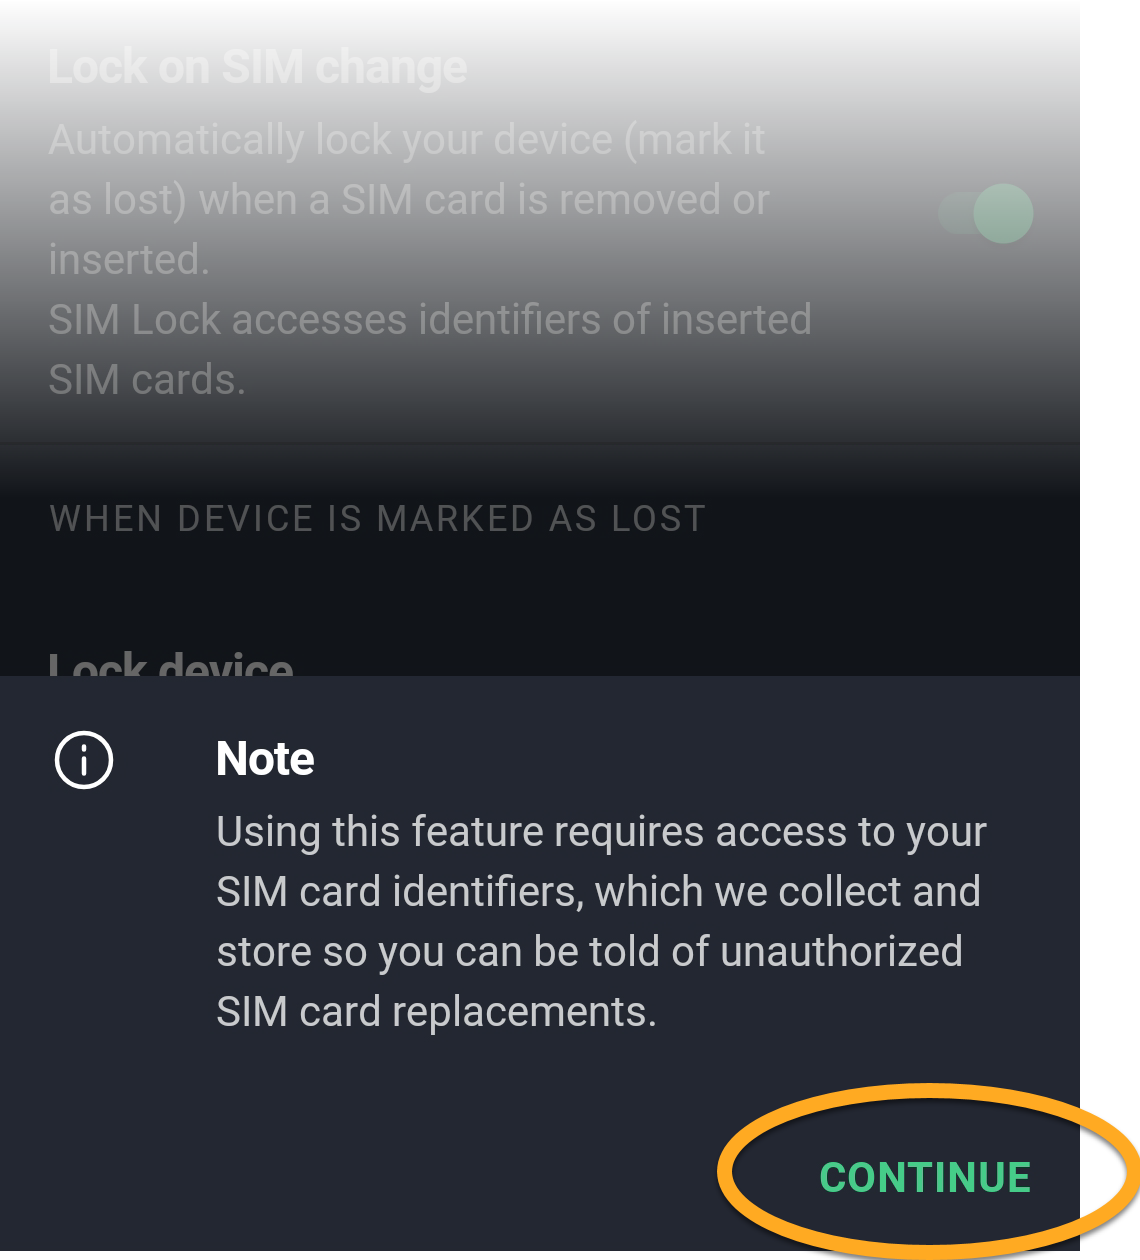
- Review the privacy notice and tap Continue.
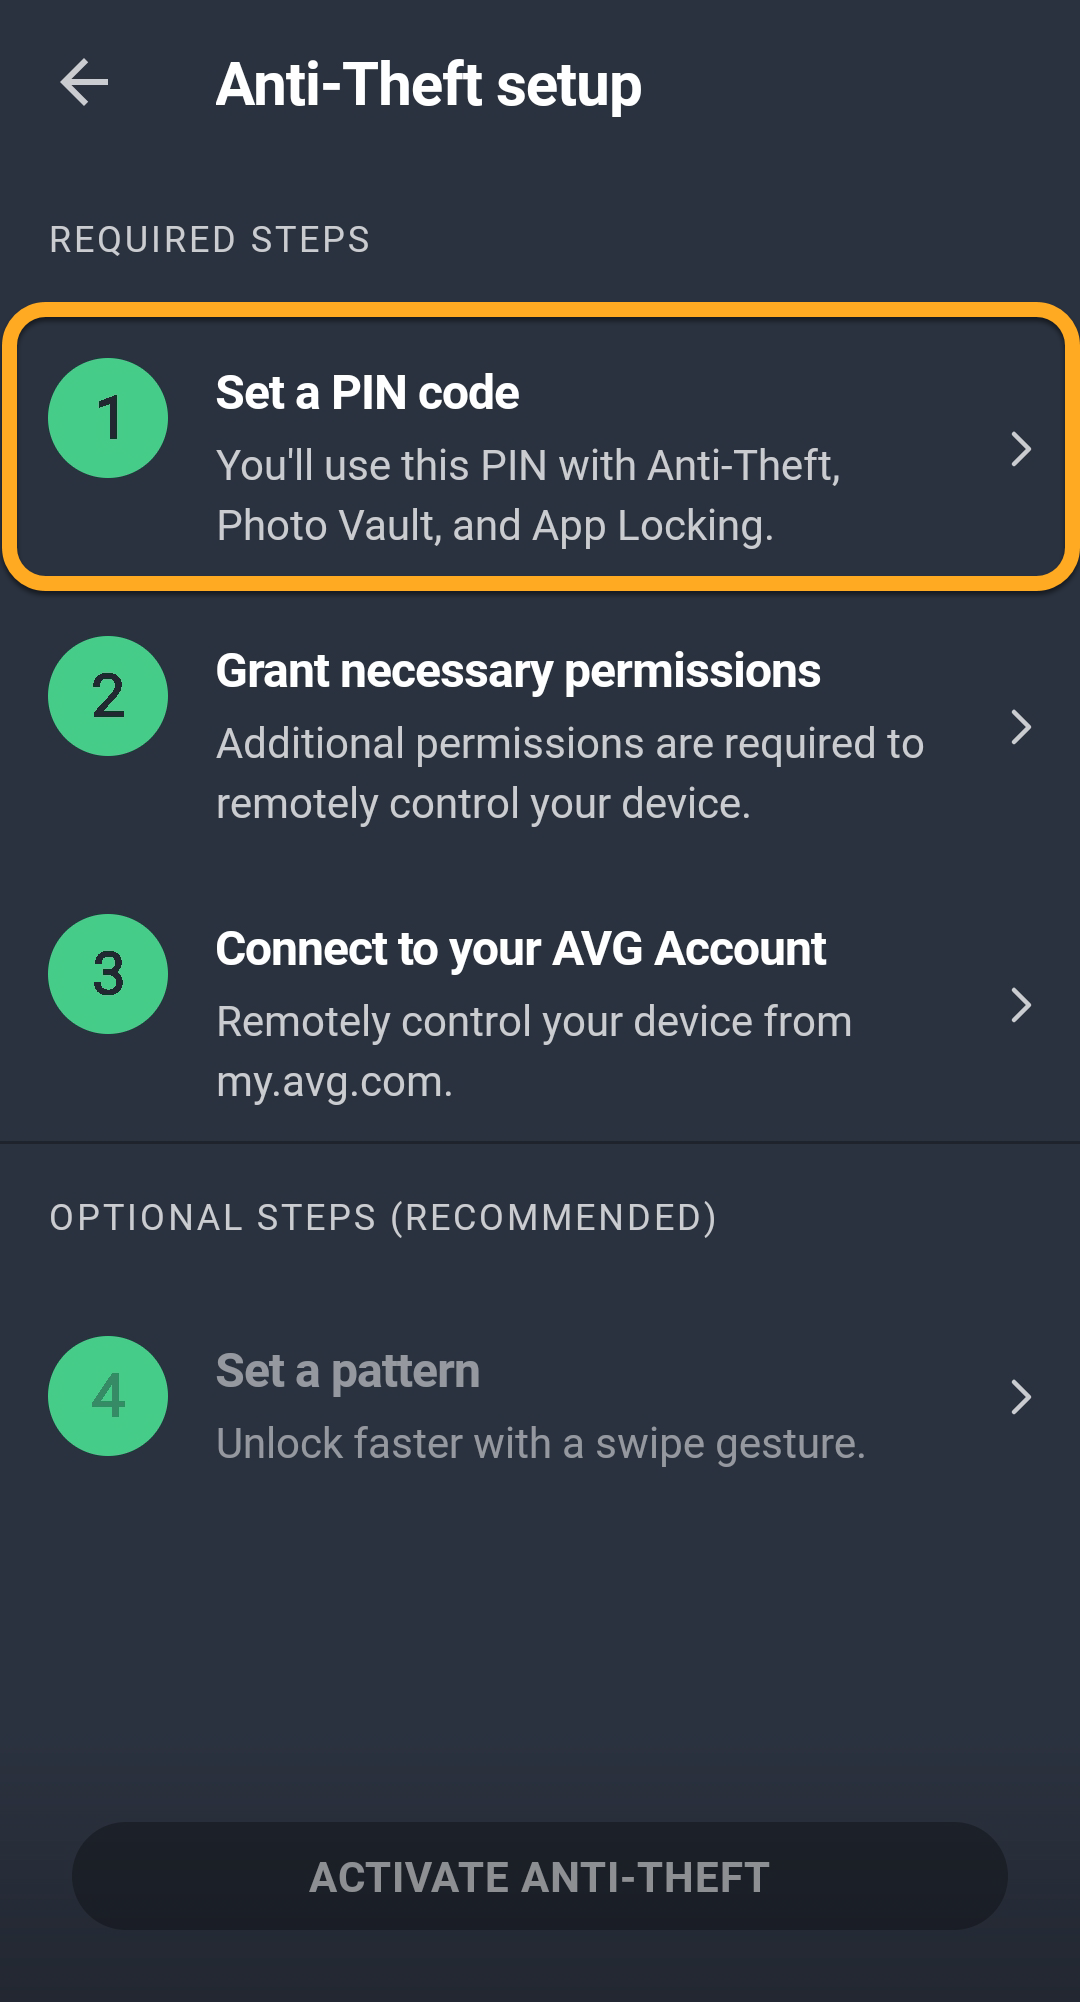
Create your PIN
- Tap Set a PIN code from the Anti-Theft setup screen.
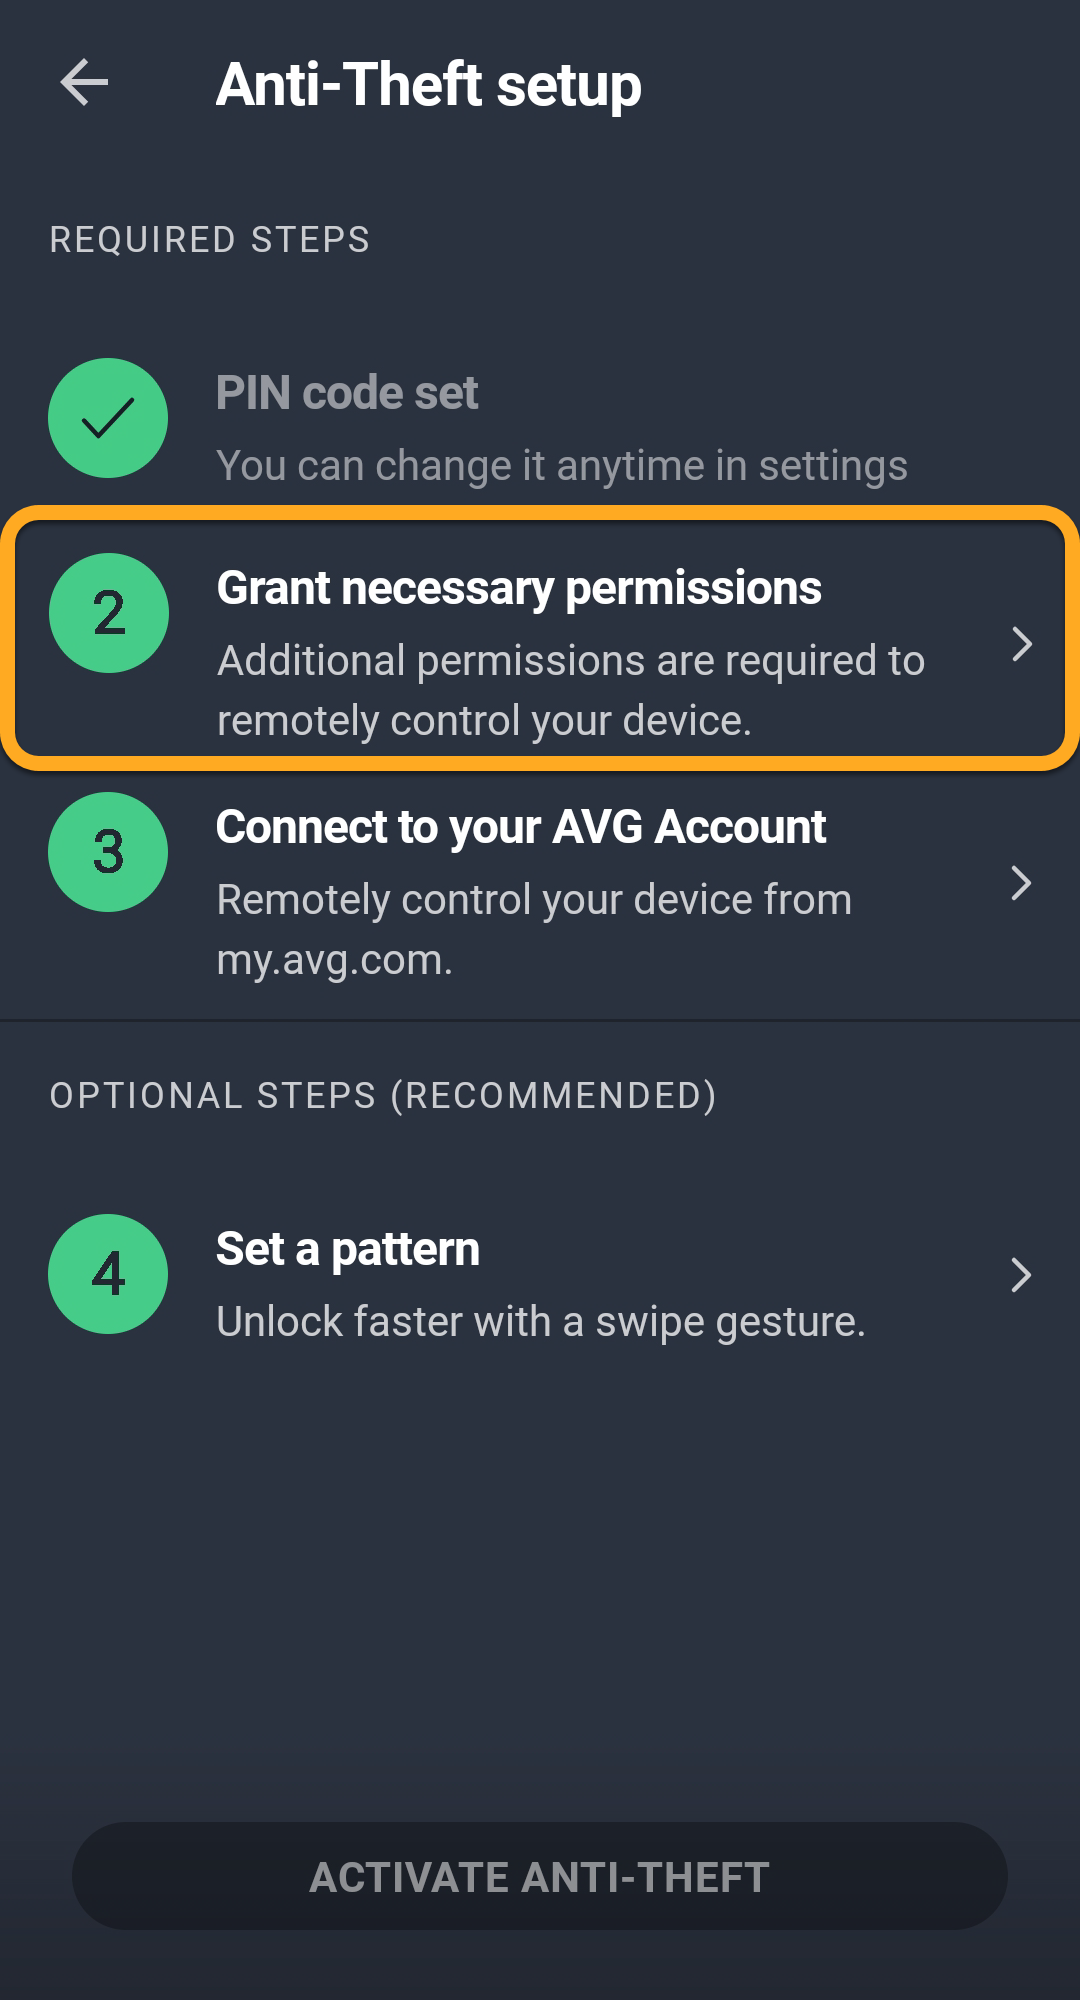
If you already created a PIN code while setting up App Locking or Photo Vault, you do not need to create a separate PIN code for Anti-Theft. If you see the messsage PIN code set, tap Grant necessary permissions to continue with Anti-Theft setup.
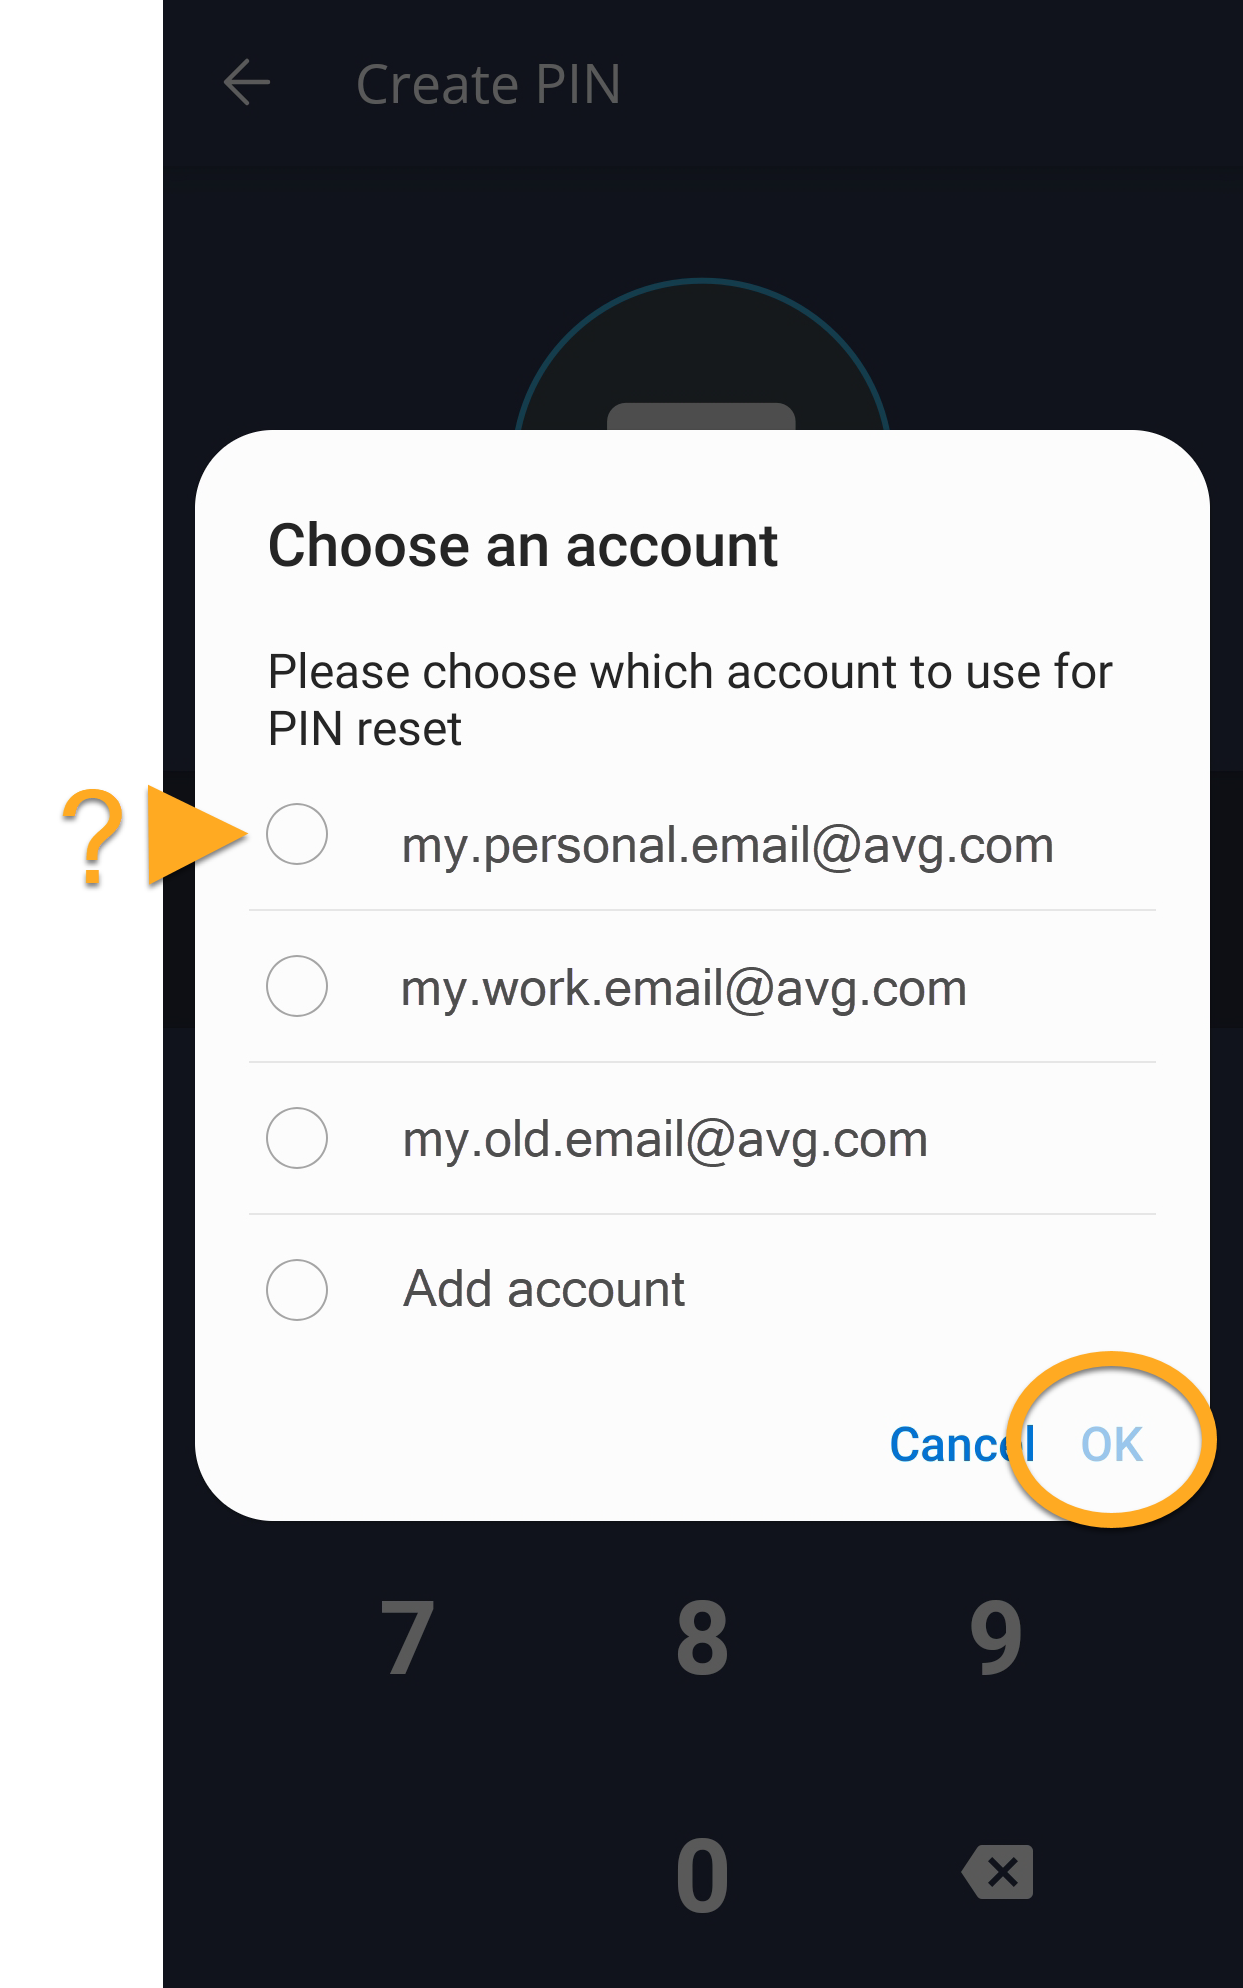
- Select a Google Account for PIN reset and tap OK to confirm. If you forget your PIN, you can reset it by signing in to the selected Google Account.
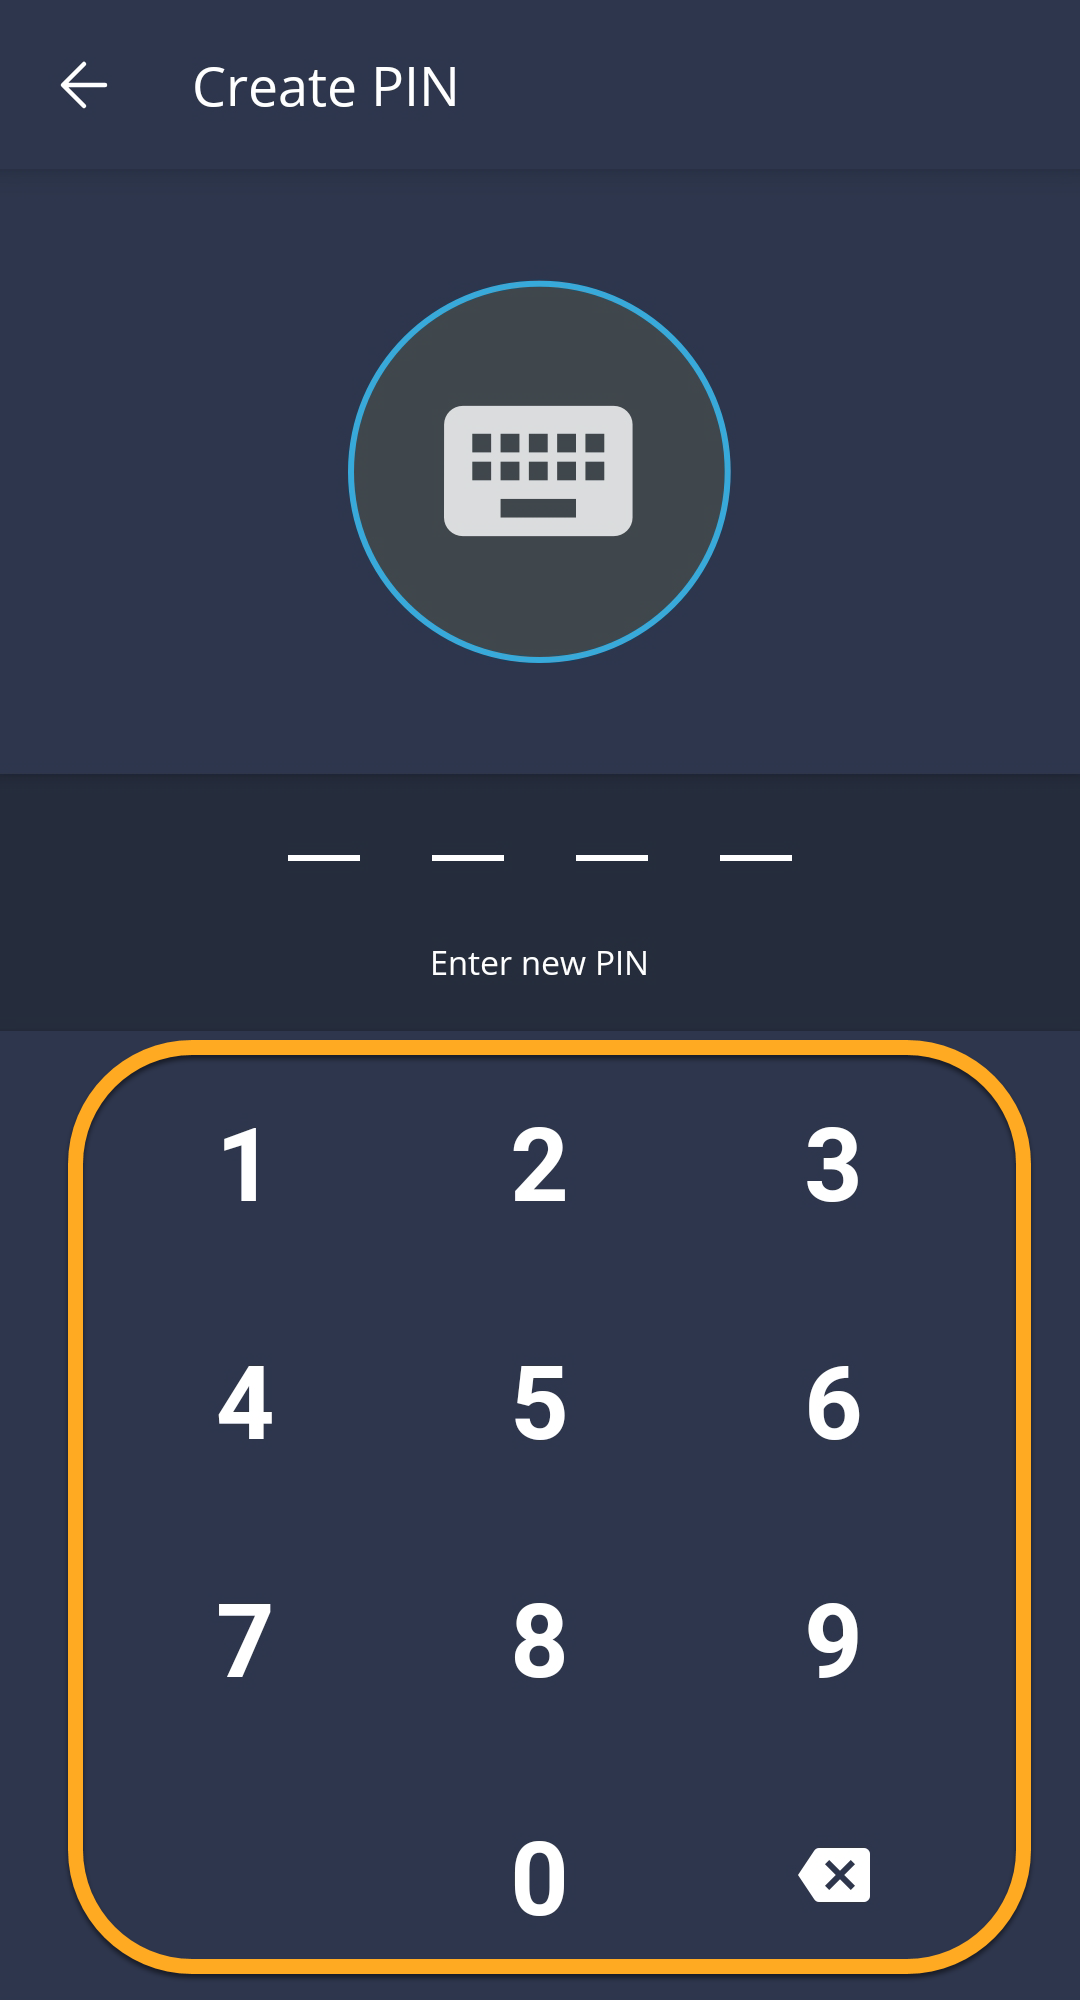
- Enter a PIN code and type it again to confirm.
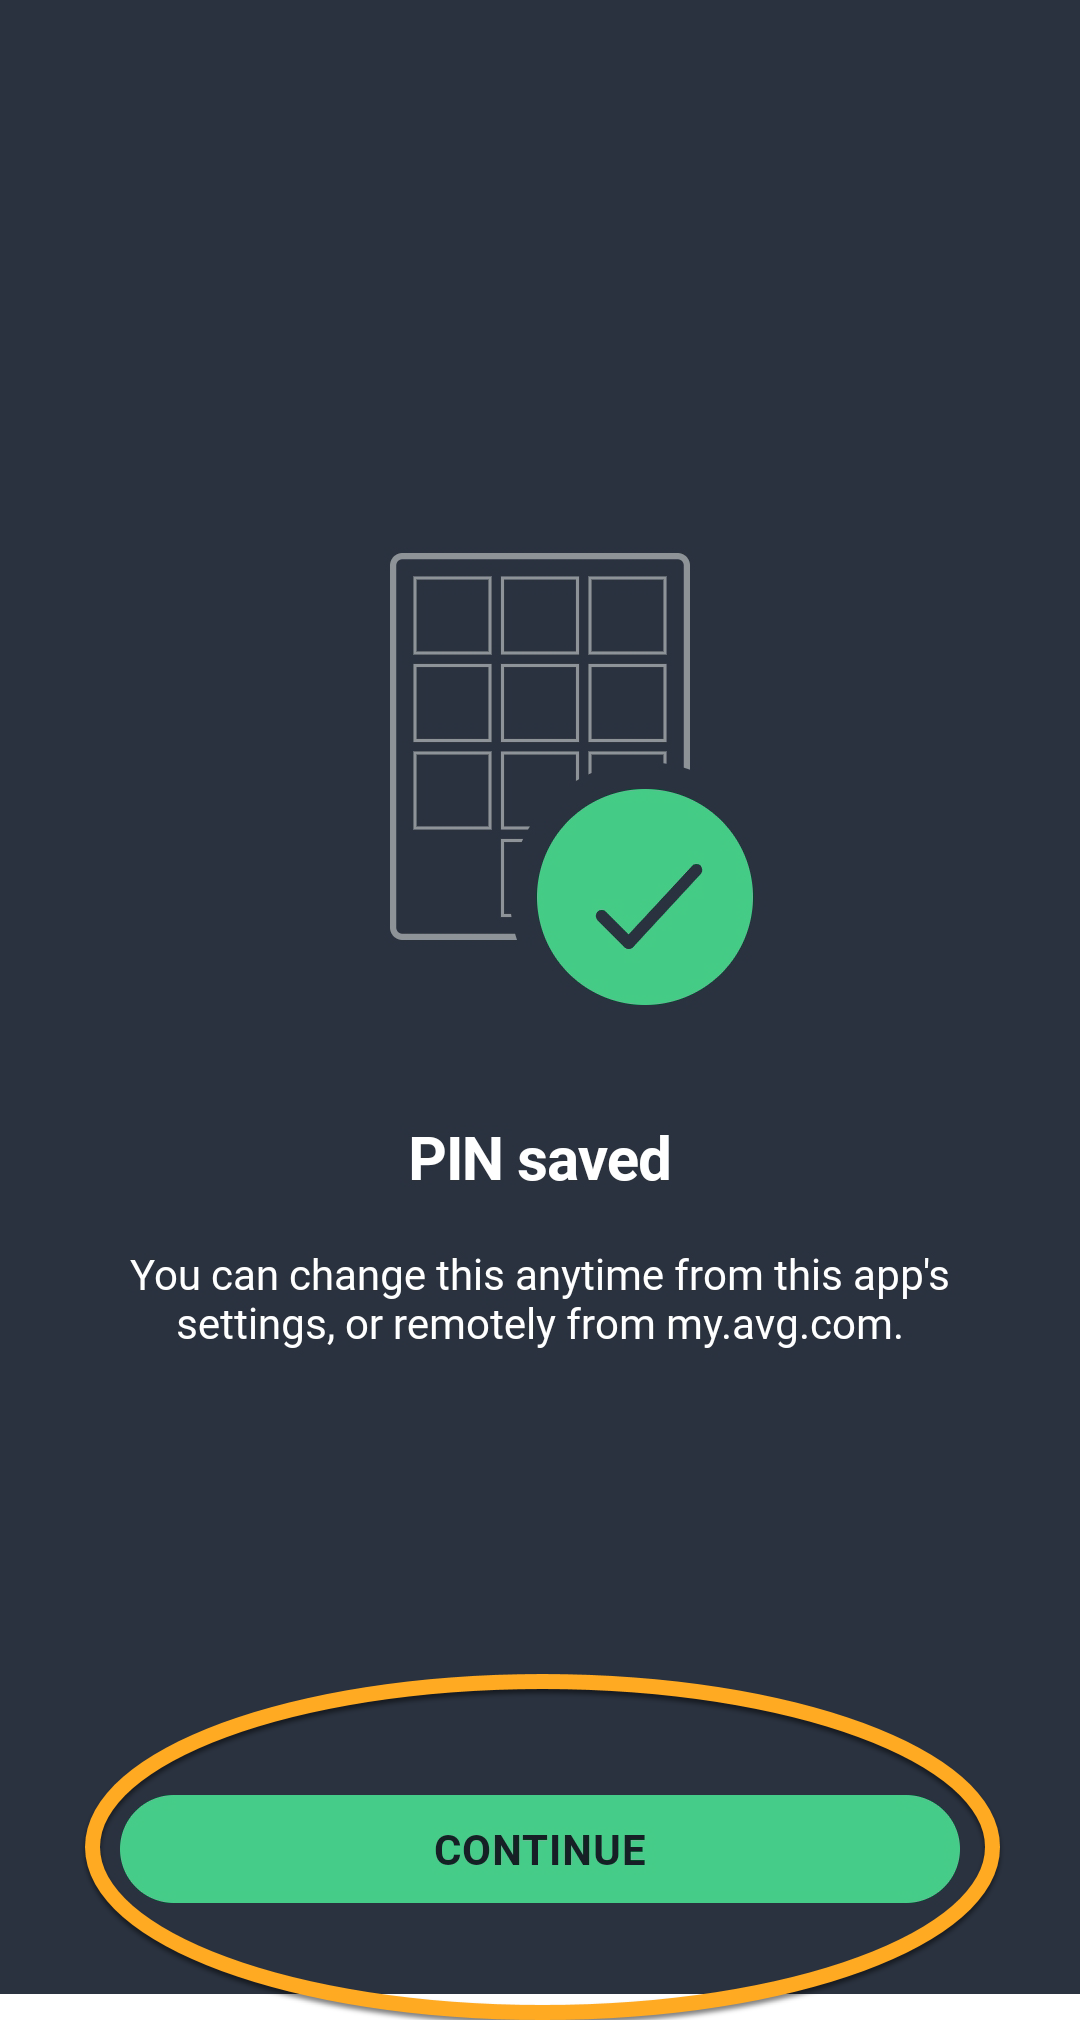
- Tap Continue to complete the PIN code setup.
Grant permissions
Before you can activate the Anti-Theft feature, you need to grant AVG AntiVirus several permissions in your device Settings. These permissions are essential for you to track and control your device remotely.
- Tap Grant necessary permissions.
- Tap Go To Settings. To grant the System overlay permission, tap the white (OFF) slider next to AntiVirus so that it changes to blue (ON).
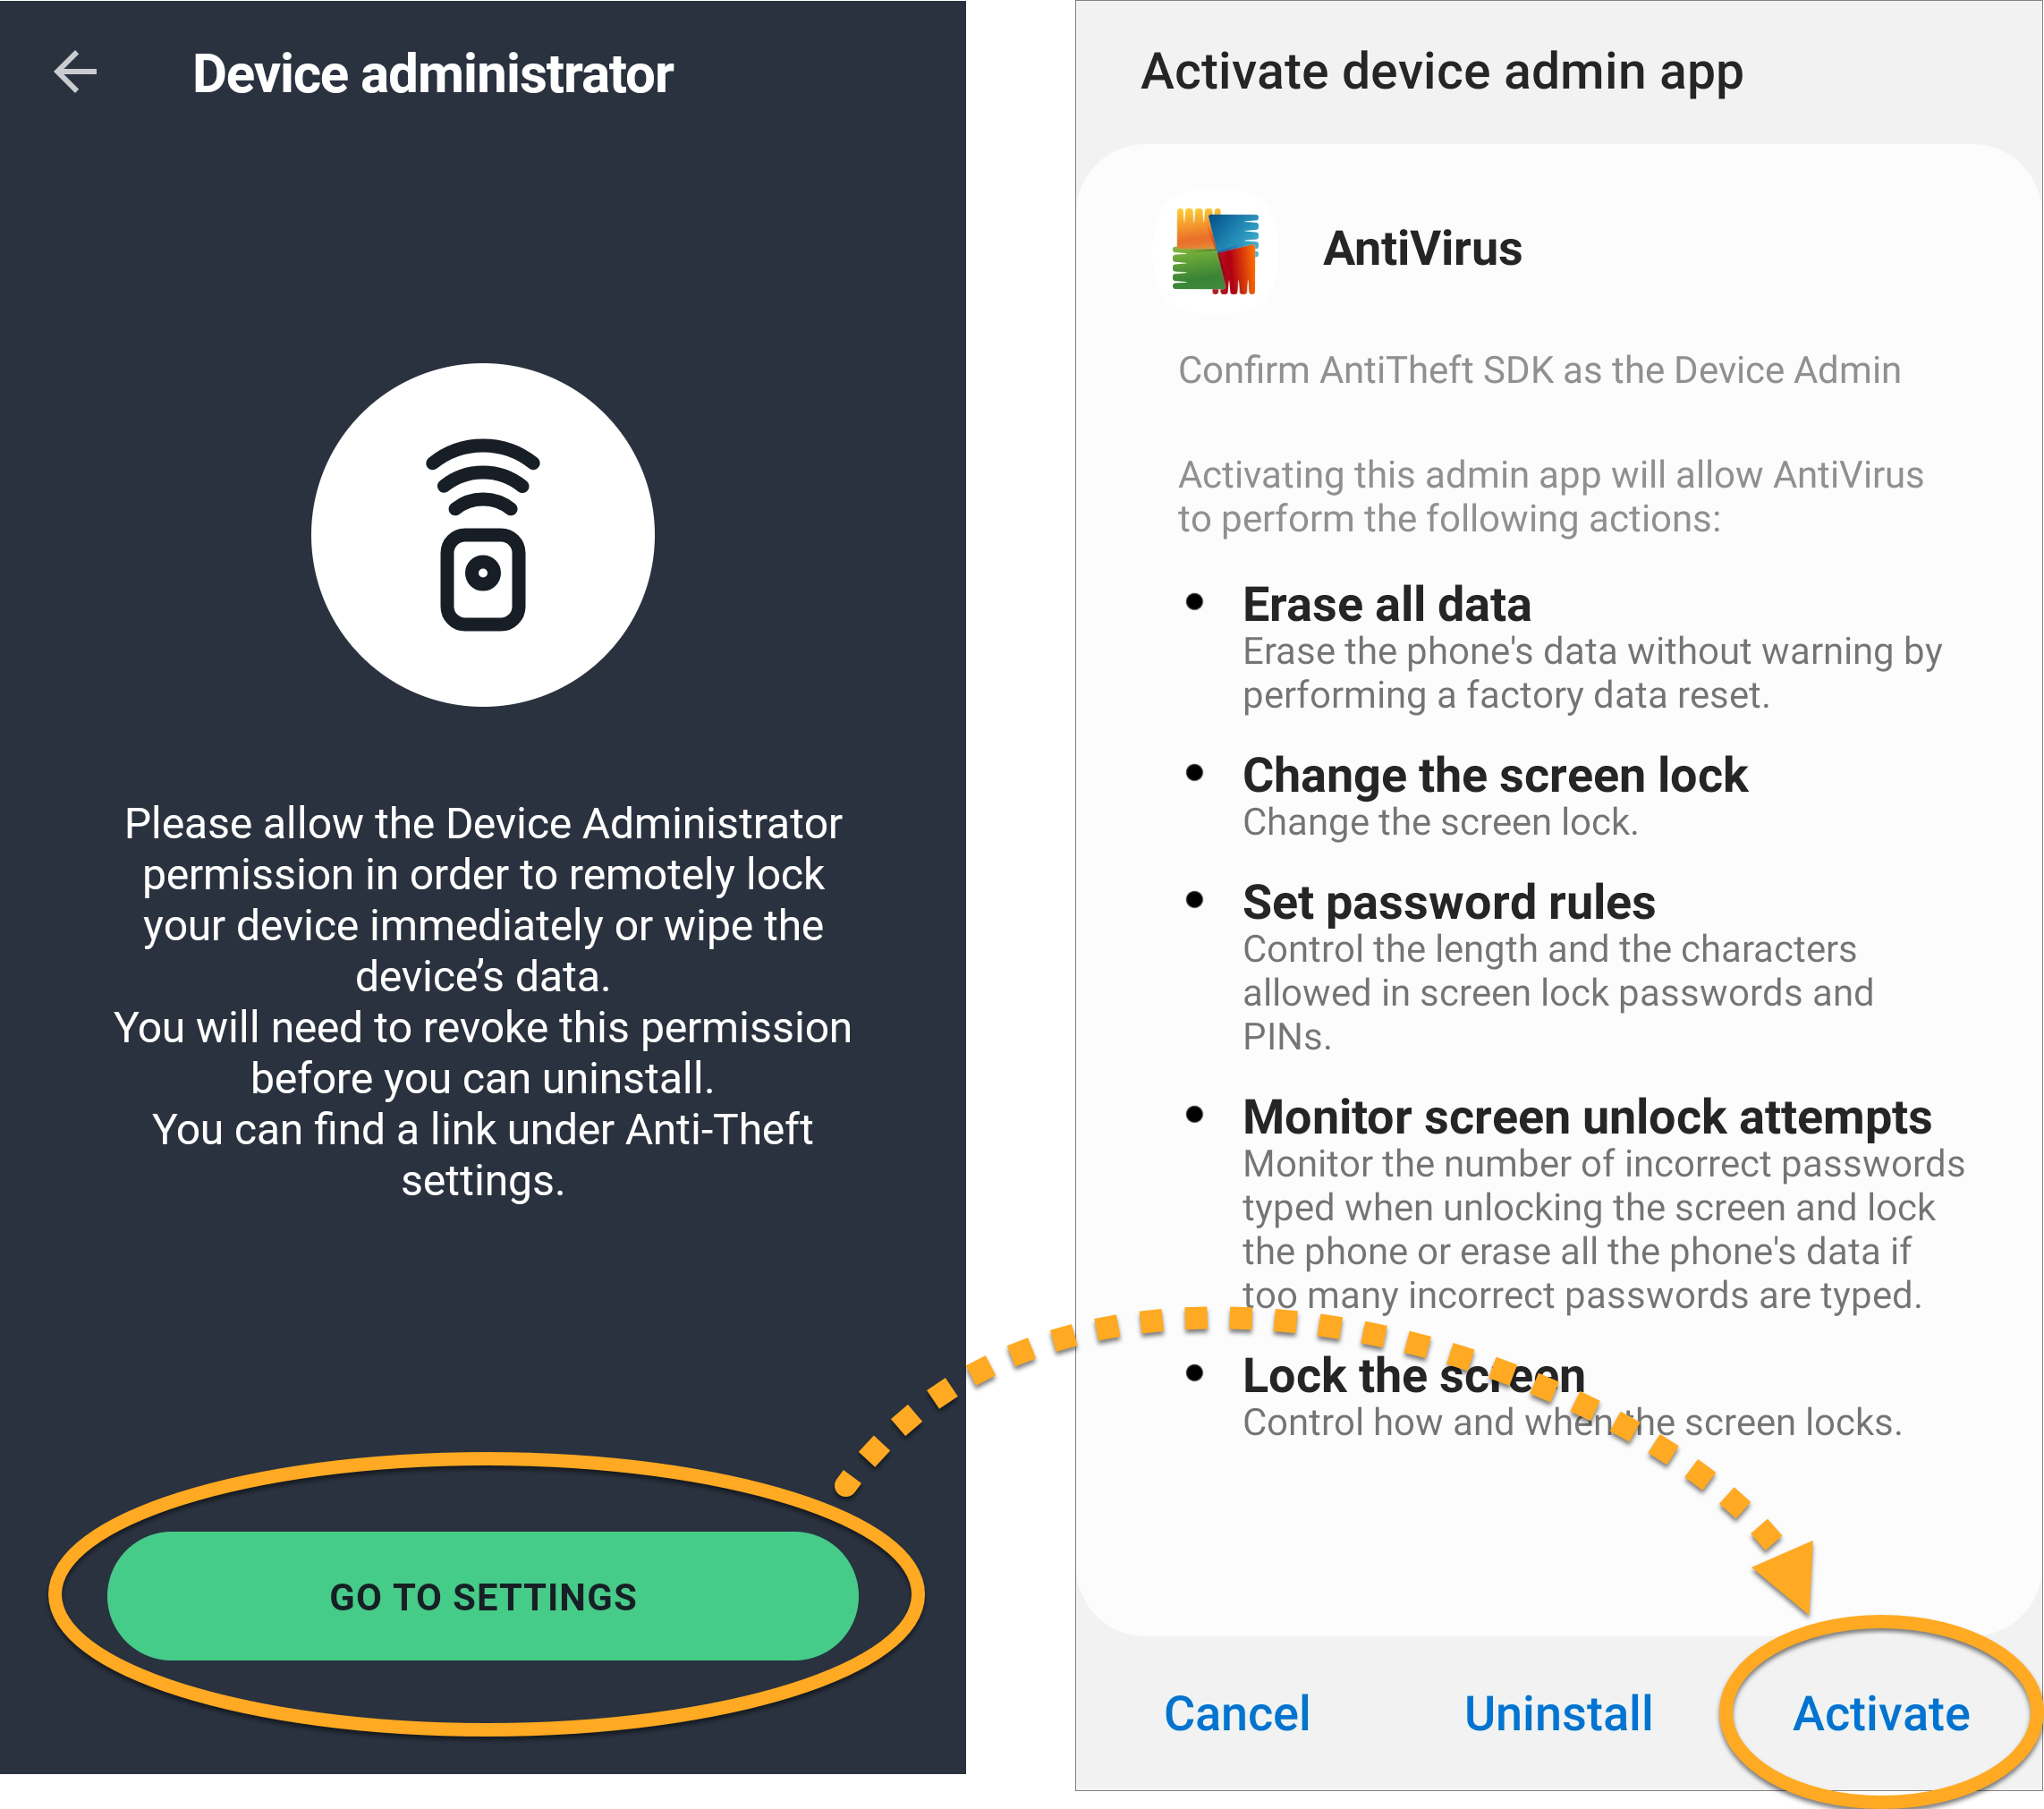
- Tap Go To Settings. Tap Activate to grant the Device admin permission.
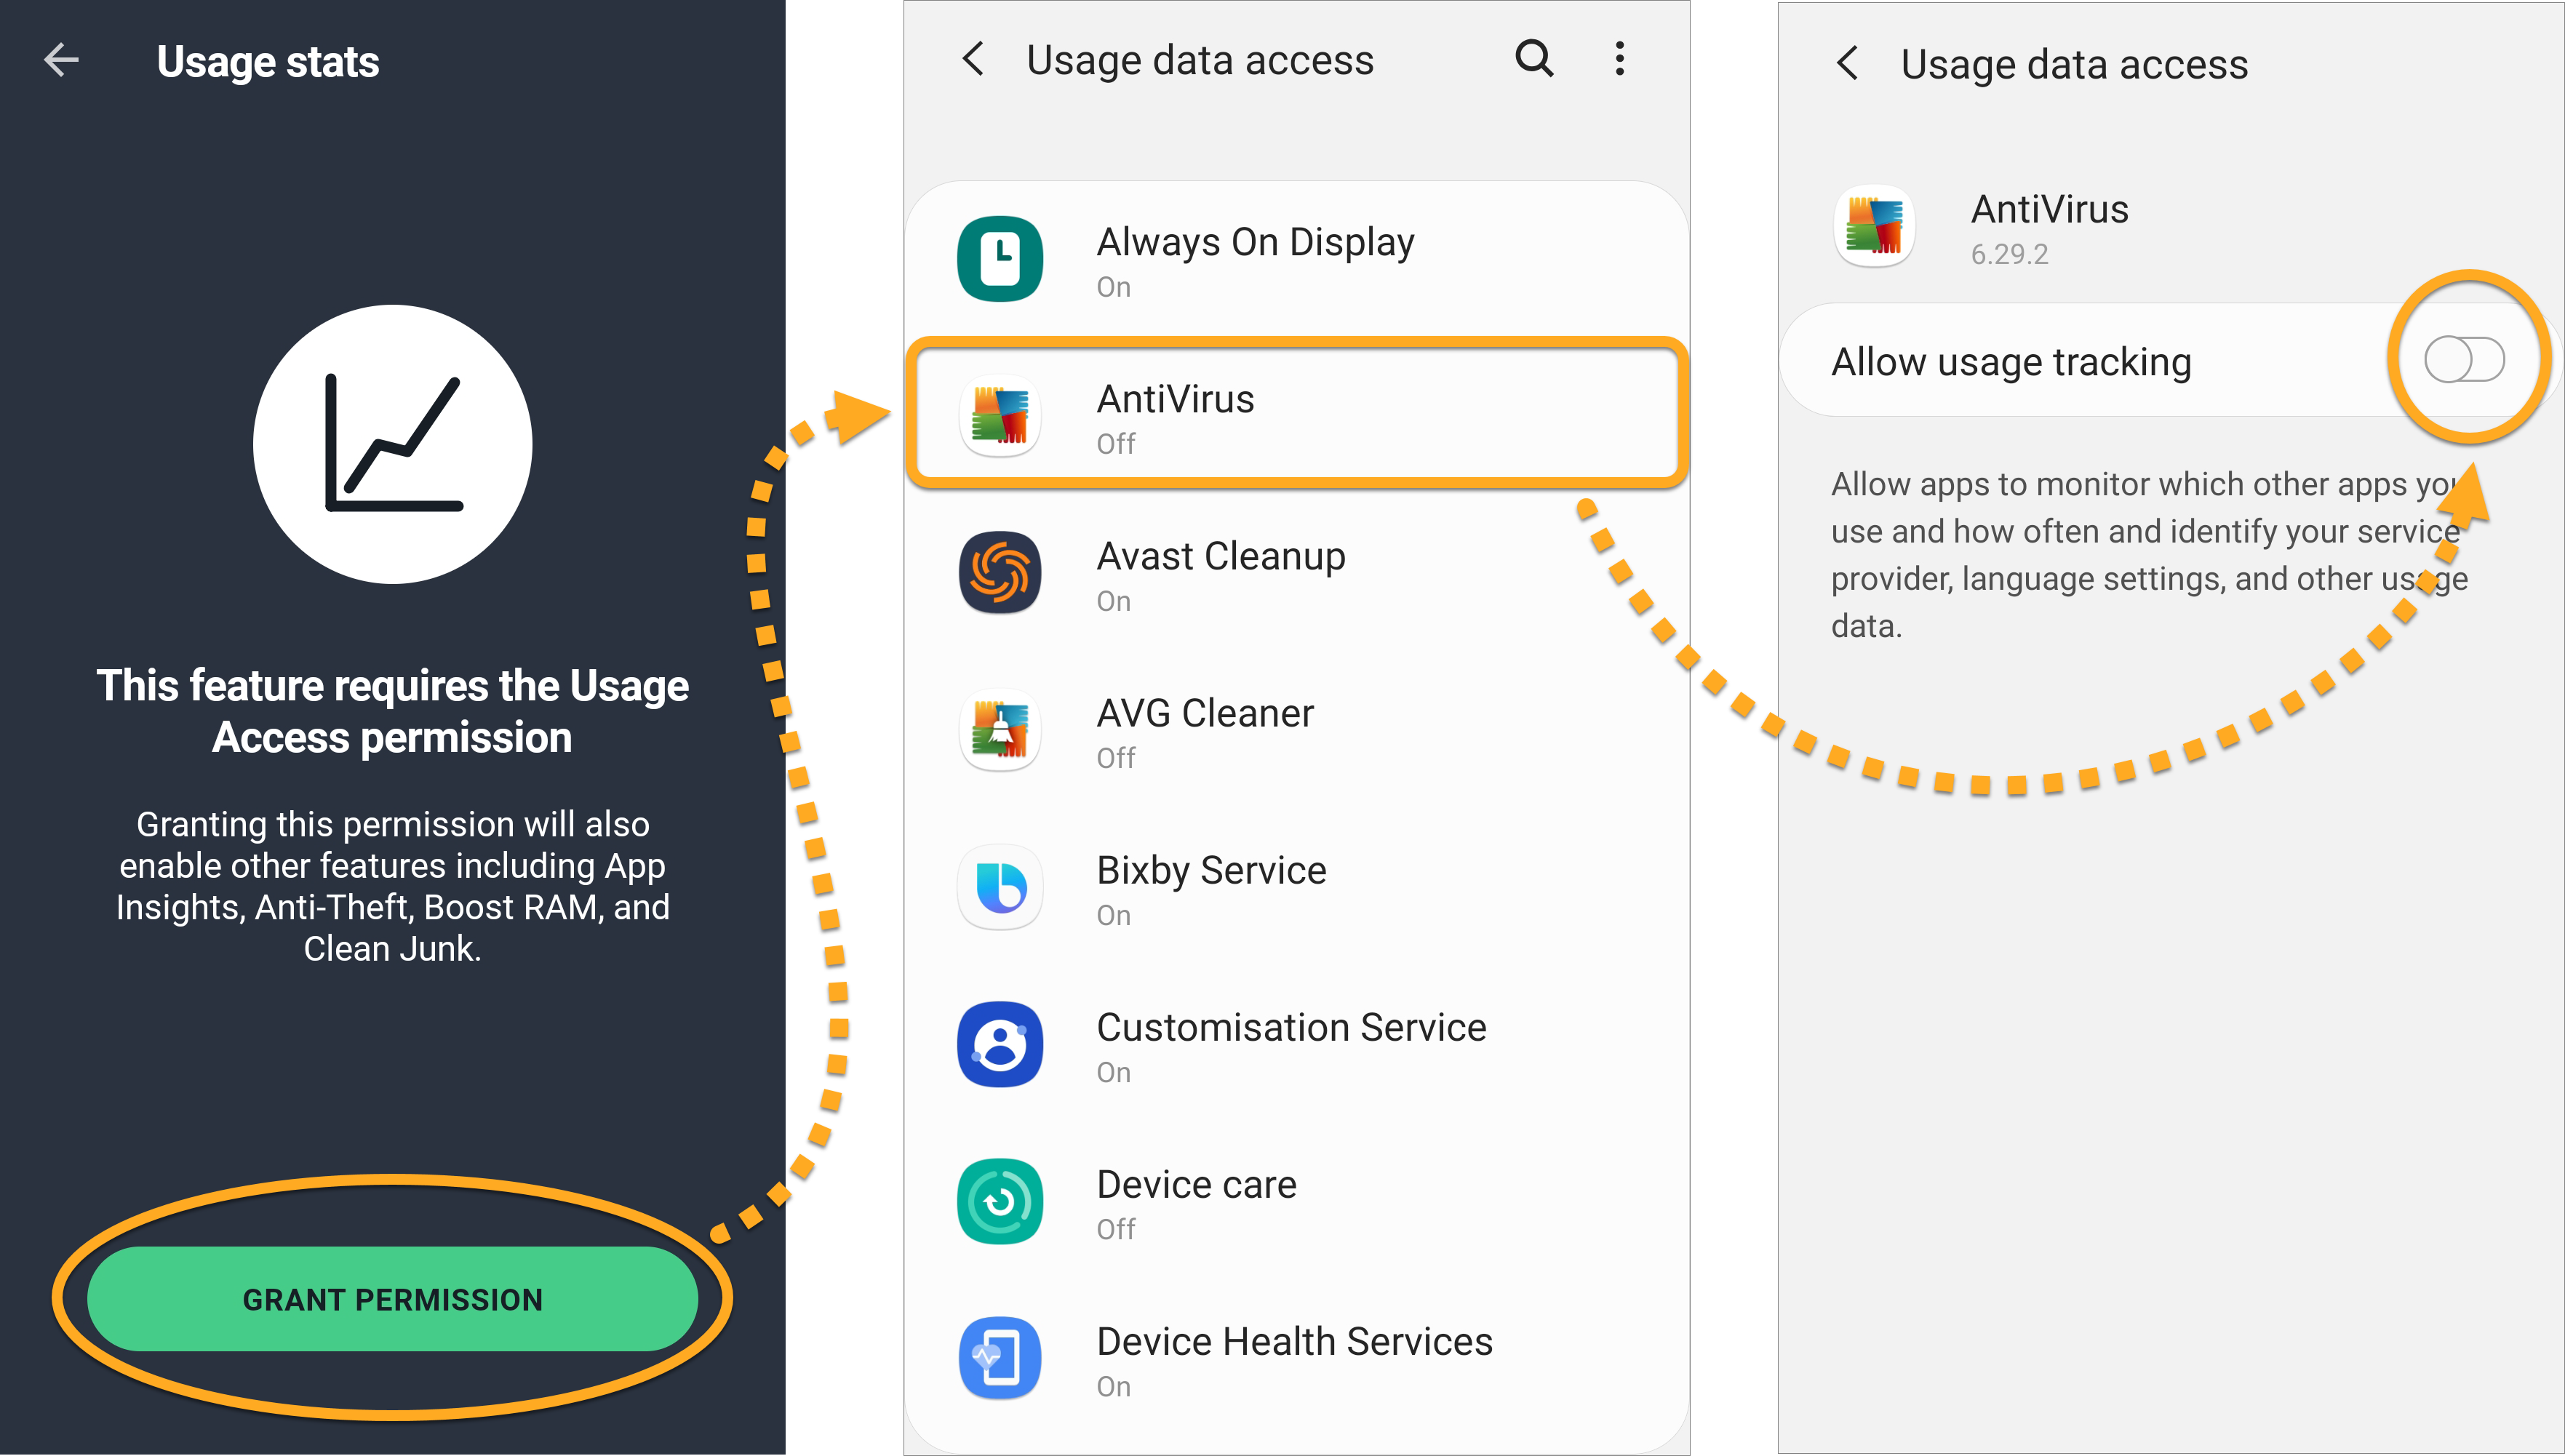
- Tap Grant Permision. To grant the Usage Access permission, select AntiVirus, and tap the white (OFF) slider next to Allow usage tracking so that it changes to blue (ON).
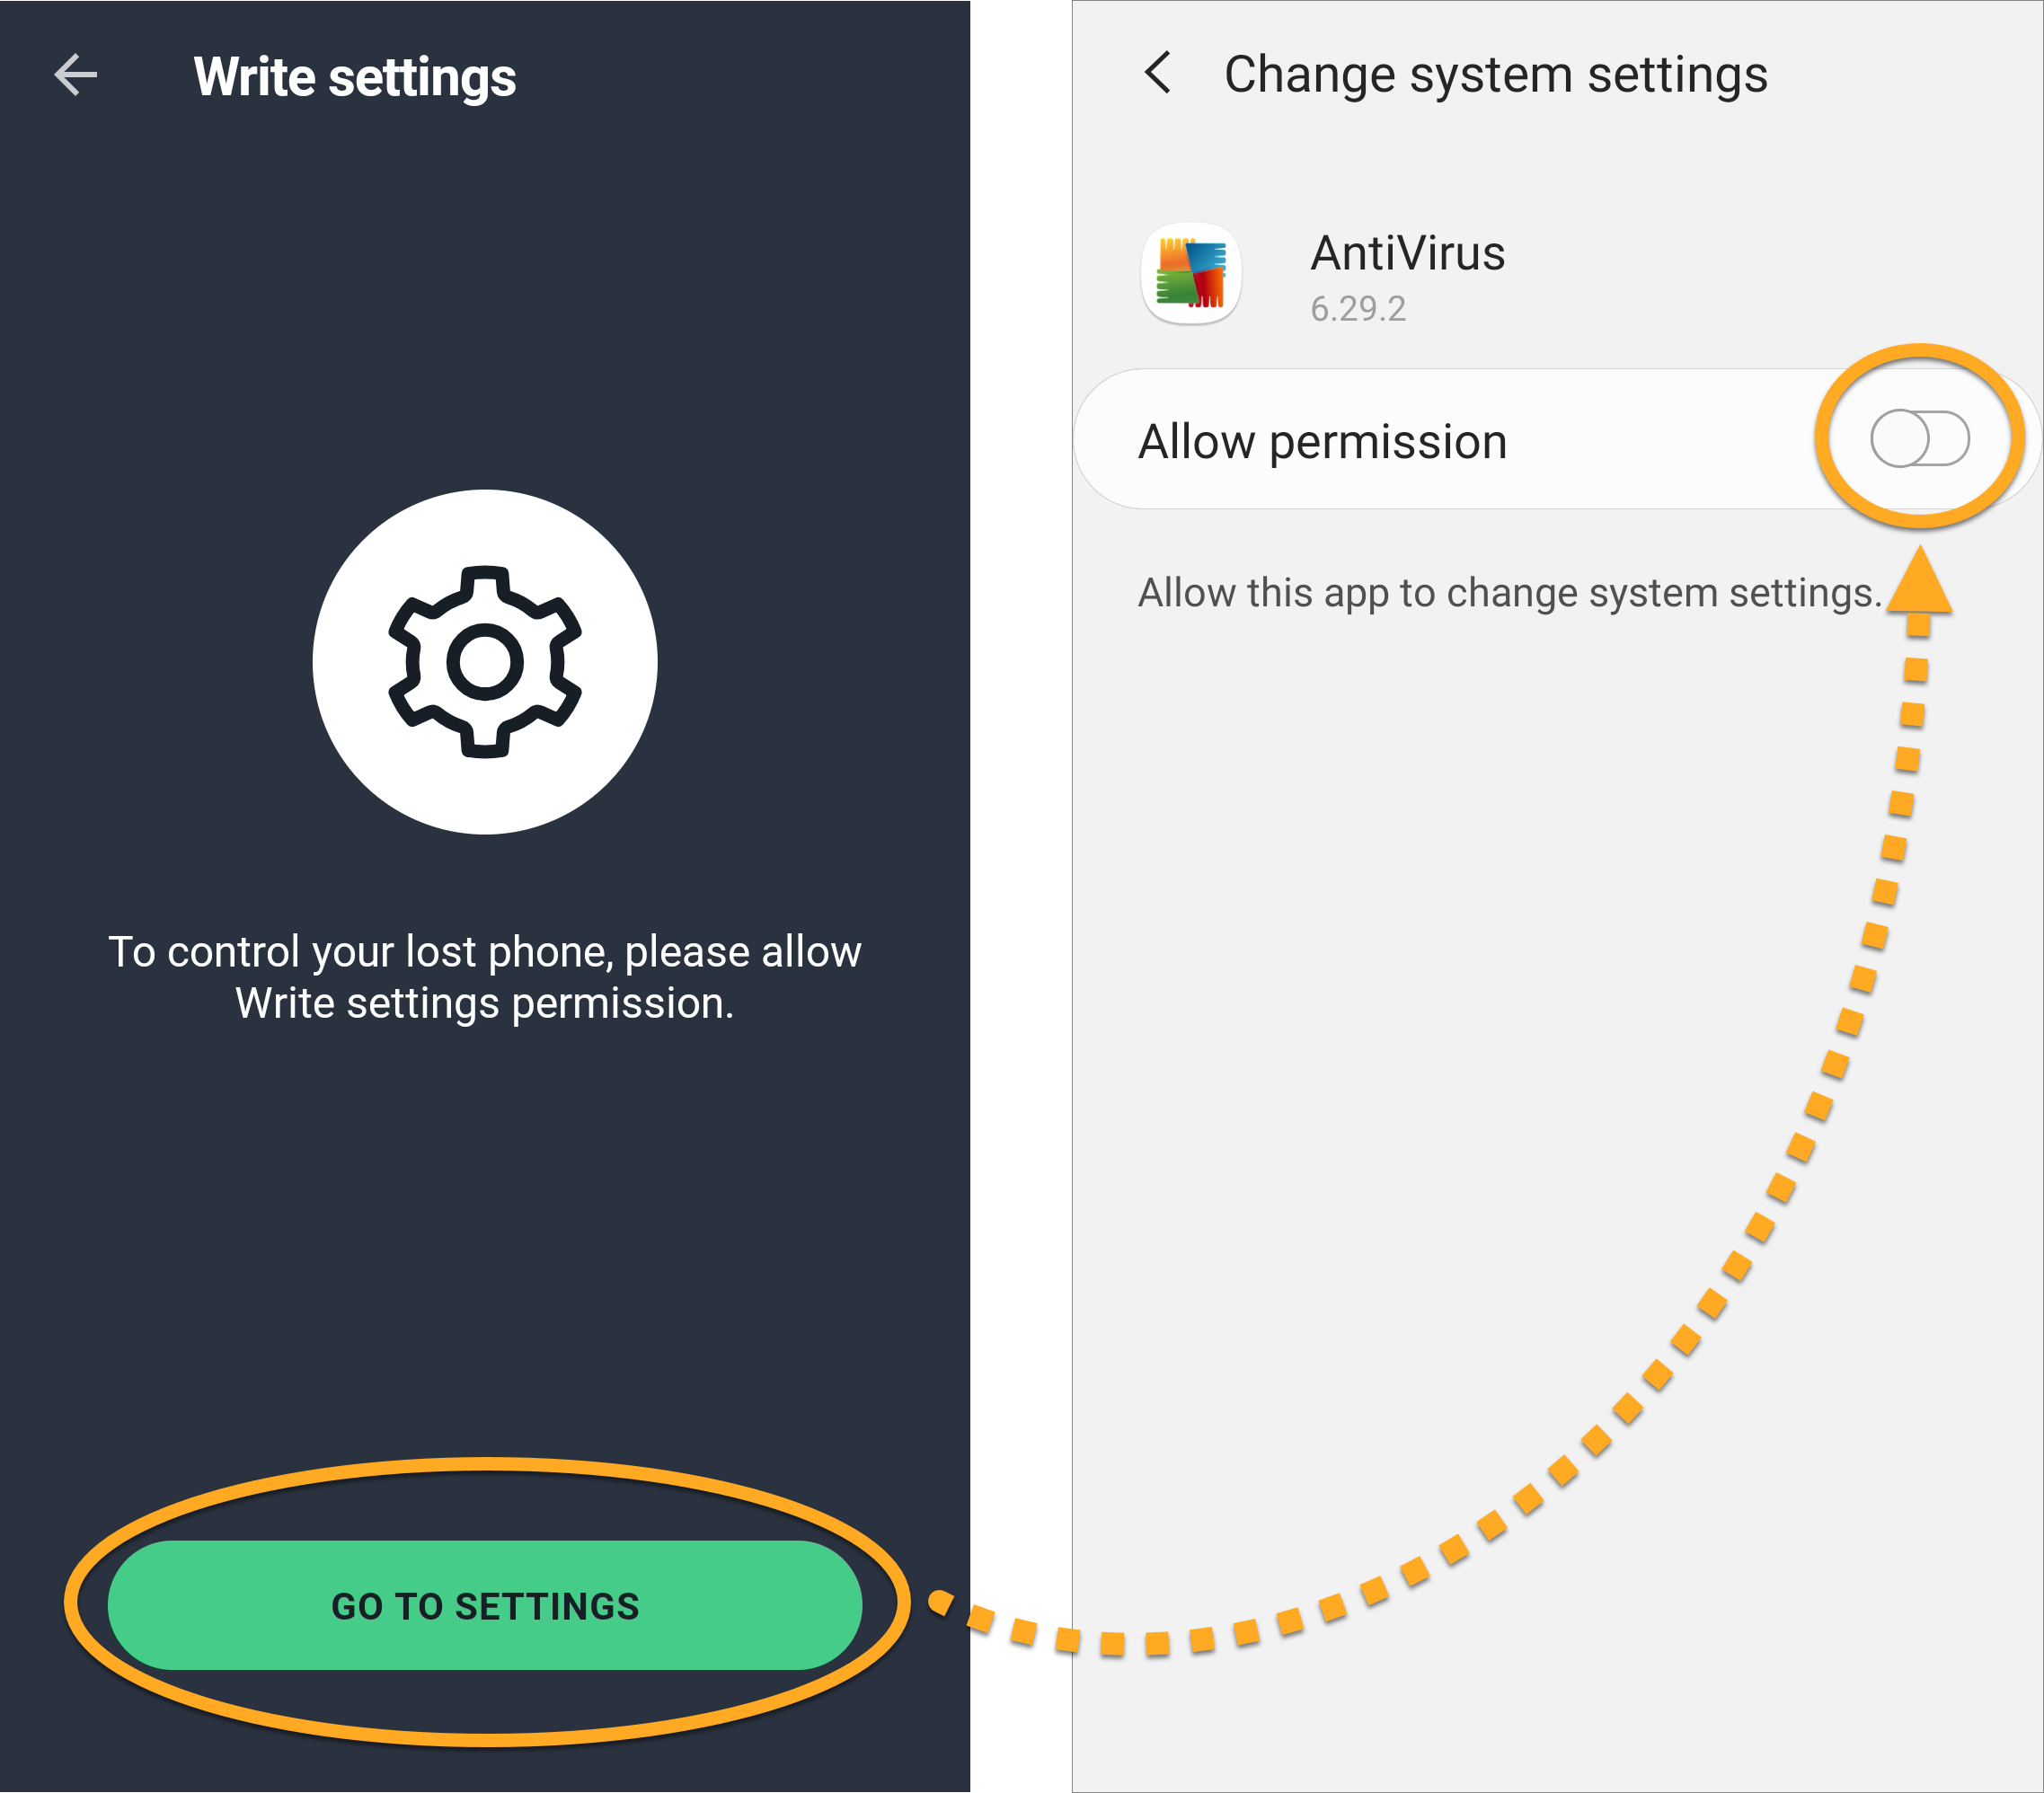
- Tap Go To Settings. To grant the Write settings permission, tap the white (OFF) slider next to Allow permission so that it changes to blue (ON).
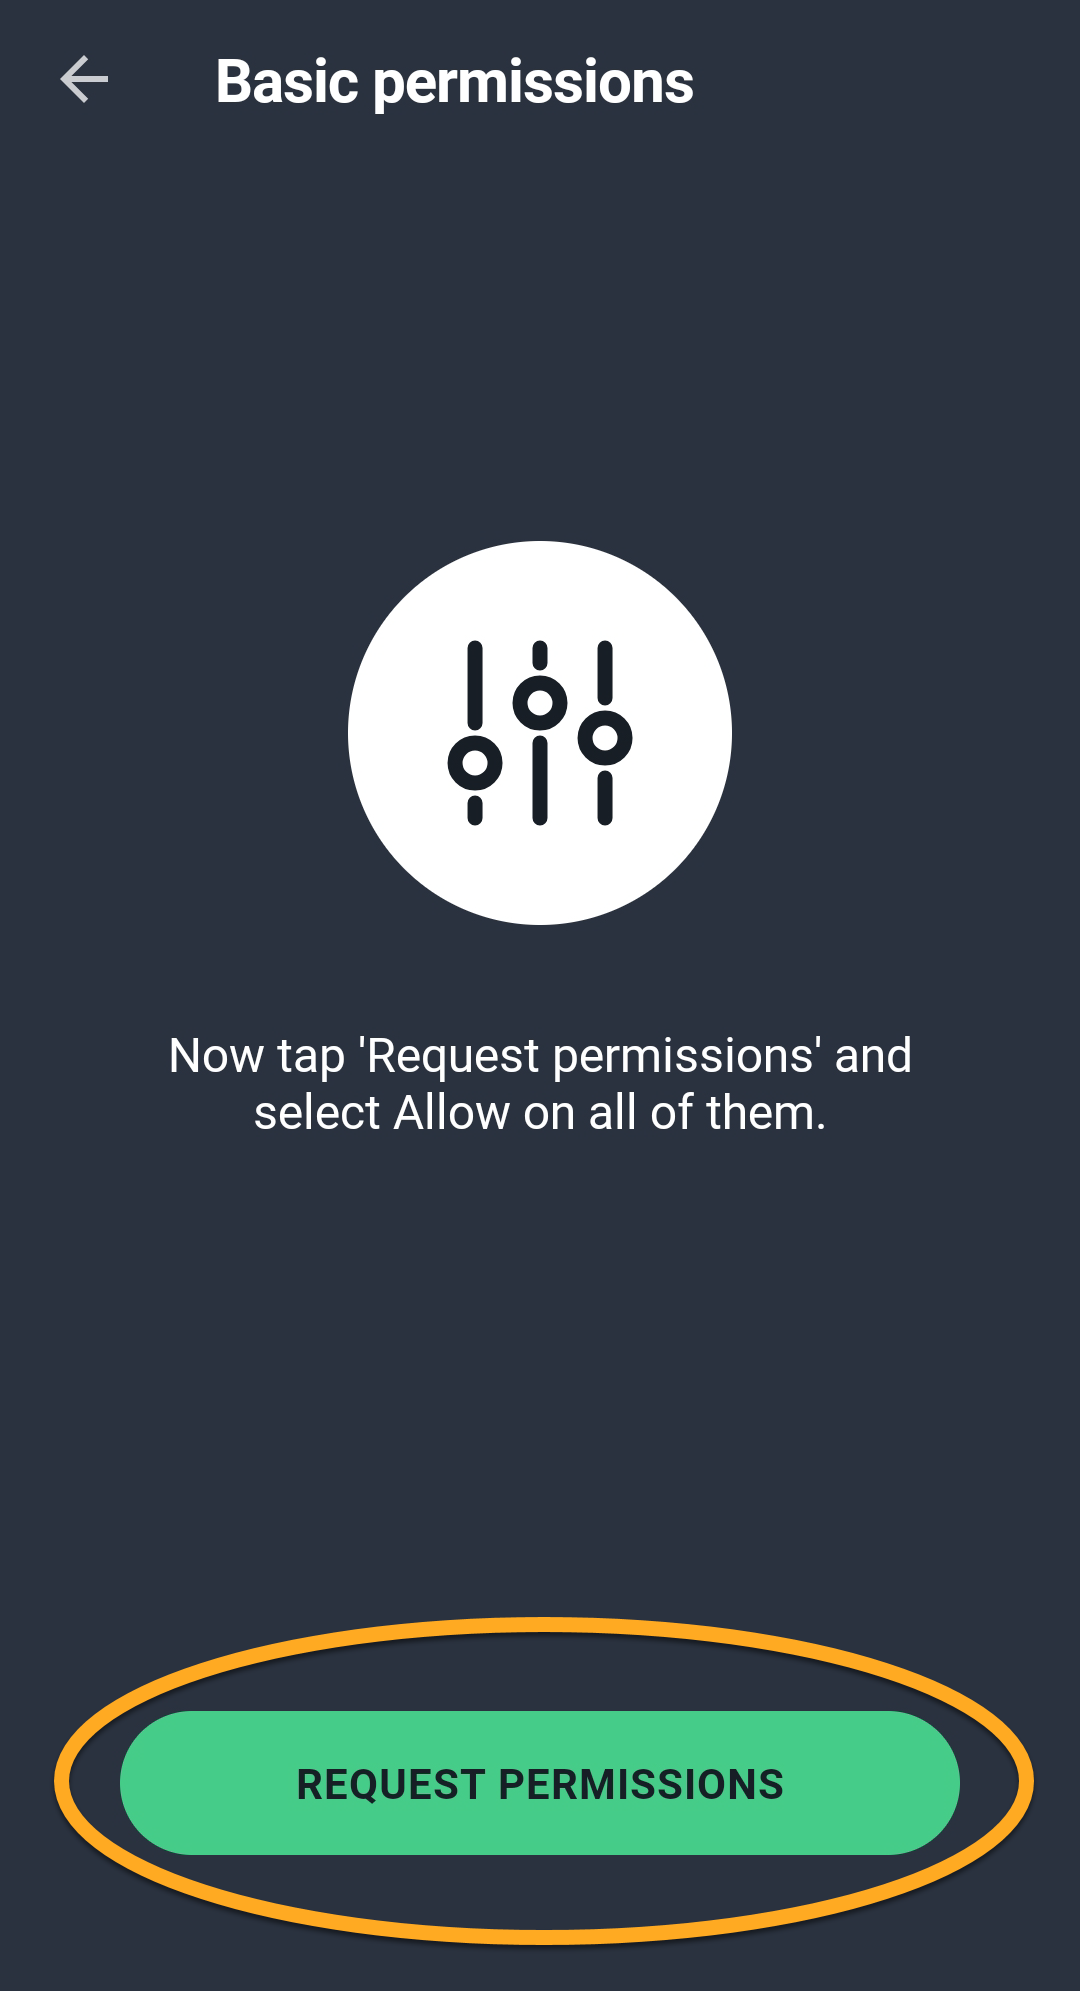
- Tap Request Permissions to proceed with setup.
- Tap Allow on each dialog that appears to grant the remaining necessary permissions. You may need to grant the following permissions:
- Location
- Calls
- Media and files

Anti-Theft now has all the permissions necessary for you to track and control your device remotely. For more information about the permissions required by AVG AntiVirus for Android, refer to the following article:
Connect to your AVG Account
Follow the steps below to connect AVG AntiVirus for Android to your AVG Account.
- Tap Connect to your AVG Account.
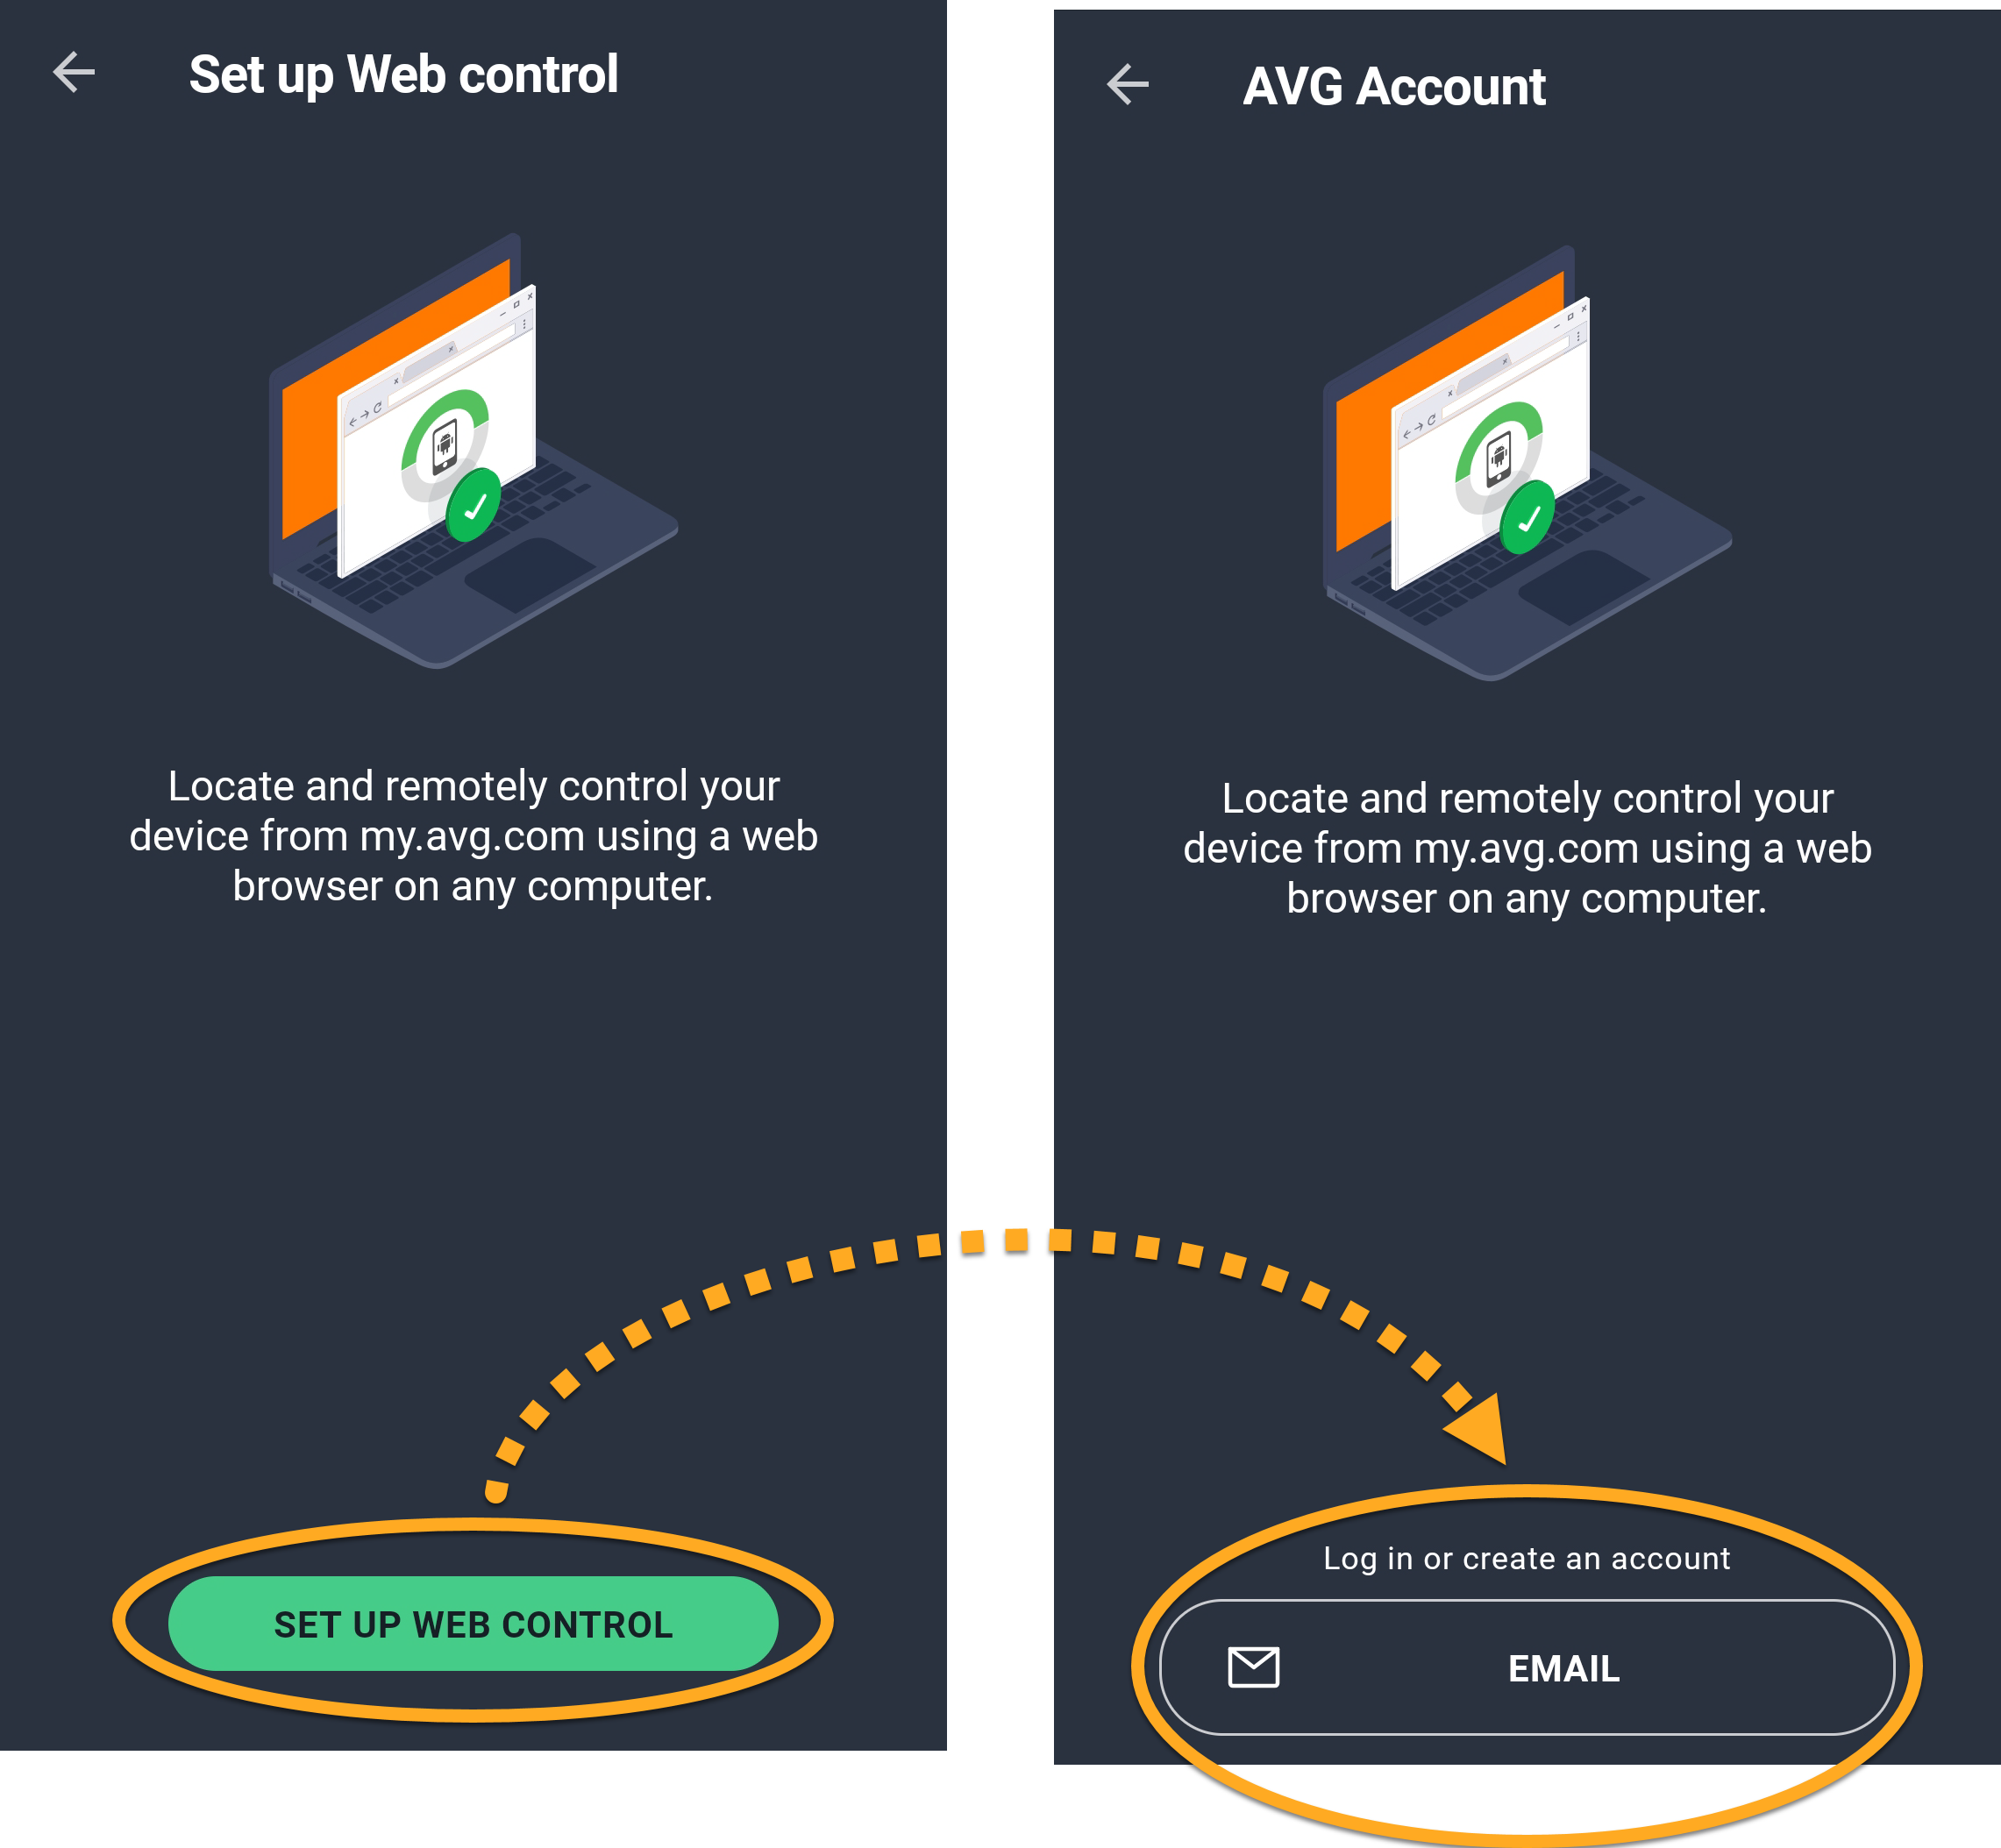
- Tap Set Up Web Control ▸ Email.
- Enter your AVG Account credentials and tap Log In AVG Account. If you do not yet have an AVG Account, tap Sign Up.


AVG AntiVirus for Android is now connected to your AVG Account.
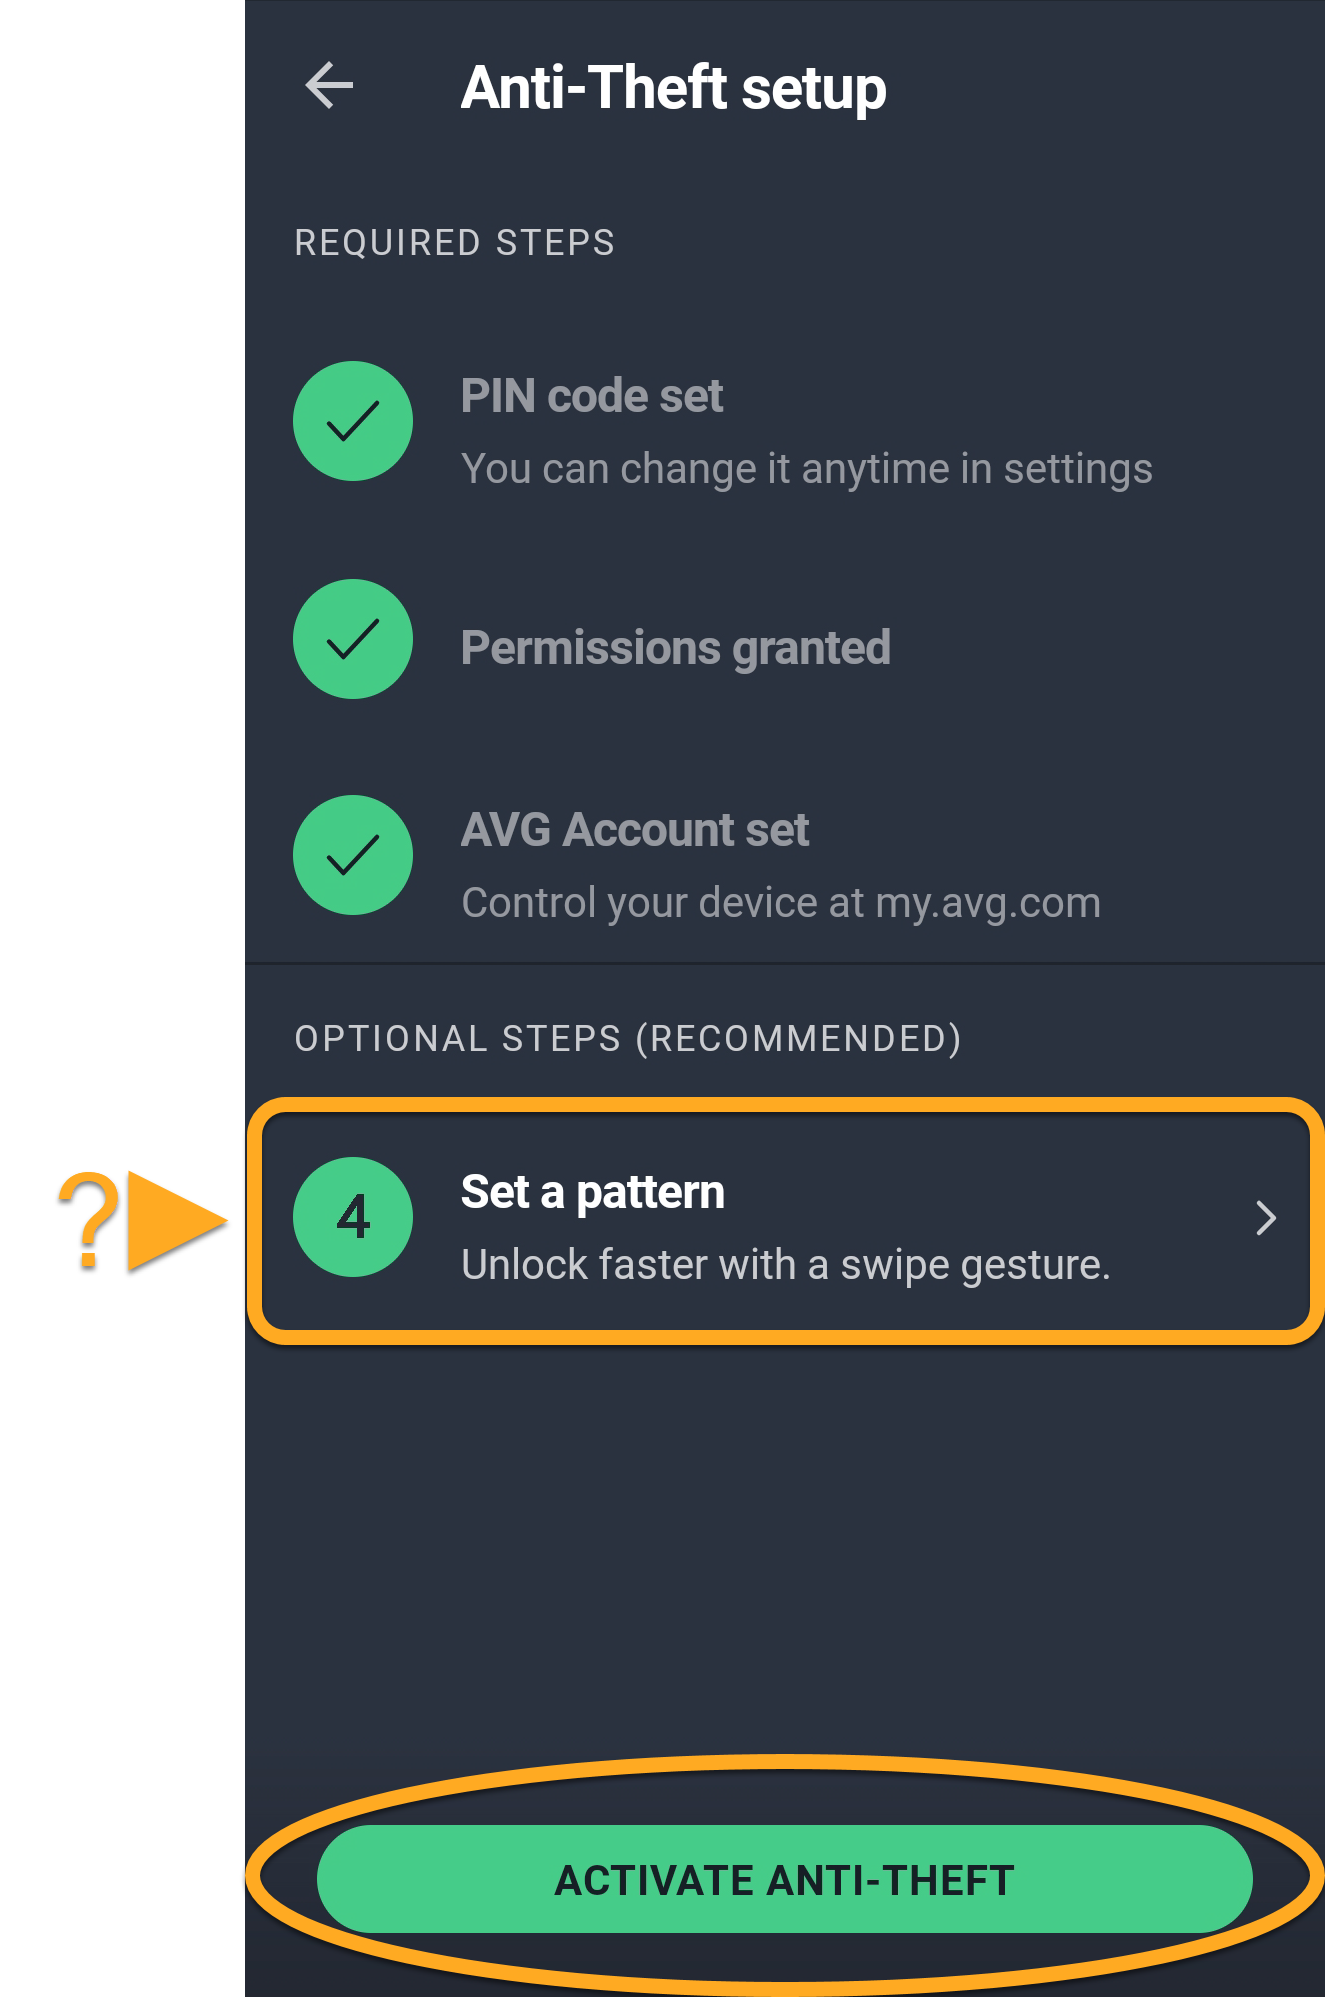
You are directed to the Anti-Theft setup screen. To complete Anti-Theft setup, tap Activate Anti-Theft. Alternatively, tap Set a pattern to access protected areas of your device with a swipe gesture rather than a PIN code.
Further recommendations
For instructions to configure Anti-Theft settings and specify how your device will behave in the case of loss or theft, refer to the following article:
To track or control your device remotely, you need to sign in to the AVG Account that is connected to AVG AntiVirus for Android, and click the Anti-Theft tile on the AVG Account dashboard.
For detailed instructions, refer to the following article:
- AVG AntiVirus 6.x for Android
- Google Android 6.0 (Marshmallow, API 23) or later