This article explains how to configure AVG Secure VPN to turn on automatically when your device connects to an untrusted or unsecured Wi-Fi network, such as in a cafe or airport.
Enable auto-connect
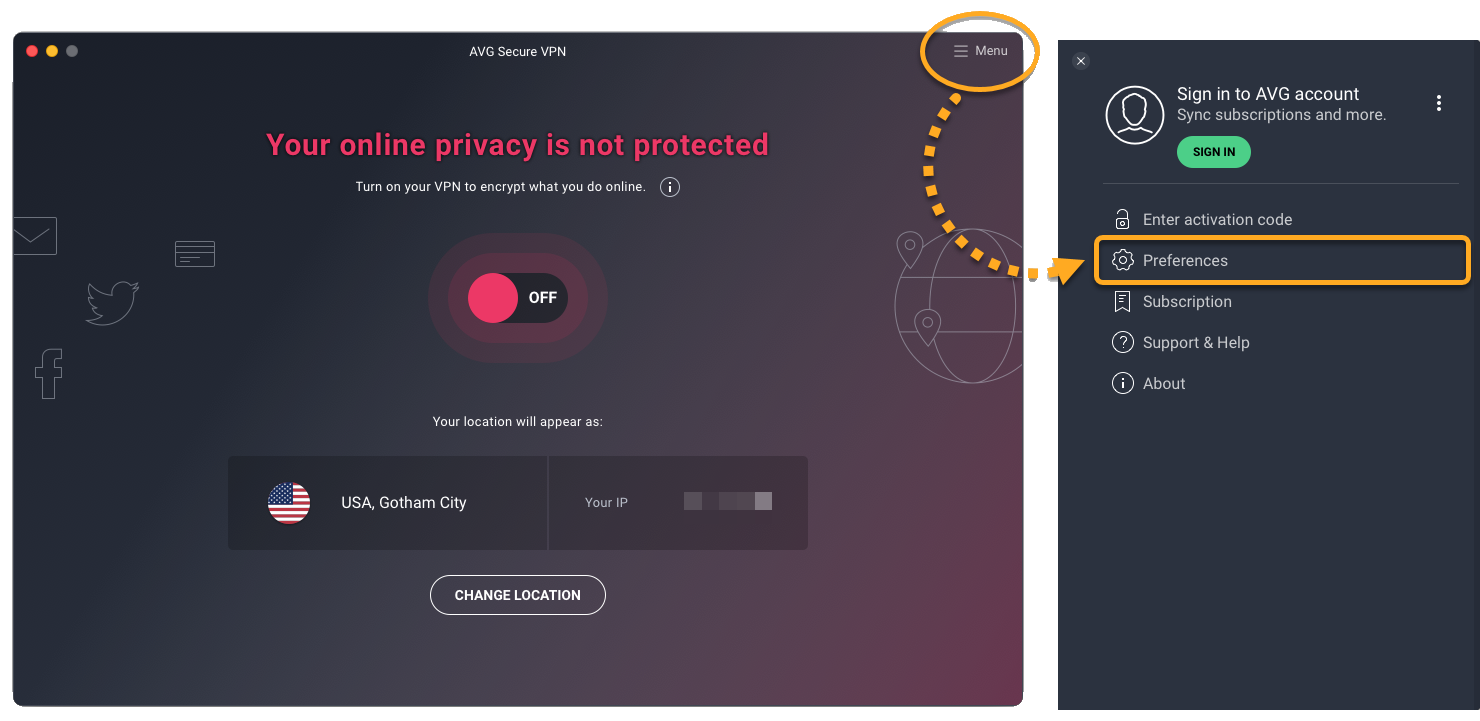
- Open AVG Secure VPN and go to
☰Menu ▸ Settings.
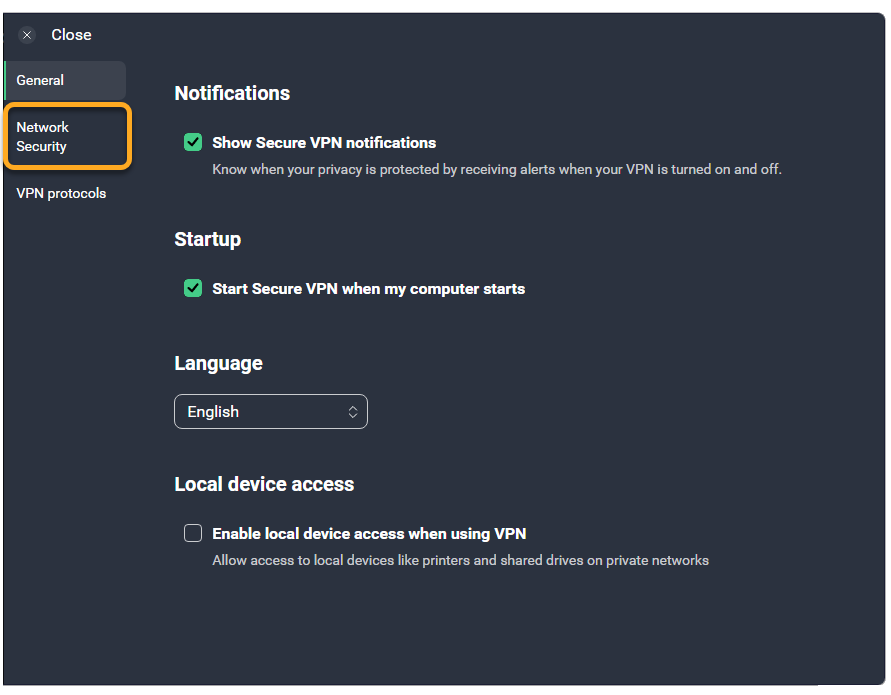
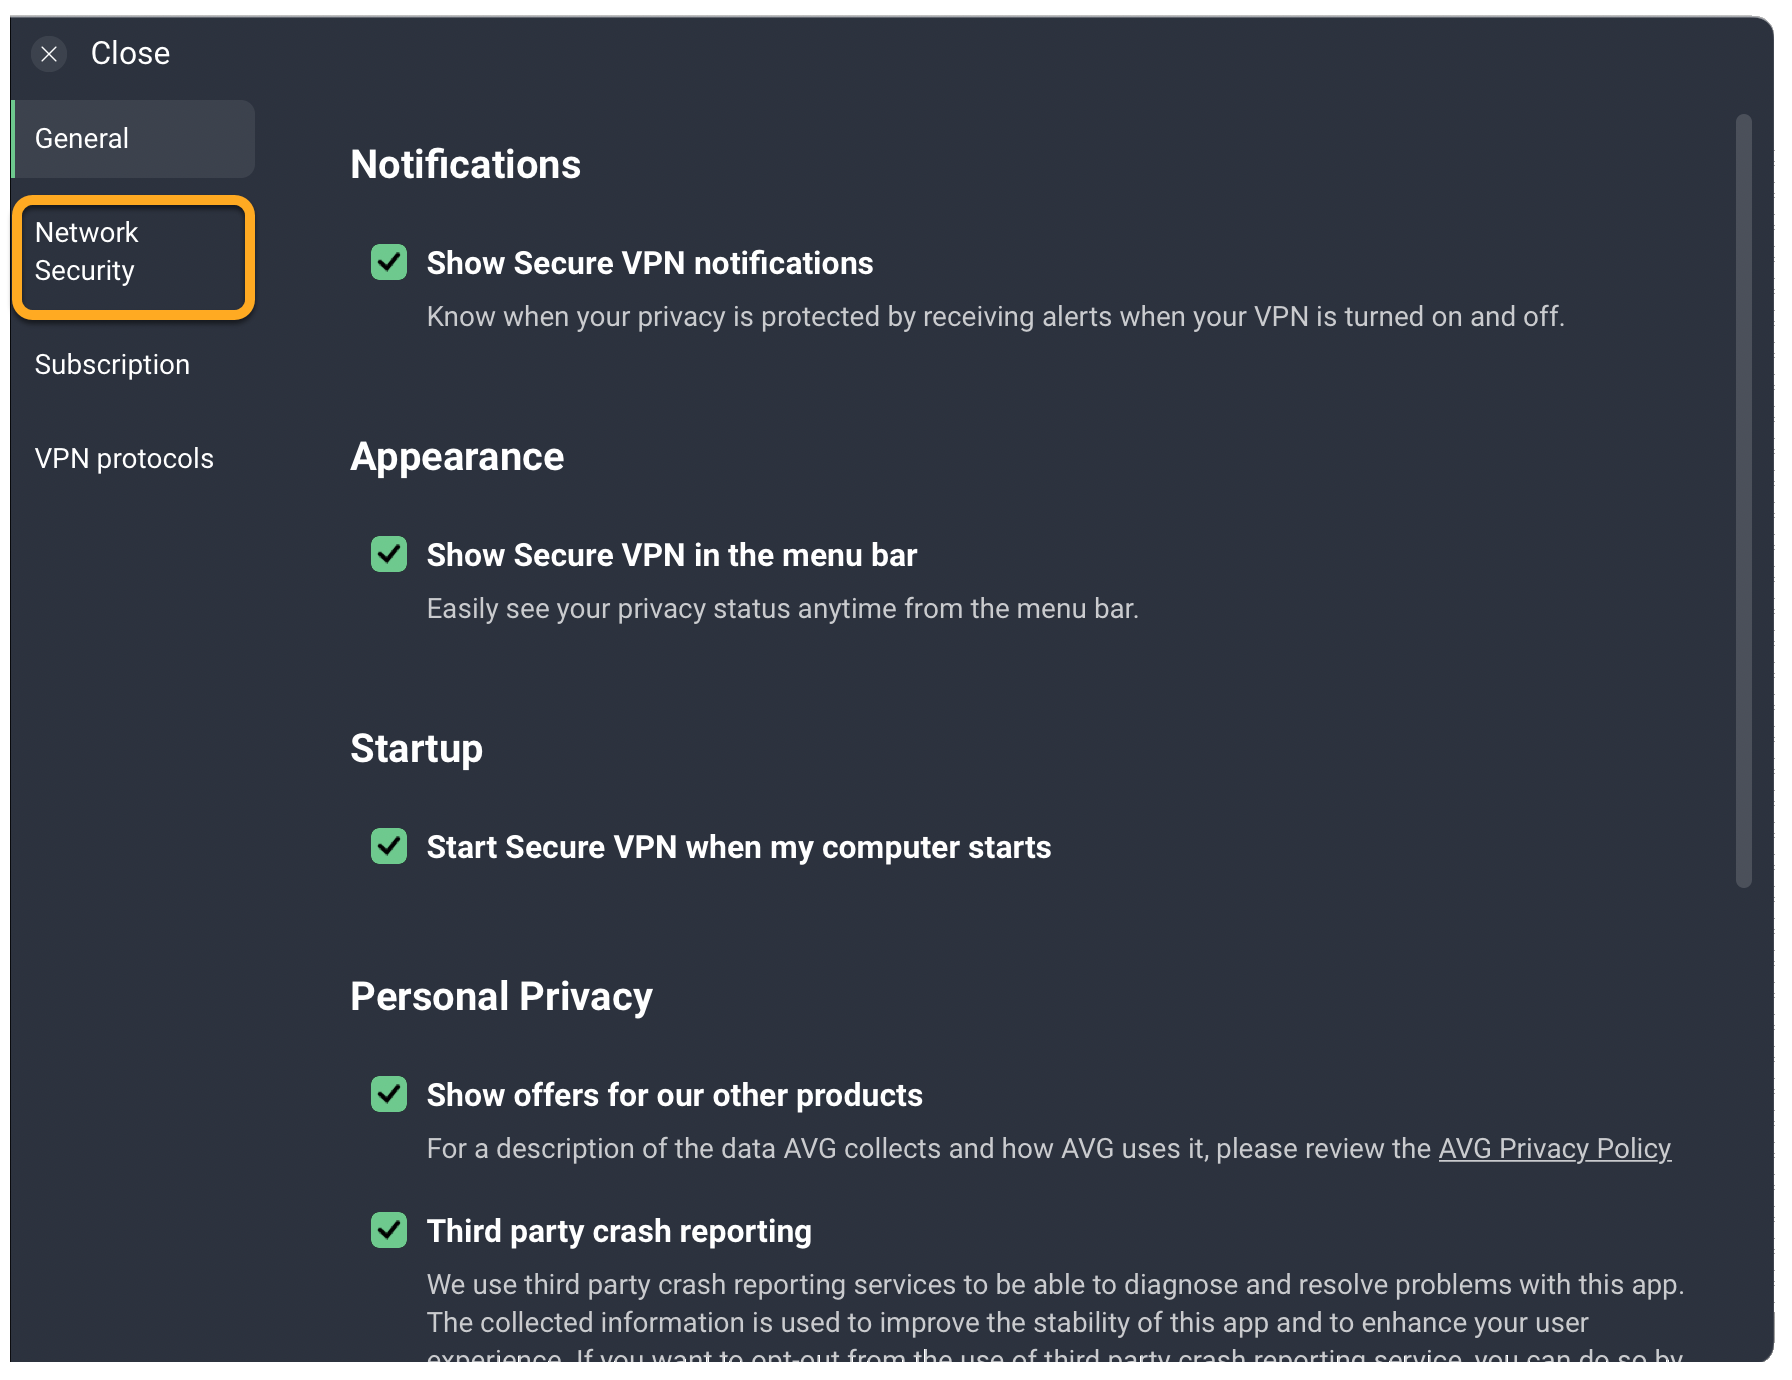
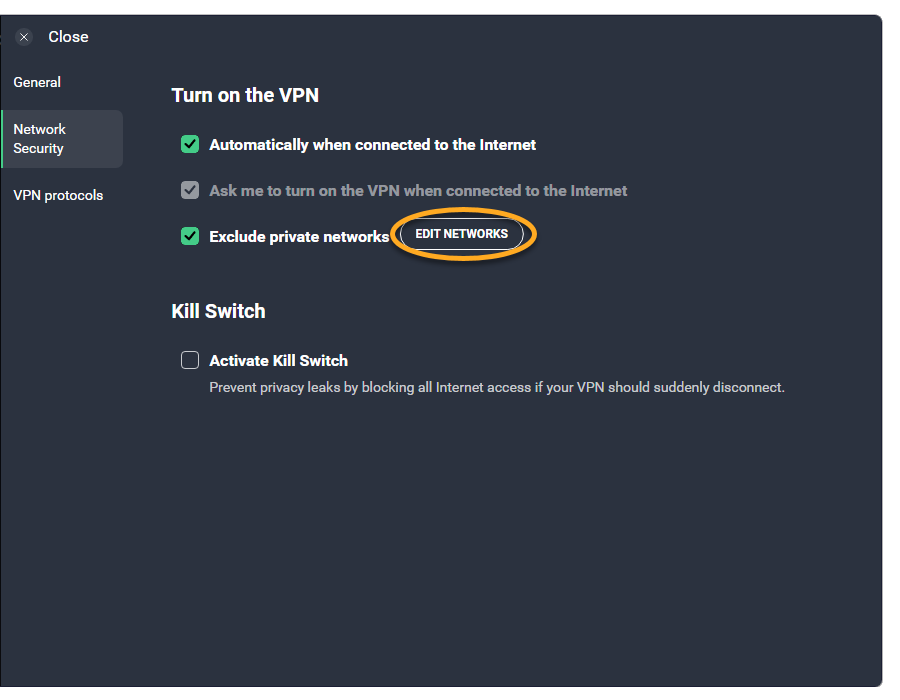
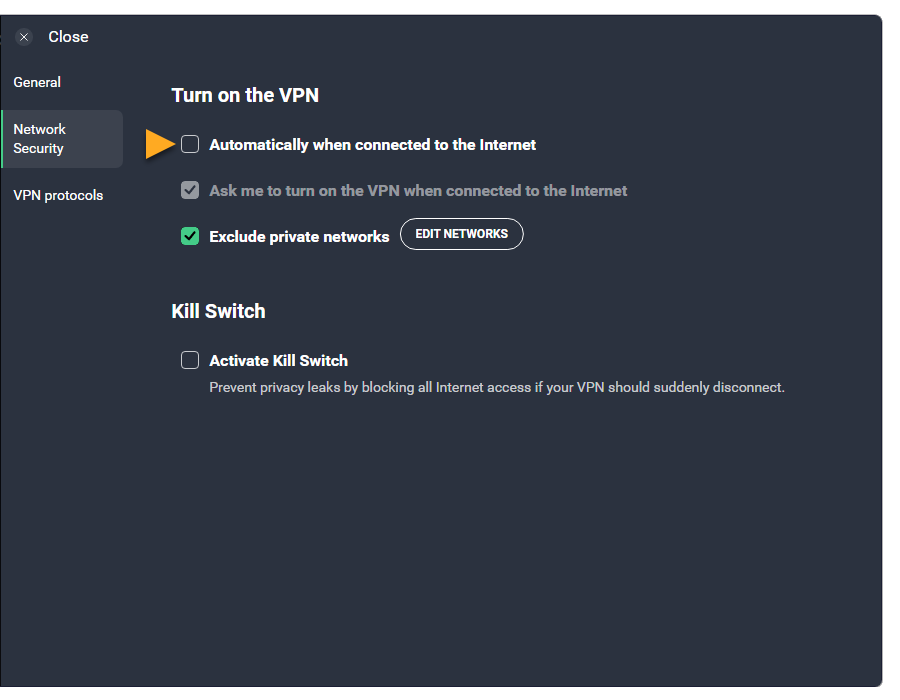
- Select Network Security in the left panel.
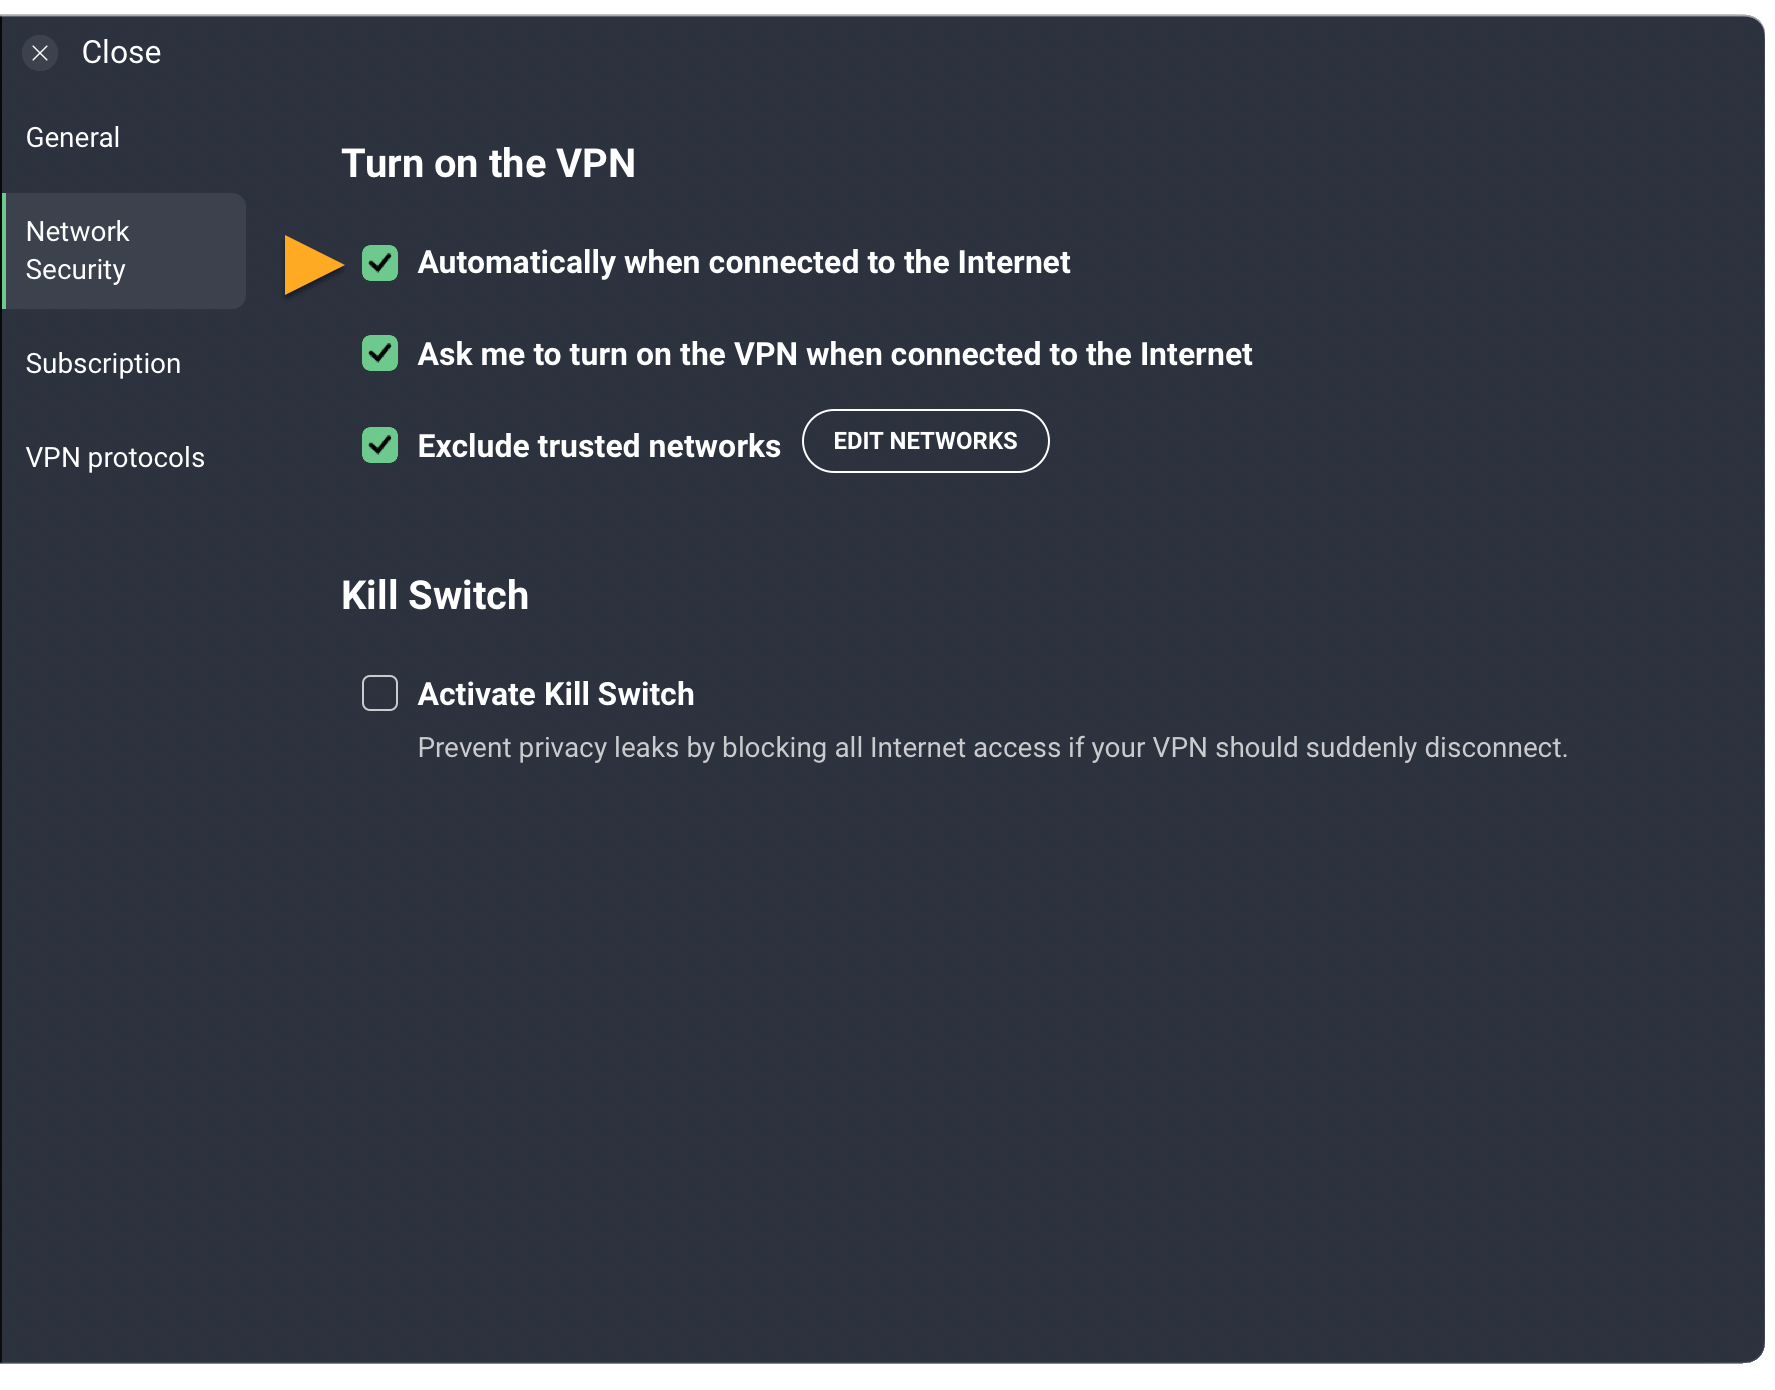
- Tick the box next to Automatically when connected to the Internet.
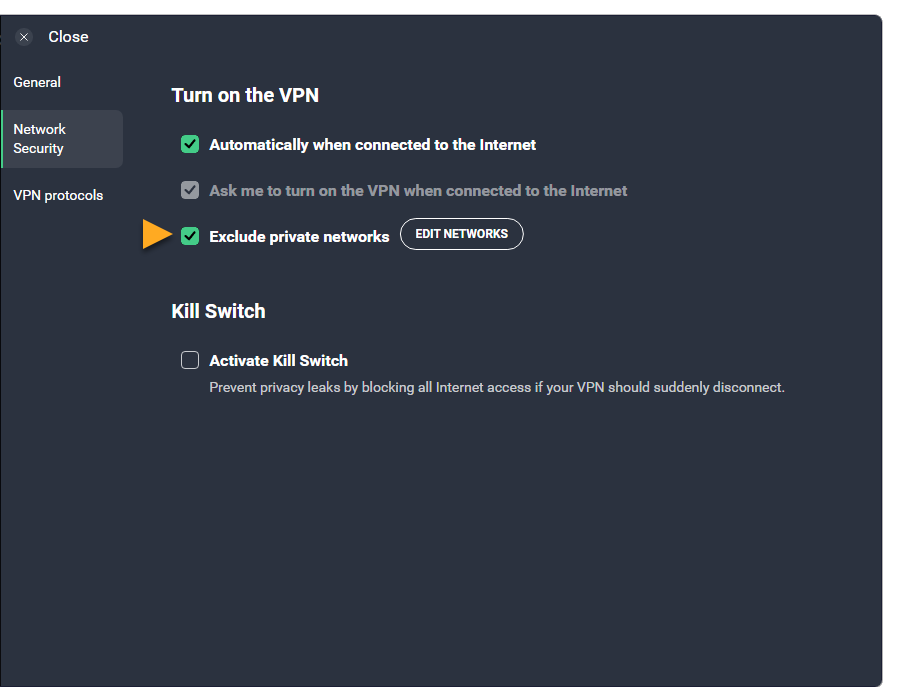
- If you do not want AVG Secure VPN to automatically turn on when you connect to a private network (such as your home or work network), ensure the box next to Exclude private networks is ticked.

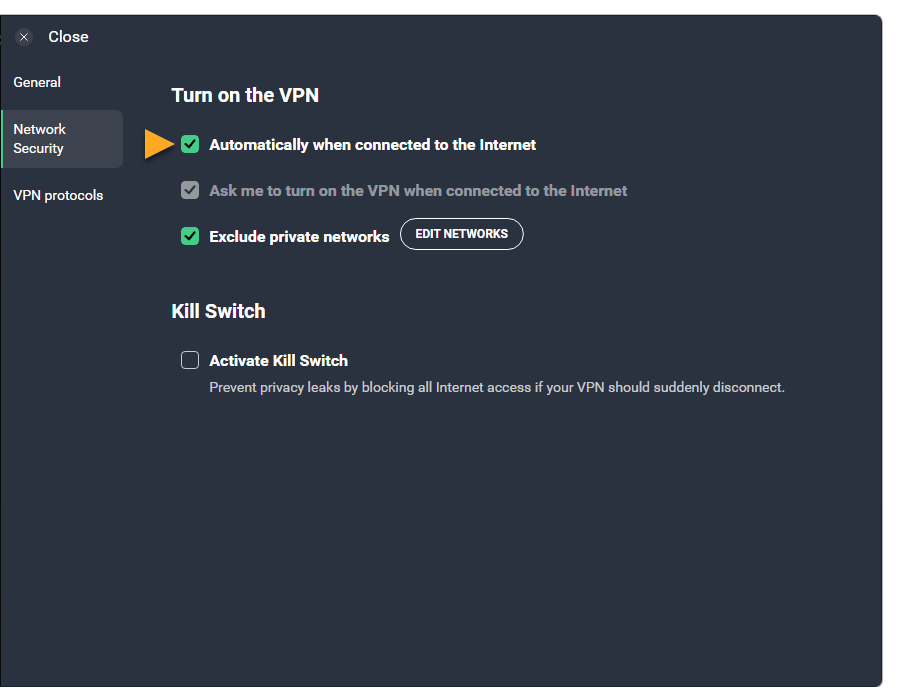
AVG Secure VPN now turns on automatically when your PC connects to a public Wi-Fi network. In most cases, AVG Secure VPN can detect if a network is private or public and apply the appropriate settings.
For more information, refer to the Manage public and private networks section of this article.
- Open AVG Secure VPN and go to
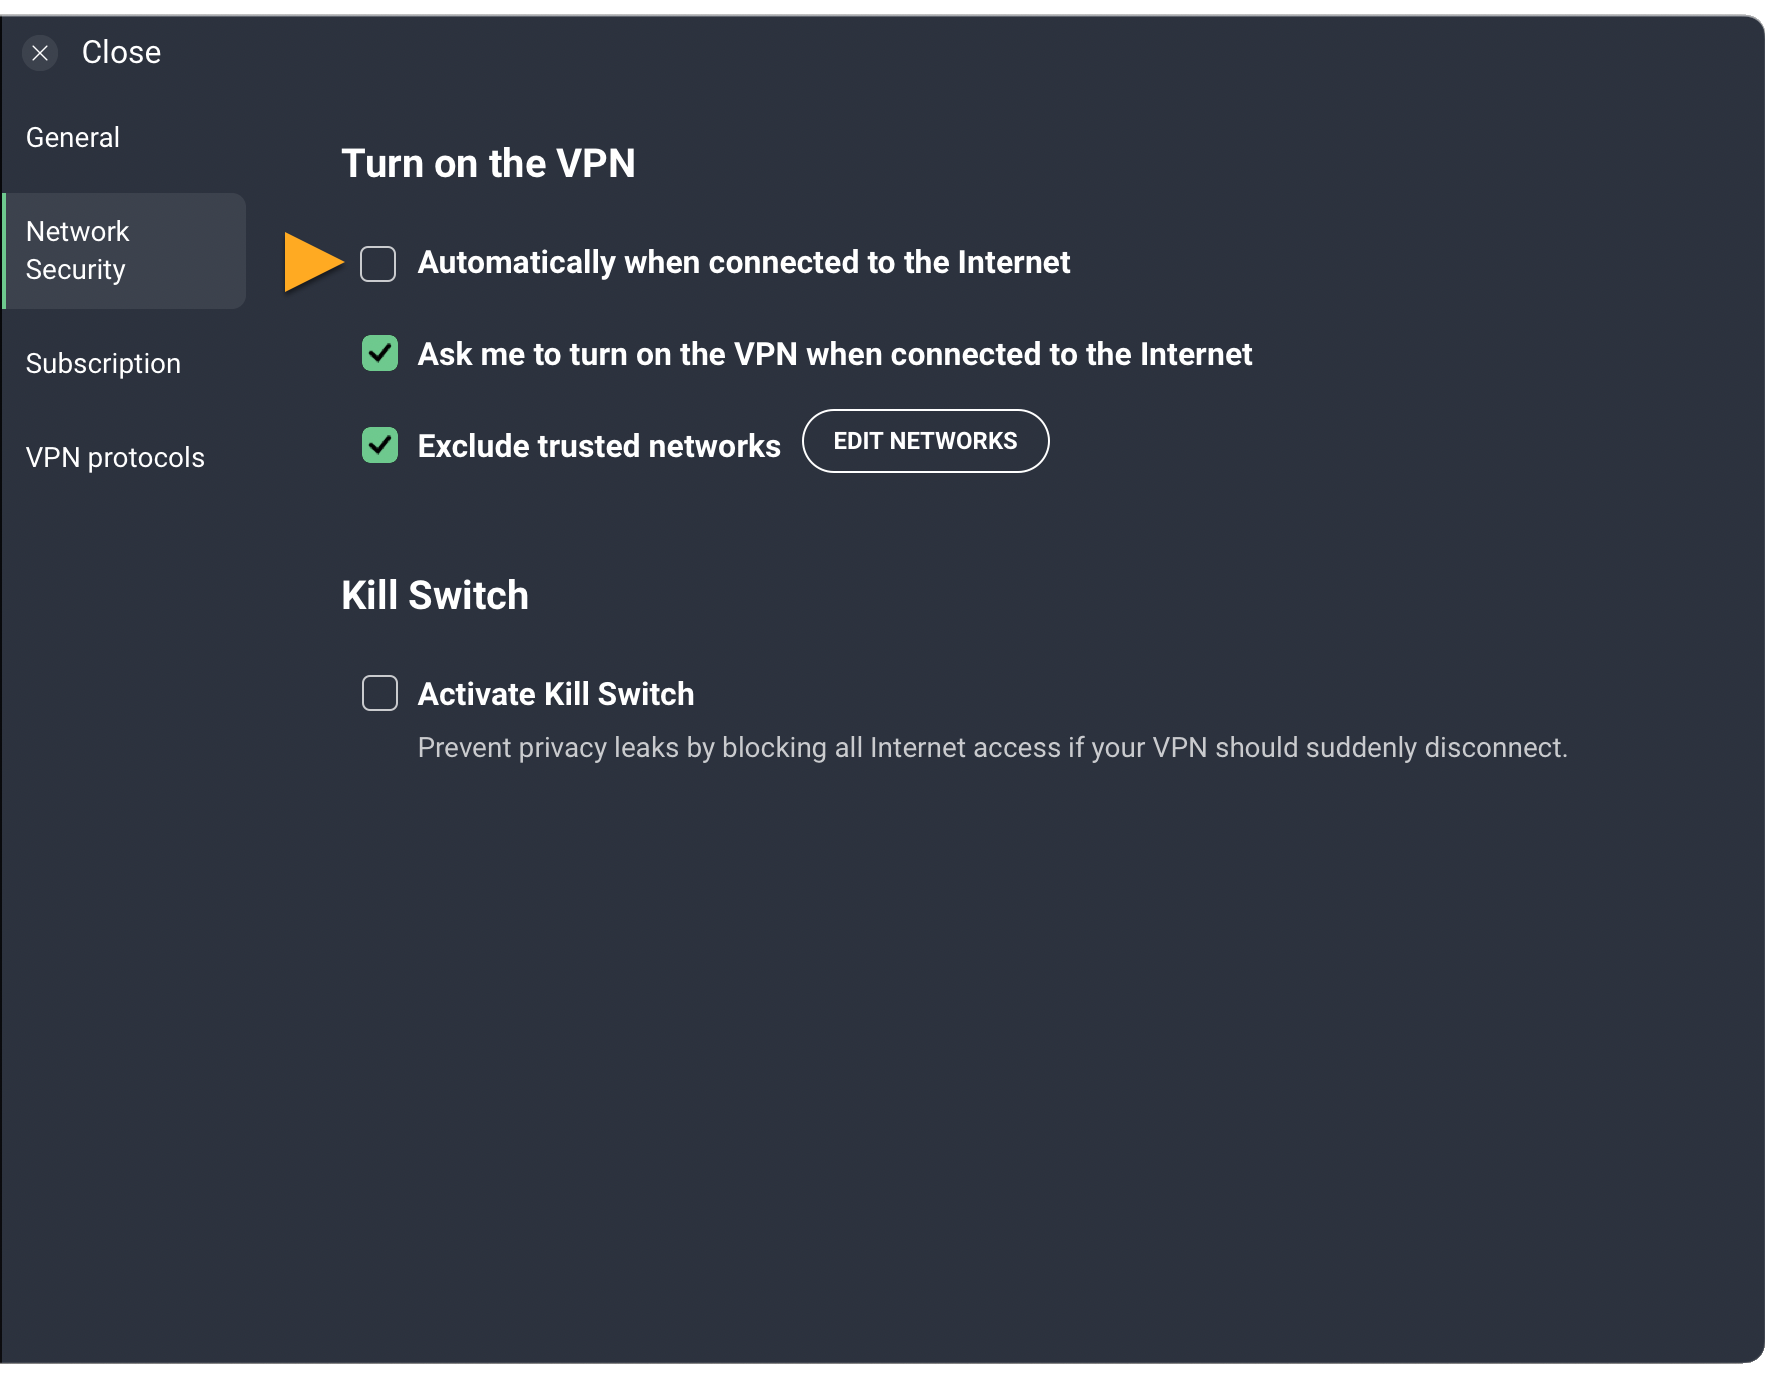
☰Menu ▸ Preferences. - Select Network Security in the left panel.
- Tick the box next to Automatically when connected to the Internet.
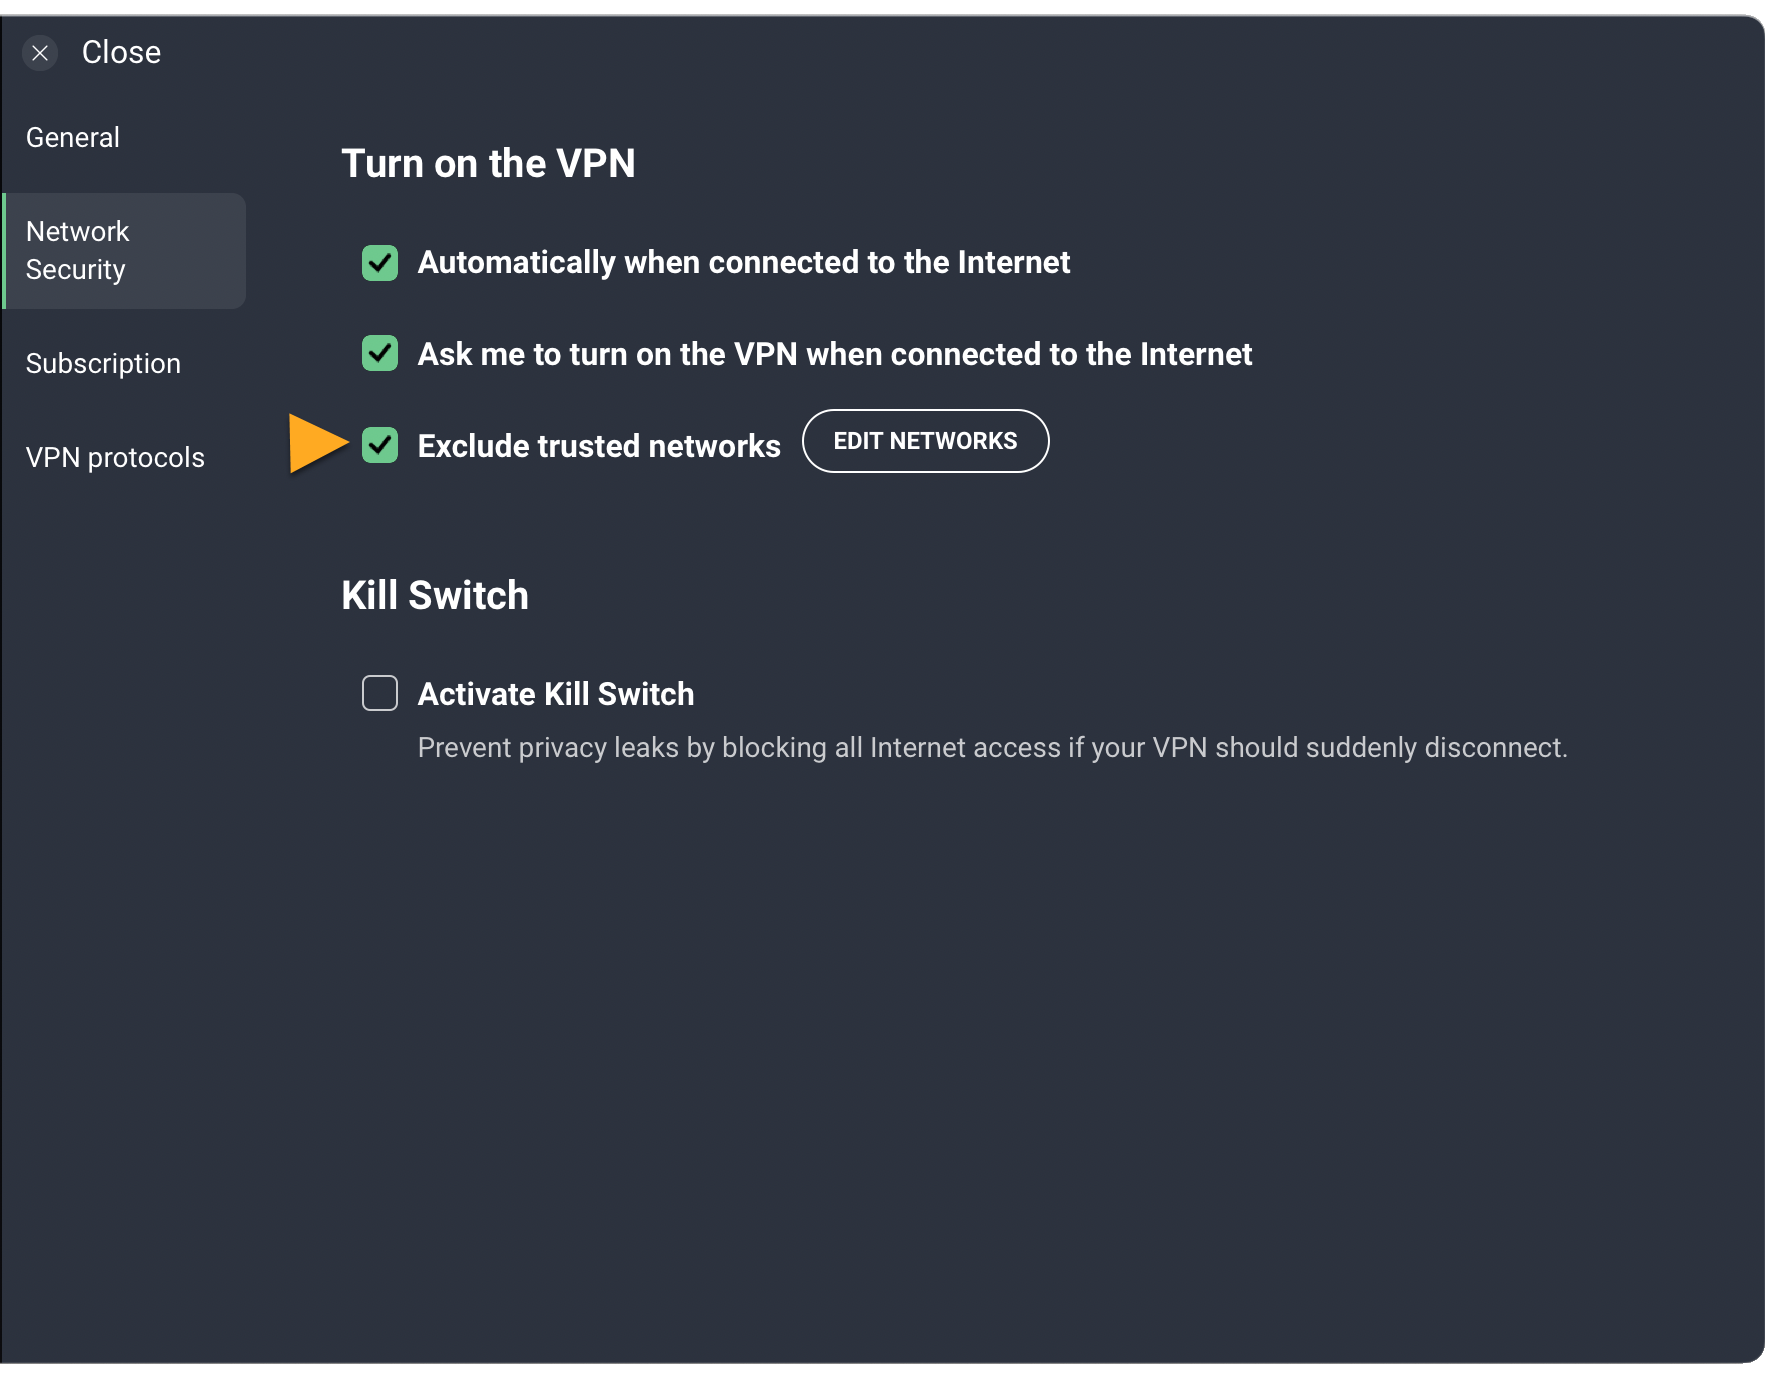
- If you do not want AVG Secure VPN to automatically turn on when you connect to a private network (such as your home or work network), ensure the box next to Exclude trusted networks is ticked.
AVG Secure VPN now turns on automatically when your Mac connects to an unsecured network. An unsecured network is any network that is not on your list of Trusted Networks.
To learn how to add a network to your list of trusted networks, refer to the Add a trusted network section of this article.
- Tap the AVG Secure VPN icon on the Home screen of your device. The app opens.
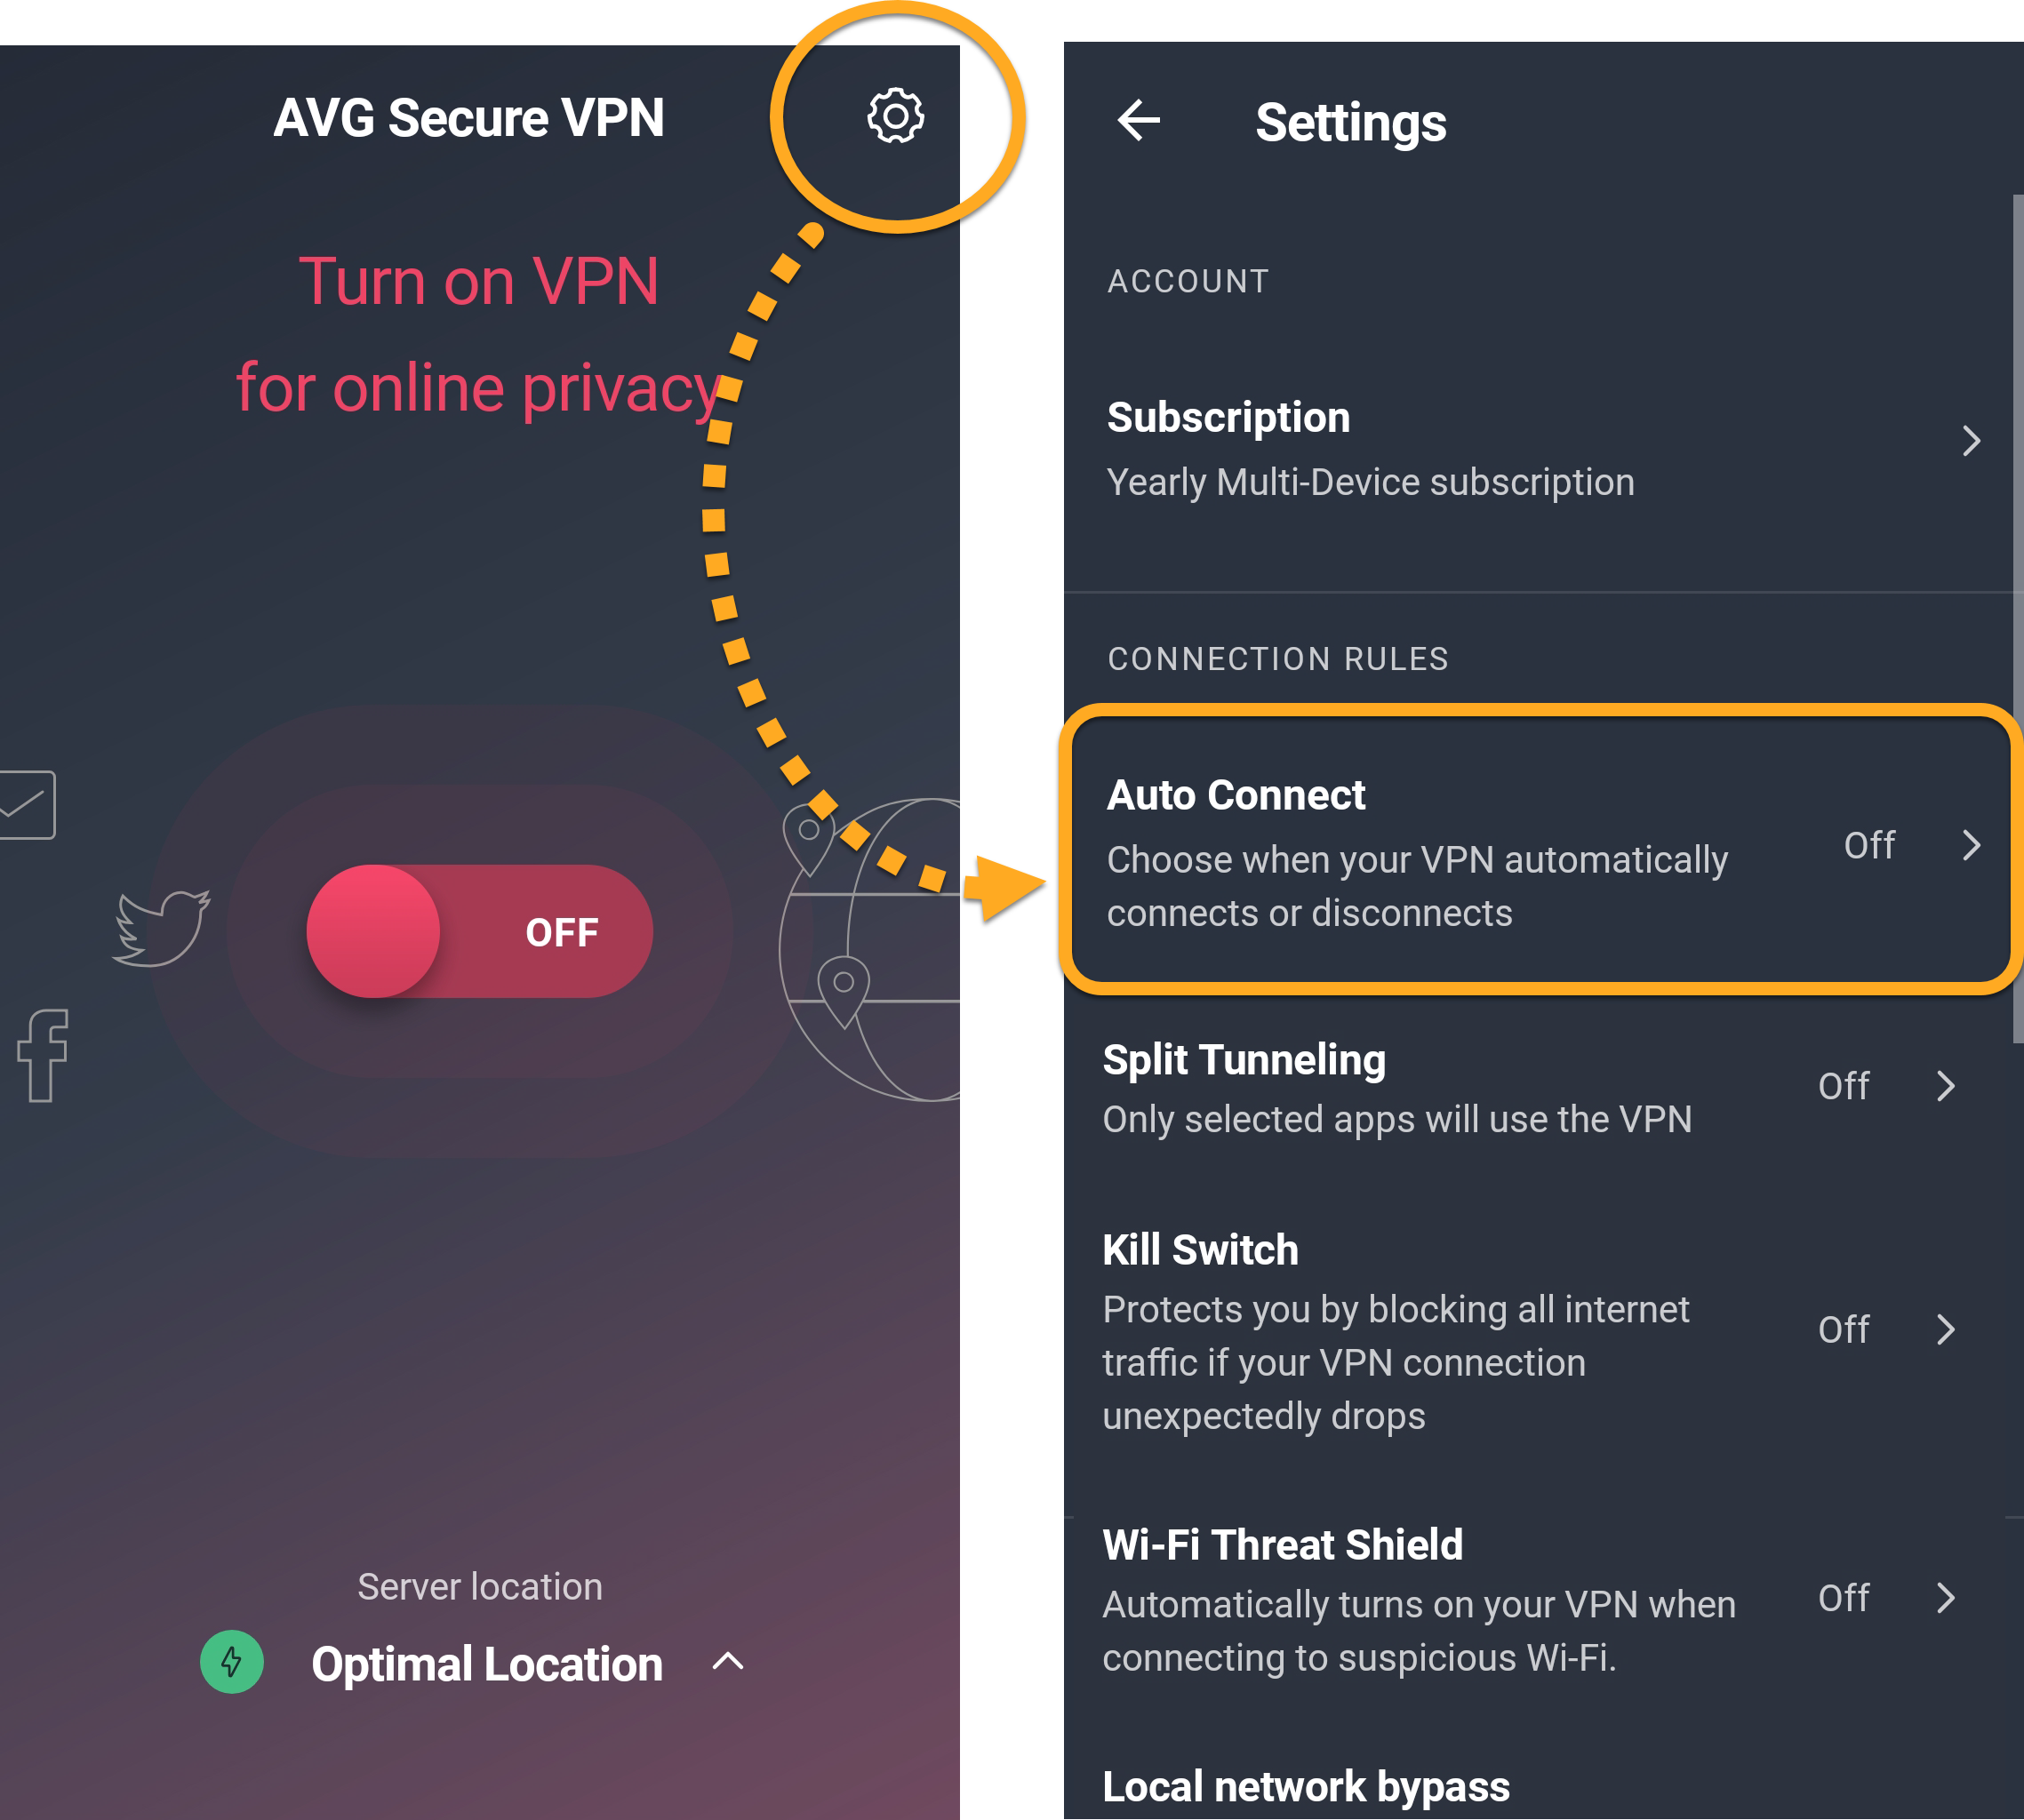
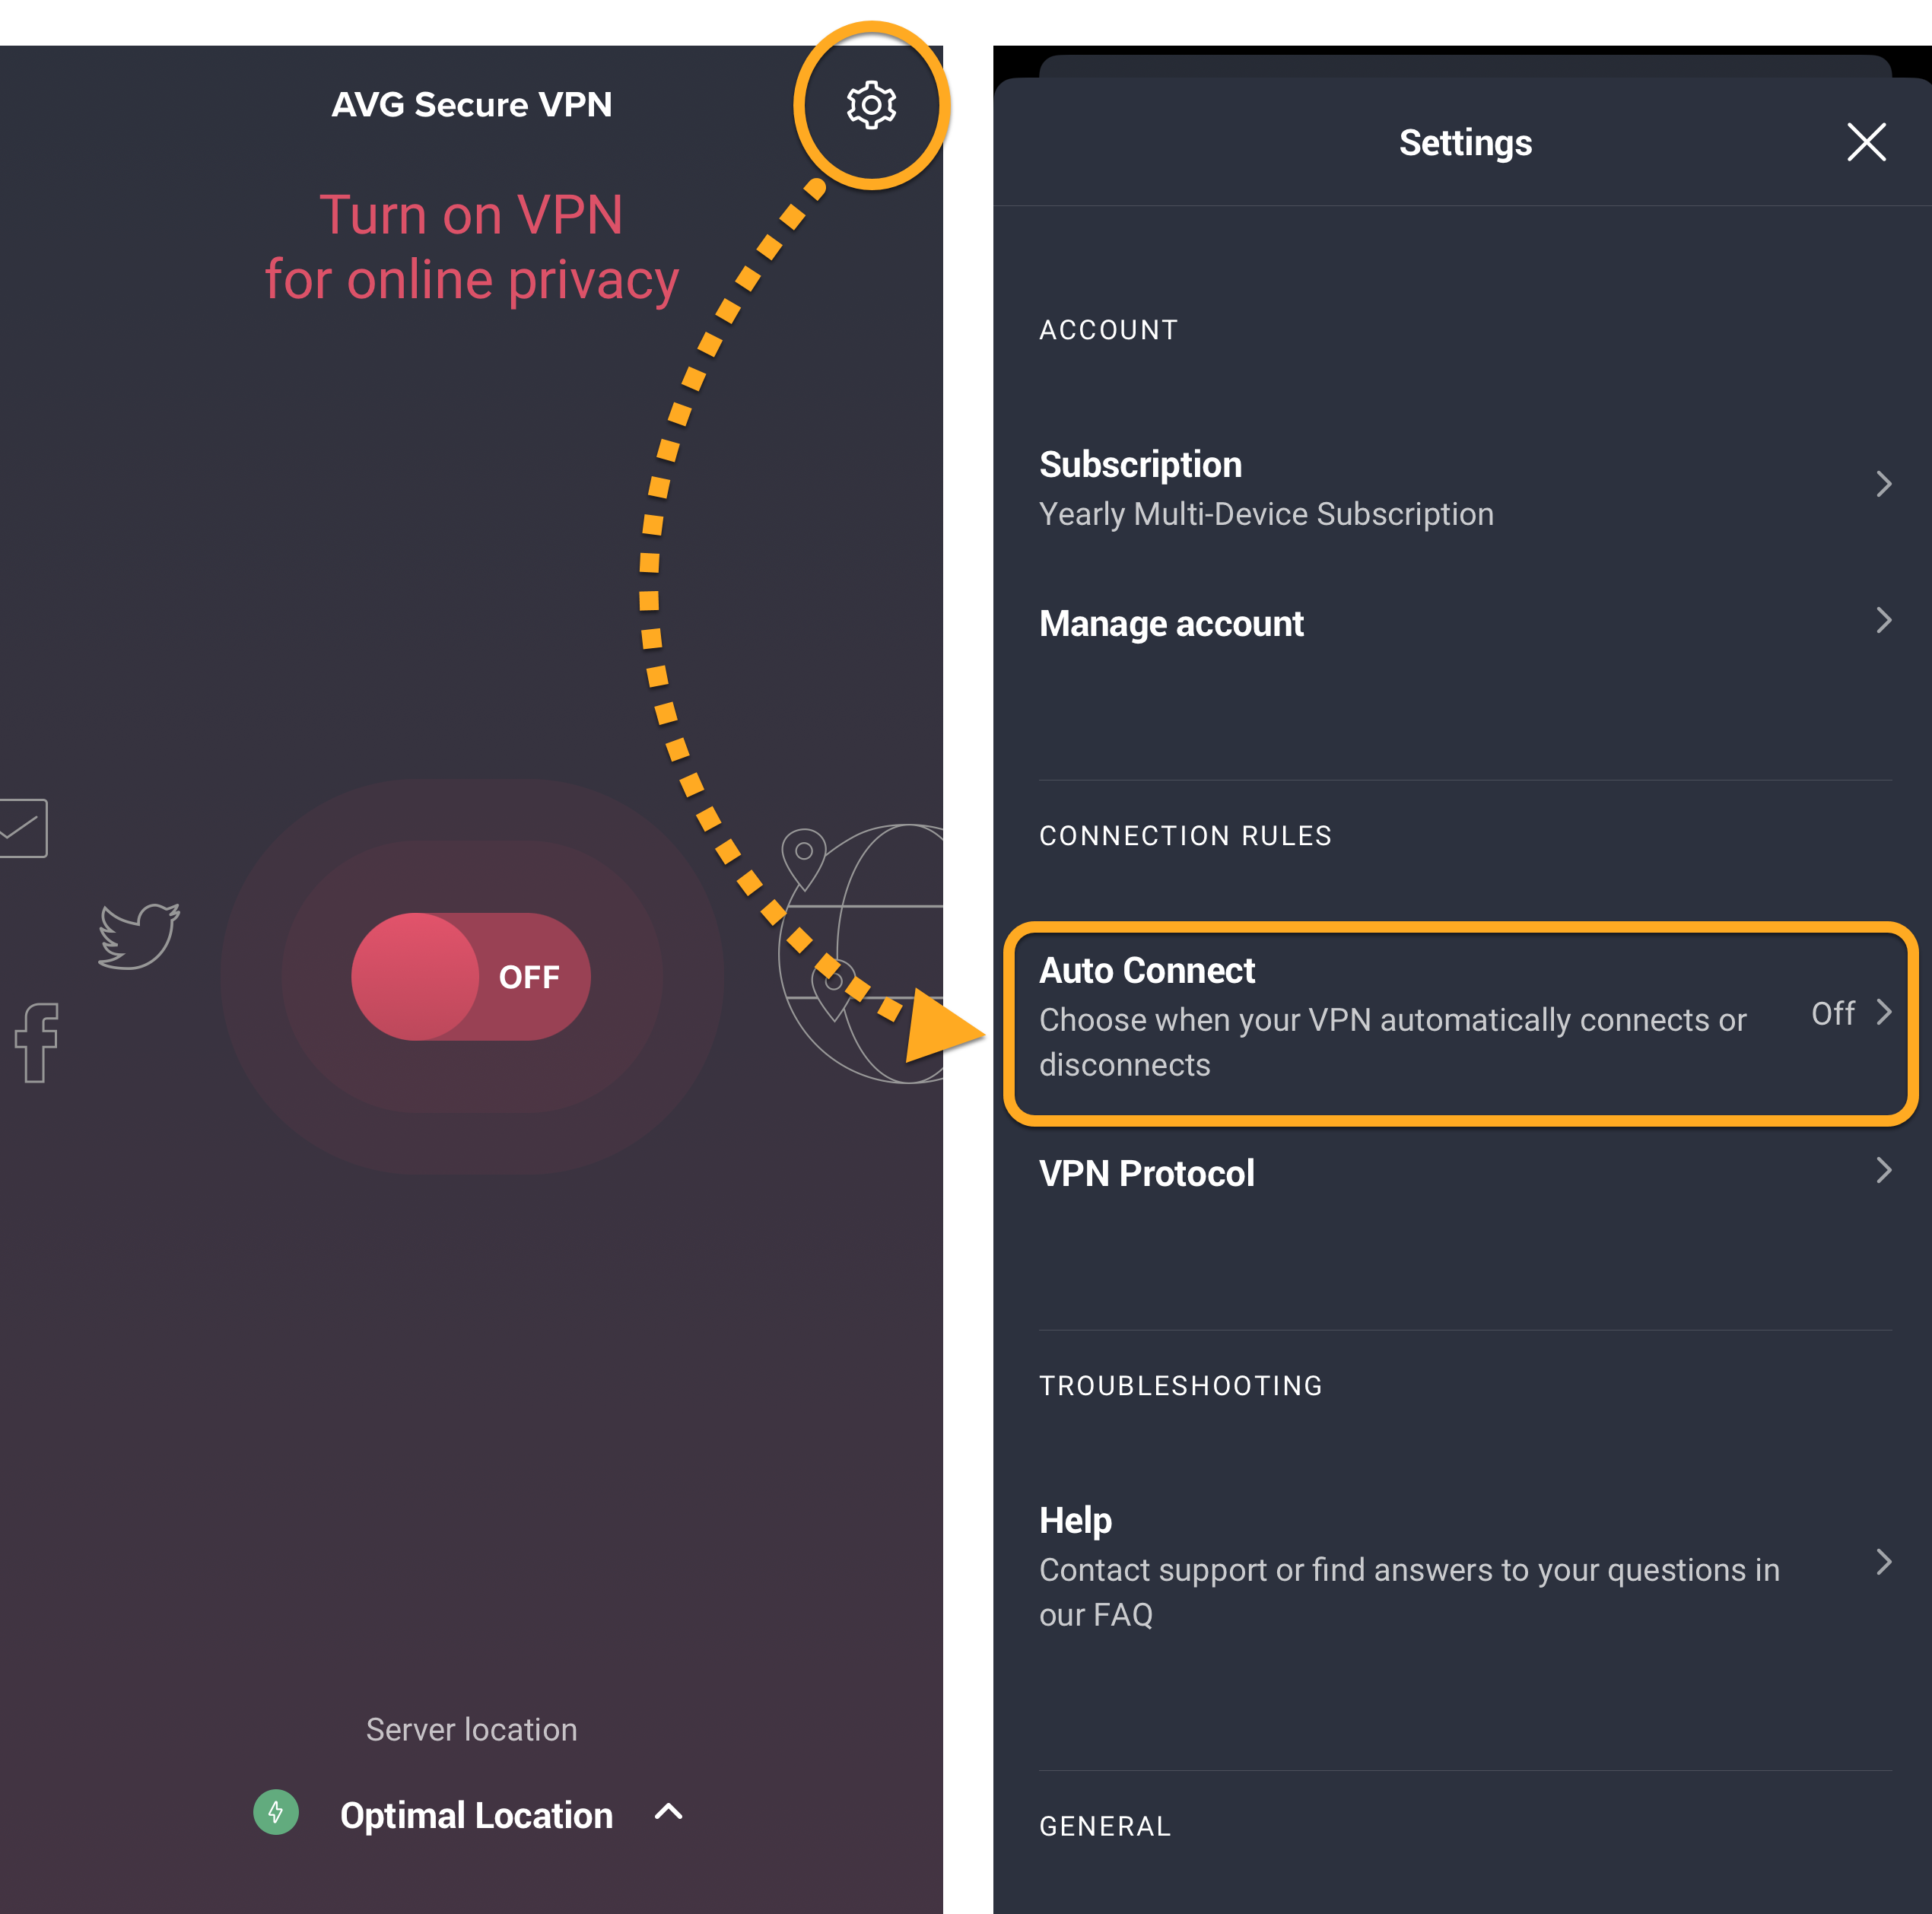
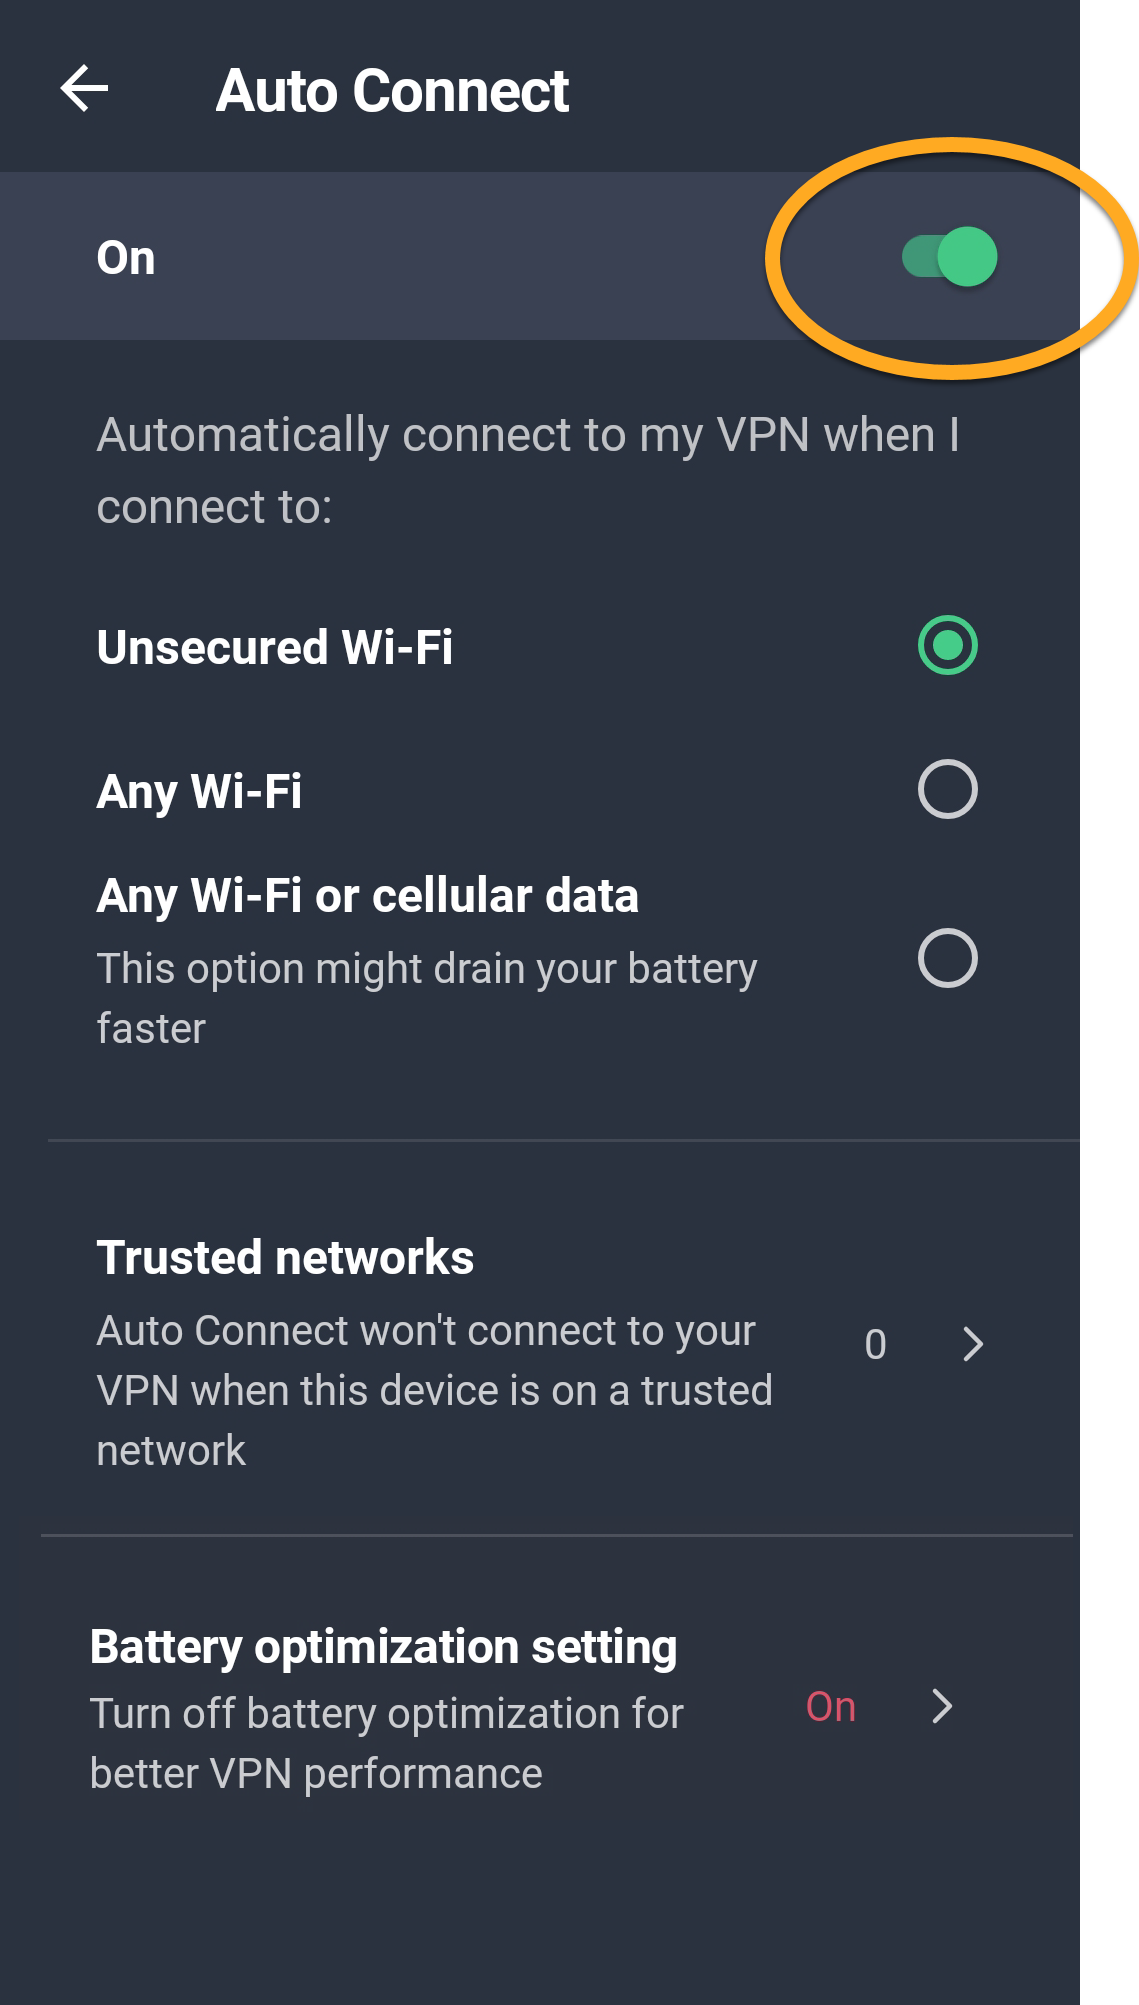
- Go to Settings (the gear icon) ▸ Auto Connect.
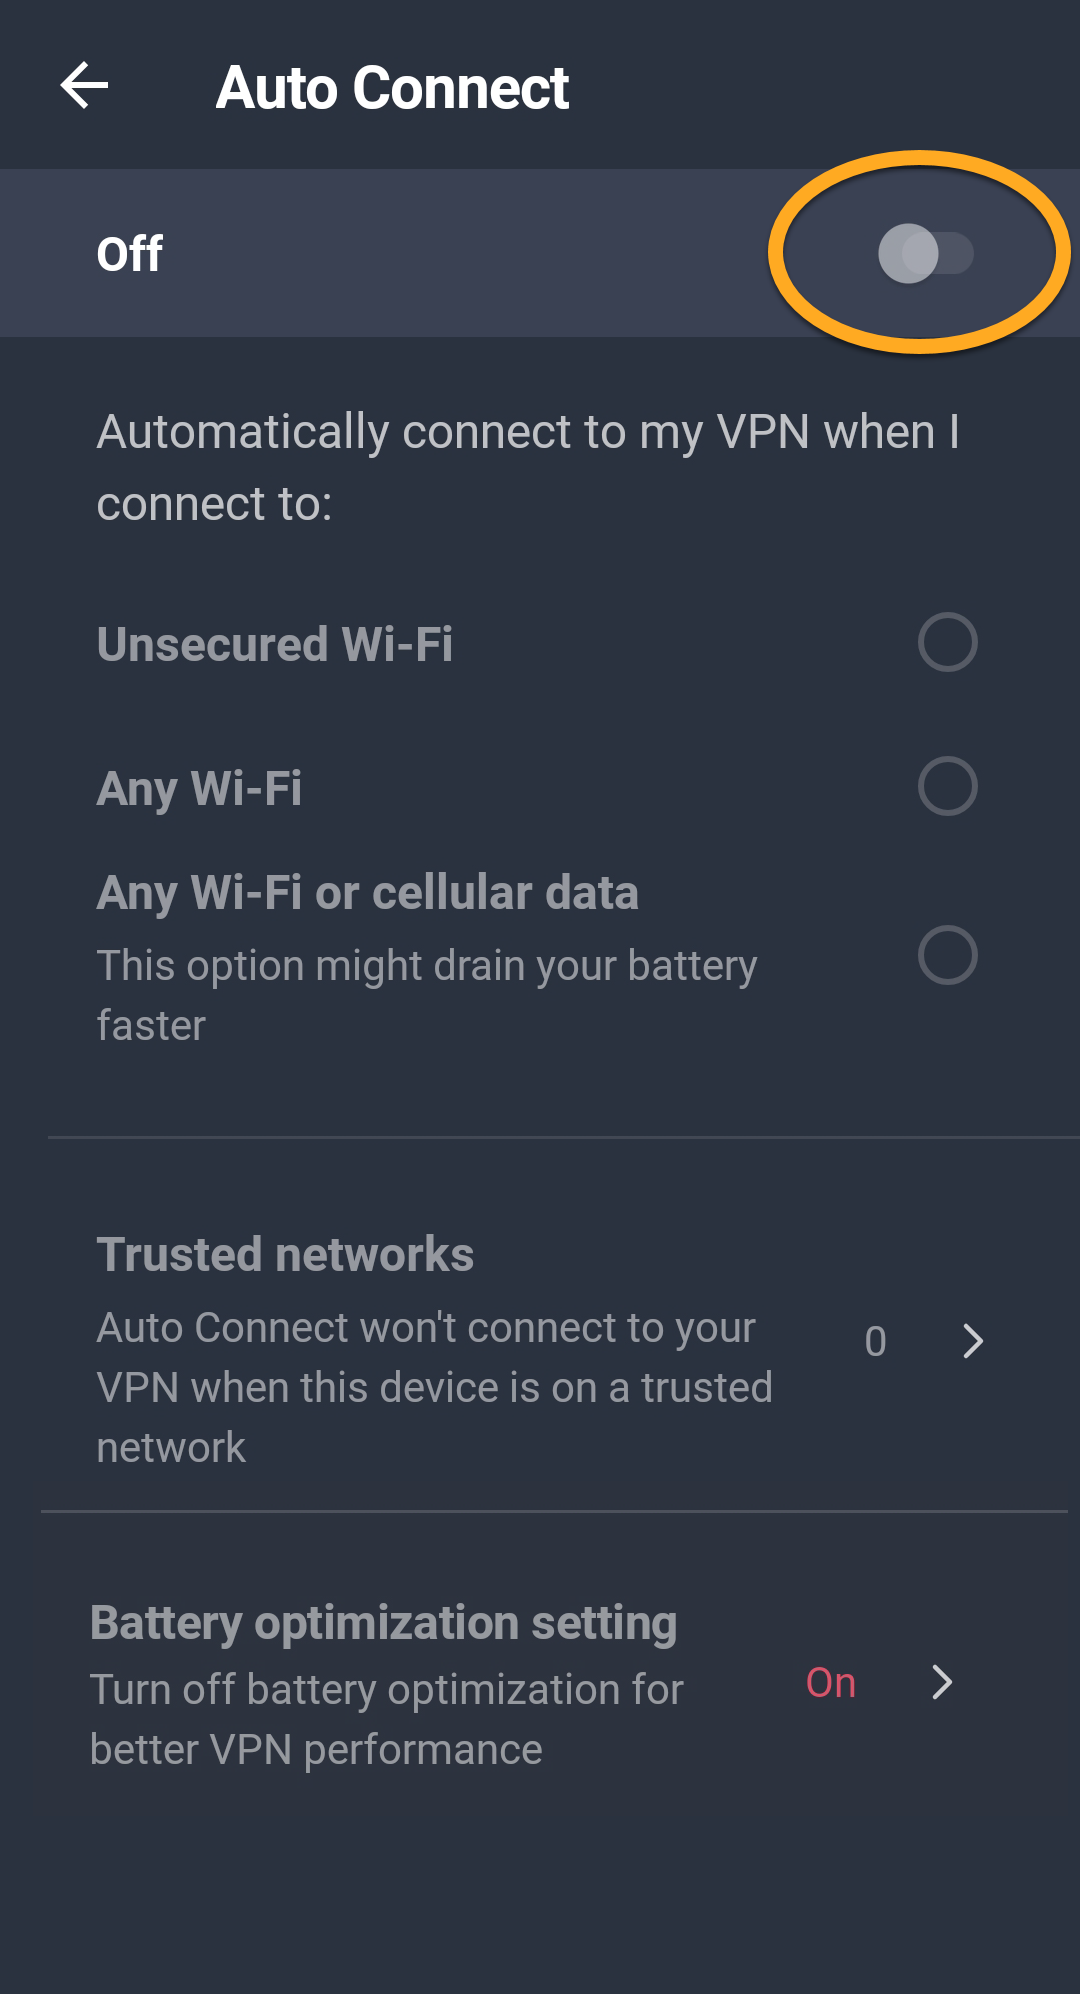
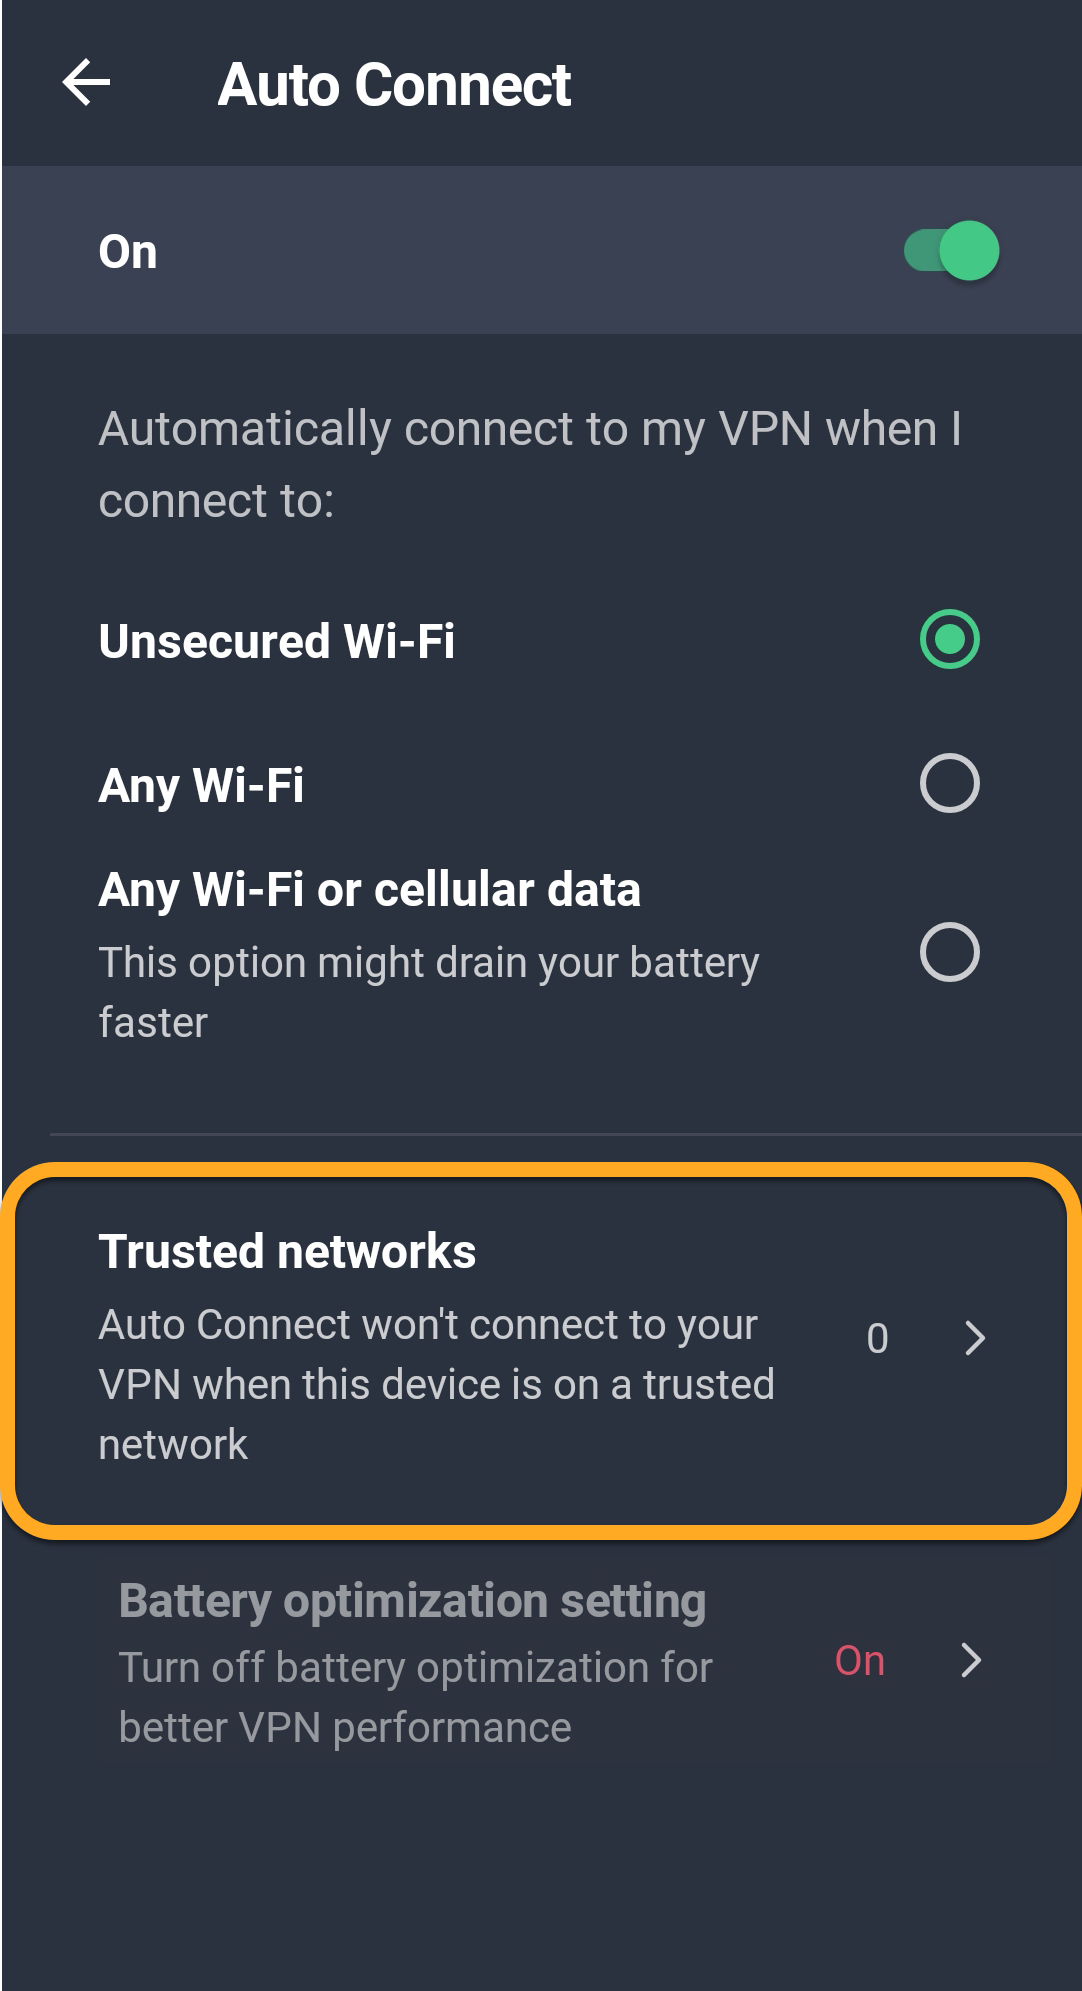
- Tap the gray (Off) slider at the top of the screen so that it changes to green (On).
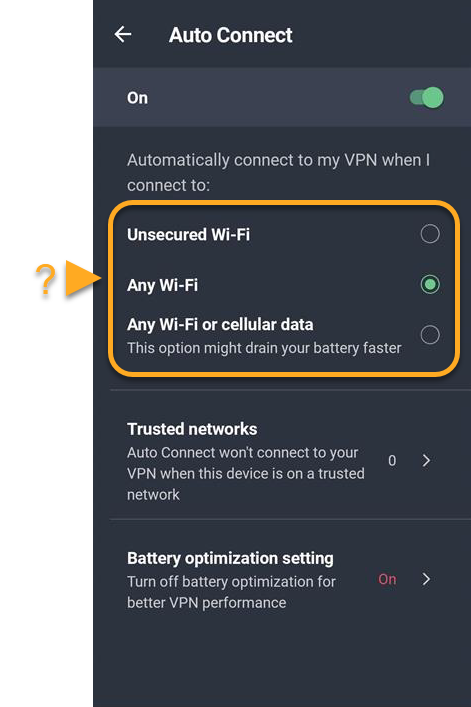
- Select your preferred option:
- Unsecured Wi-Fi: The VPN turns on automatically when your Android device connects to an unsecured network. An unsecured network is any network that is not on your list of trusted networks.
- Any Wi-Fi: The VPN turns on automatically when your Android device connects to any Wi-Fi network.
- Any Wi-Fi or cellular data: The VPN turns on automatically when your Android device connects to any Wi-Fi or cellular data network.
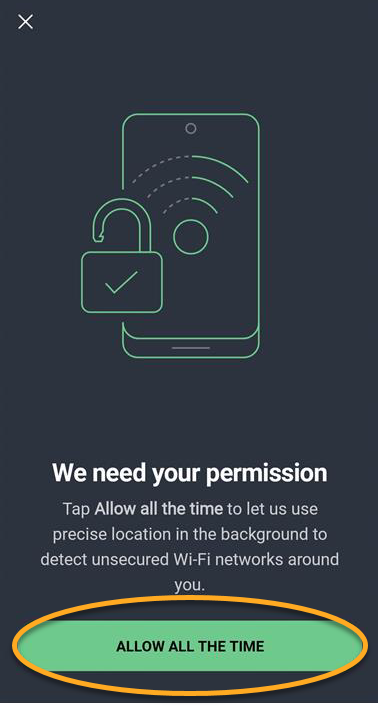
- If prompted, tap Allow all the time and follow the on-screen instructions to allow AVG Secure VPN to access your location.
AVG Secure VPN now now turns on automatically according to the preference you selected.
To learn how to add a network to your list of trusted networks, refer to the Add a trusted network section of this article.
- Tap the AVG VPN icon on the Home screen of your device. The app opens.
- Go to Settings (the gear icon) ▸ Auto Connect.
If the Auto Connect option is unavailable, AVG Secure VPN may not have permission to connect automatically. To grant the necessary permissions, tap Connect on the main app screen and follow the on-screen instructions.
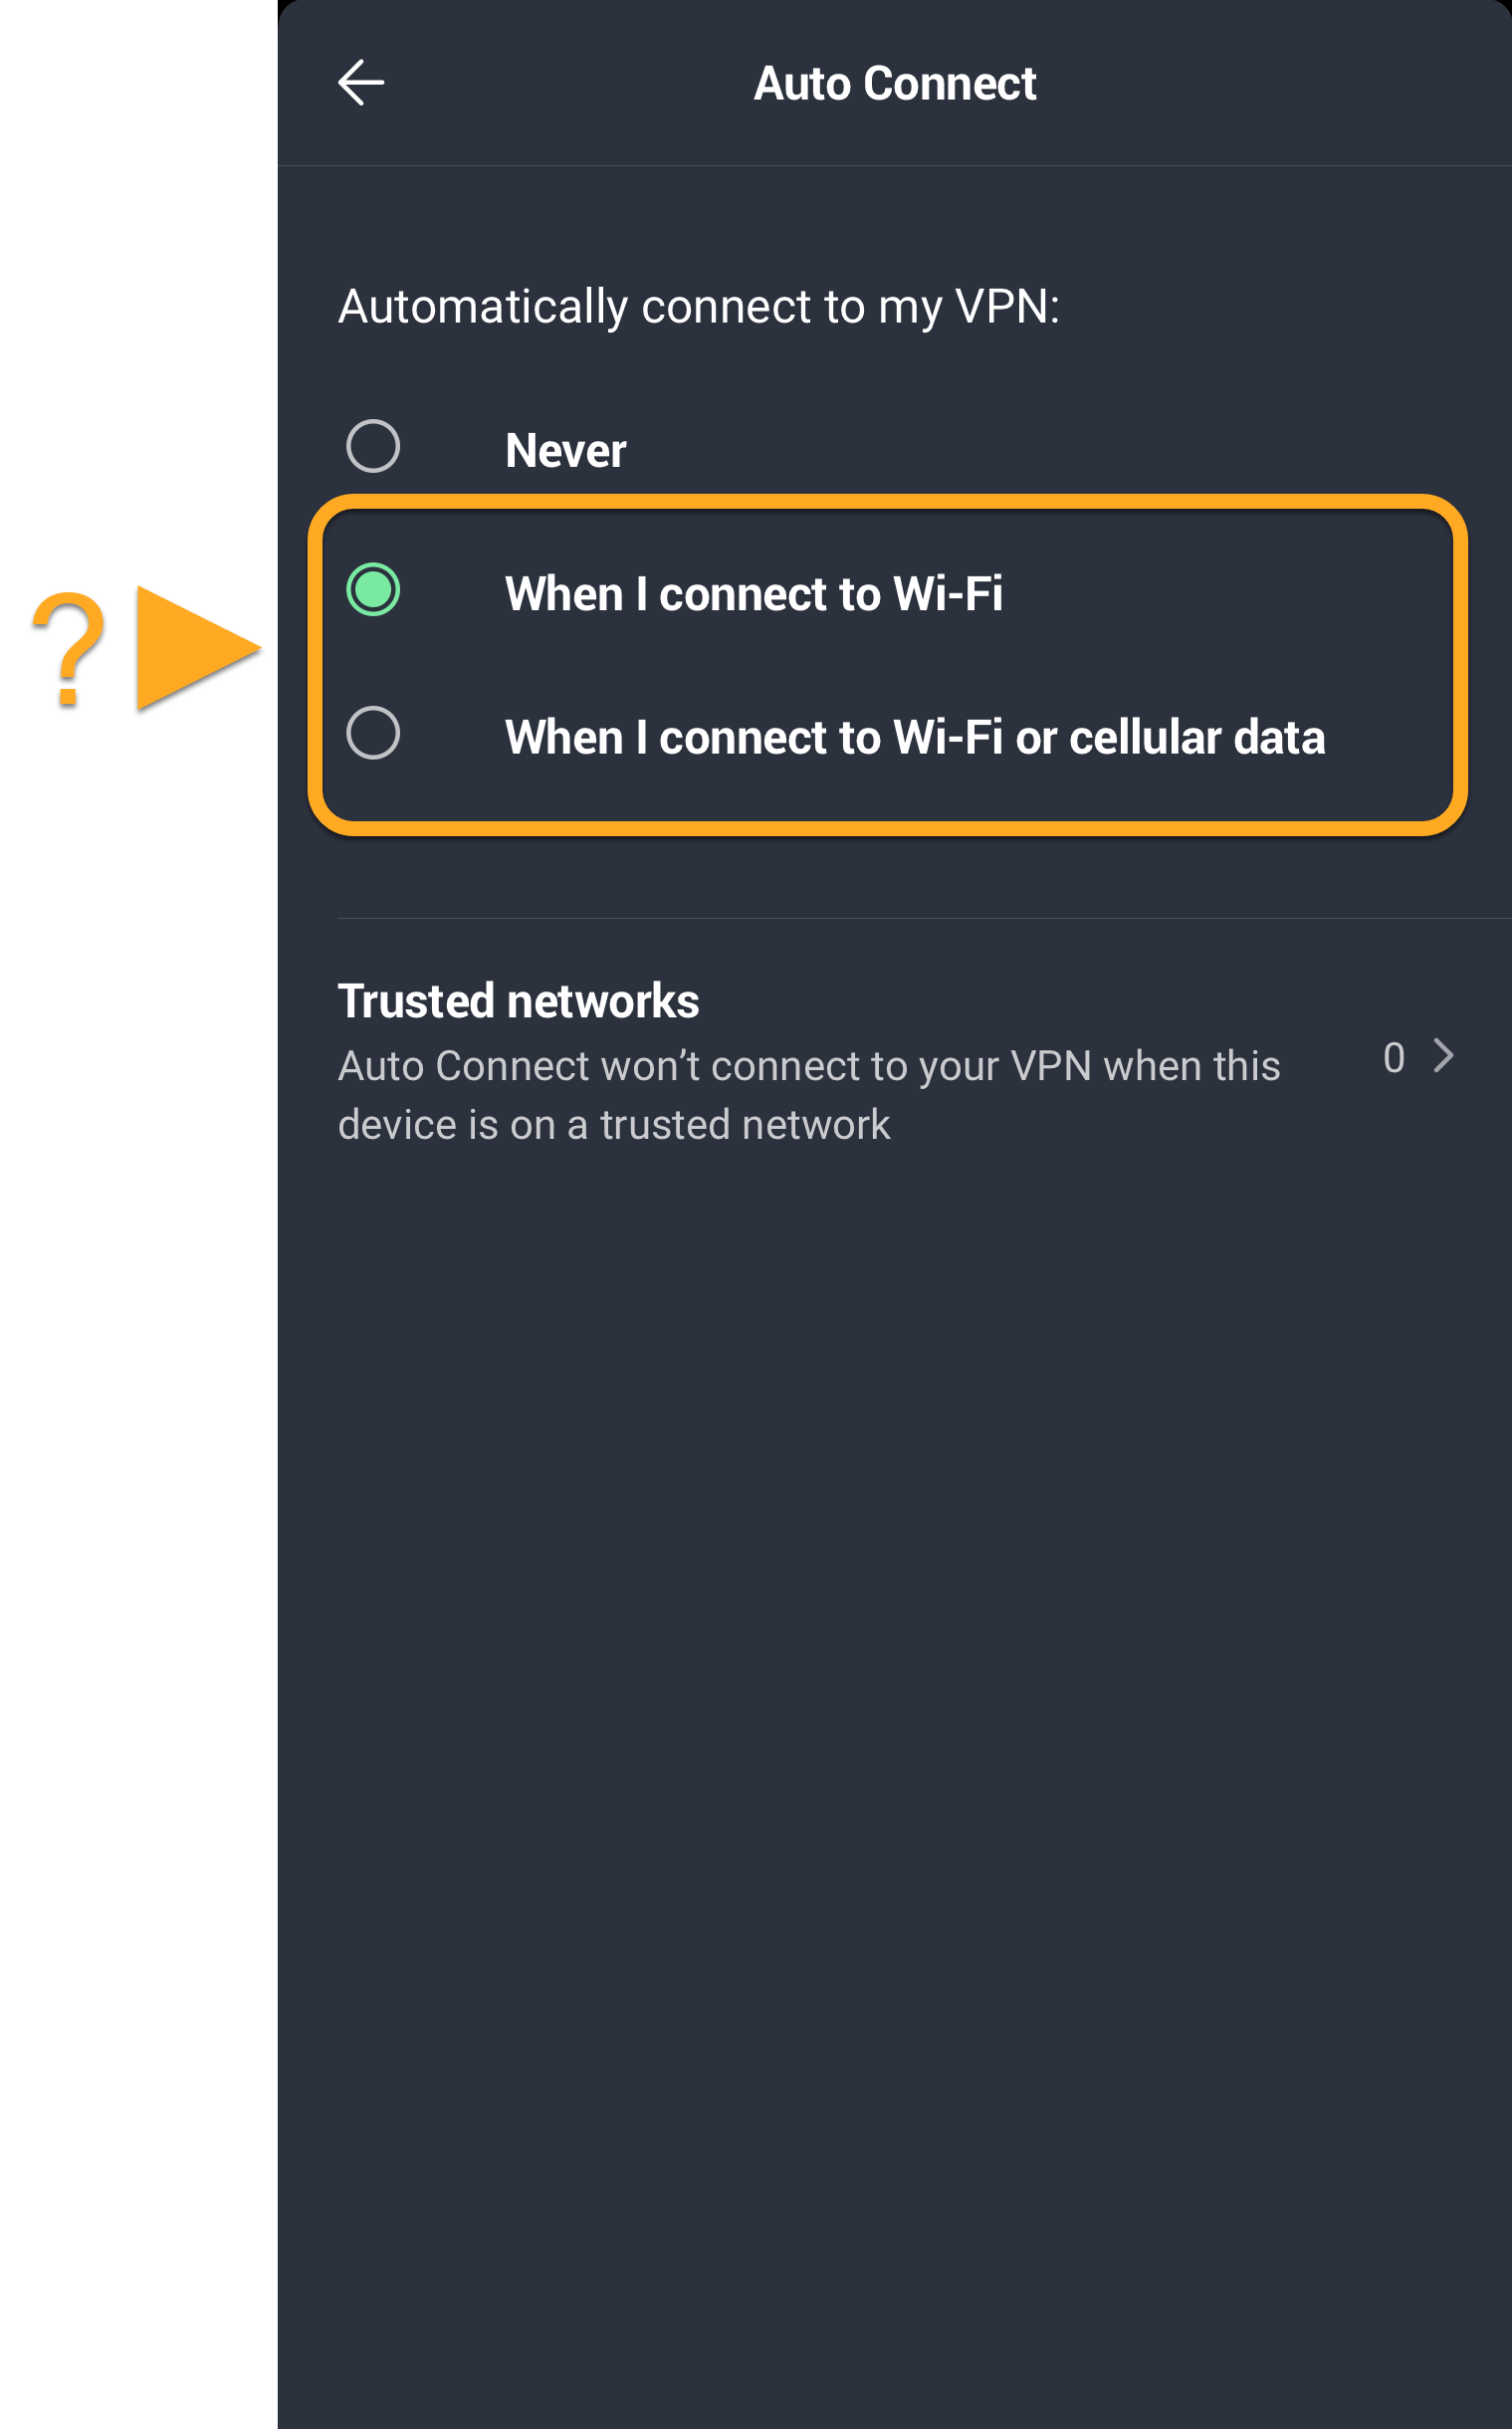
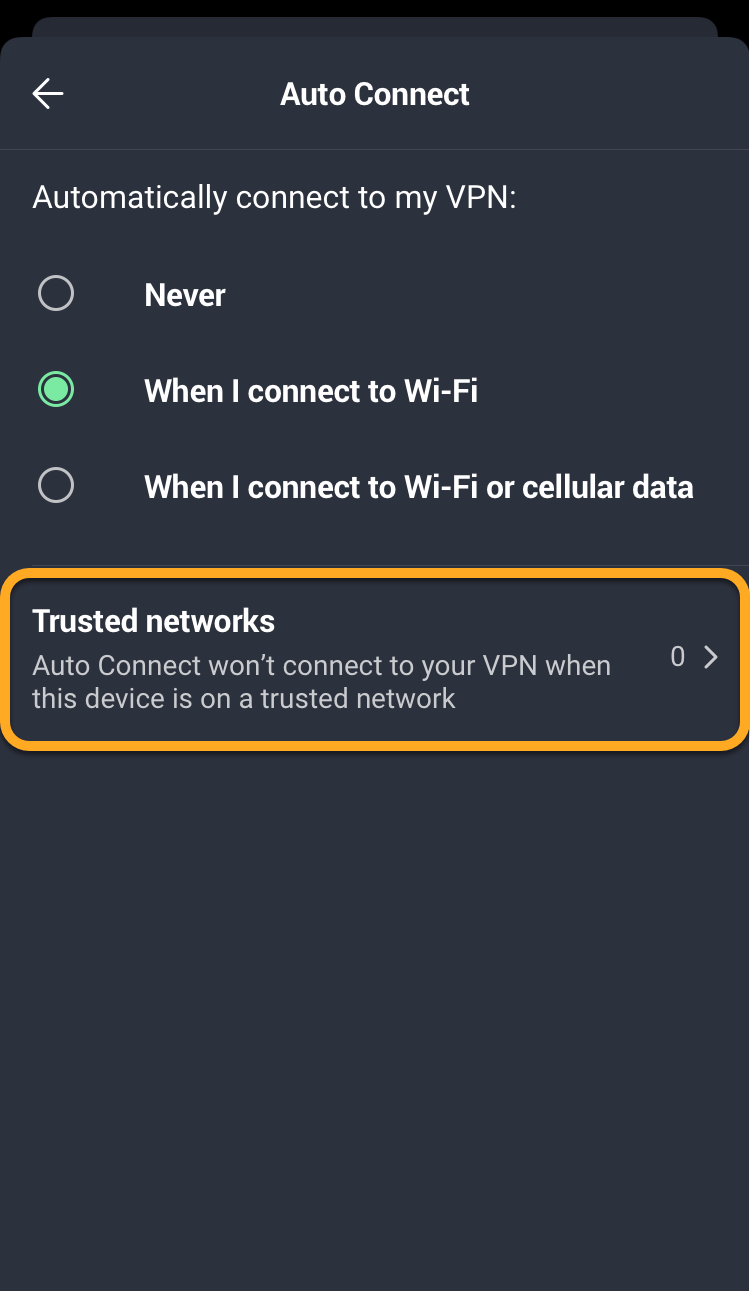
- Select your preferred option:
- When I connect to Wi-Fi: The VPN turns on automatically when your iOS device connects to any Wi-Fi network.
- When I connect to Wi-Fi or cellular data: The VPN turns on automatically when your iOS device connects to any Wi-Fi or cellular data network.
AVG Secure VPN now turns on automatically according to the preference you selected.
If you do not want AVG Secure VPN to automatically turn on when you connect to a private network (such as your home or work network), you can add the private network to your list of trusted networks. For instructions, refer to the Add a trusted network section of this article.
Add a trusted network
You can add private networks, such as your home or work Wi-Fi, to your list of trusted networks. These trusted networks are excluded from your VPN auto-connect settings. To add a private network to the trusted networks list:
- Open AVG Secure VPN and go to
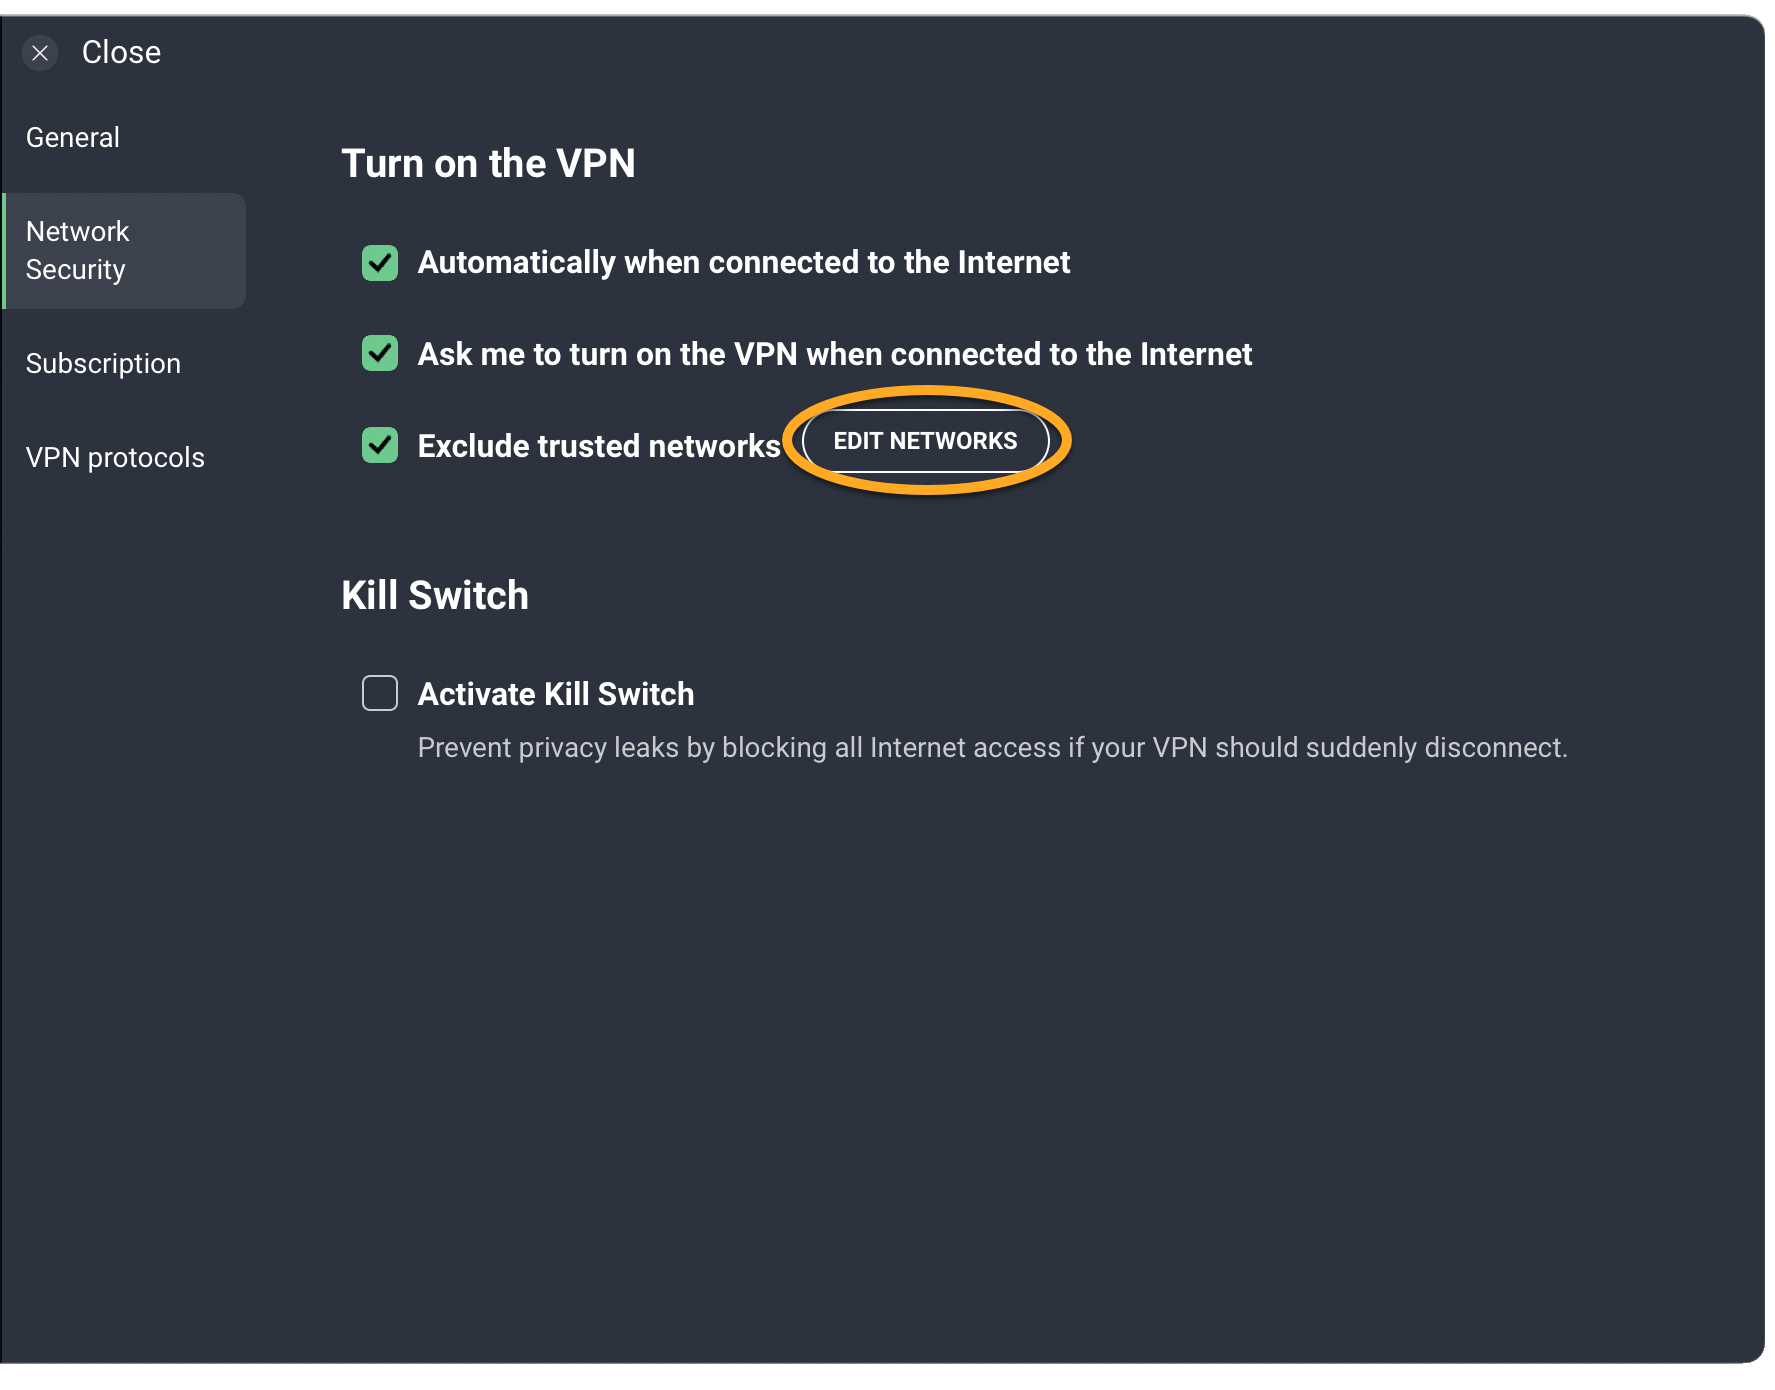
☰Menu ▸ Preferences. - Select Network Security in the left panel.
- Ensure the box next to Exclude trusted networks is ticked.
- Click Edit networks.
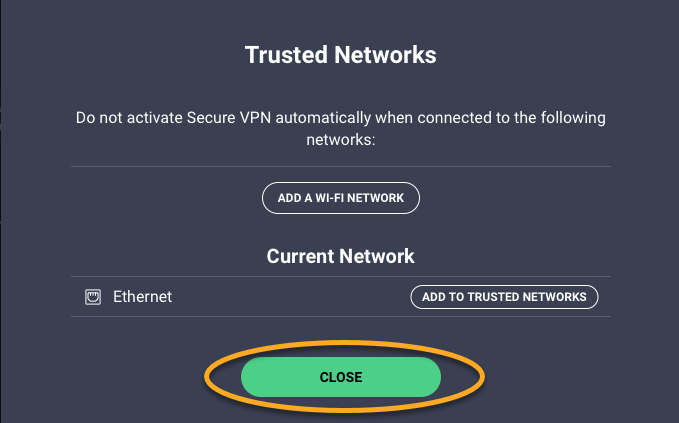
- Click Add to trusted networks next to your current network.
- Click Close to return to the main AVG Secure VPN screen.

- Open AVG Secure VPN and go to Settings (the gear icon) ▸ Auto Connect.
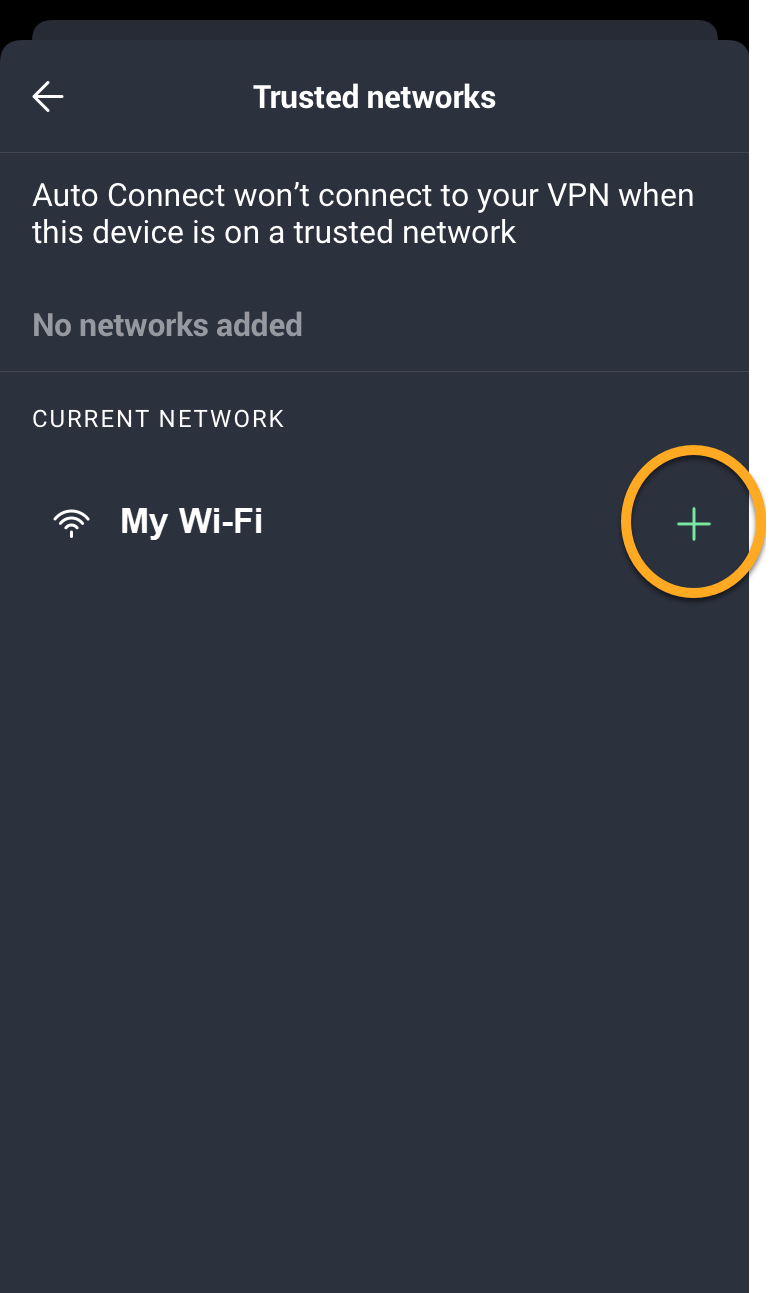
- Tap Trusted networks.
- Tap the + plus icon next to your current network.
- Open AVG Secure VPN and go to Settings (the gear icon) ▸ Auto Connect.
- Tap Trusted networks.
- Tap the + plus icon next to your current network.
Your current network now appears on your list of trusted networks.
Manage public and private networks
To manually define whether a network is public or private:
- Open AVG Secure VPN and go to
☰Menu ▸ Settings. - Select Network Security in the left panel.
- Ensure the box next to Exclude private networks is ticked.
- Click Edit networks.
- Use the slider to define whether your current network is Public or Private, then click Close.
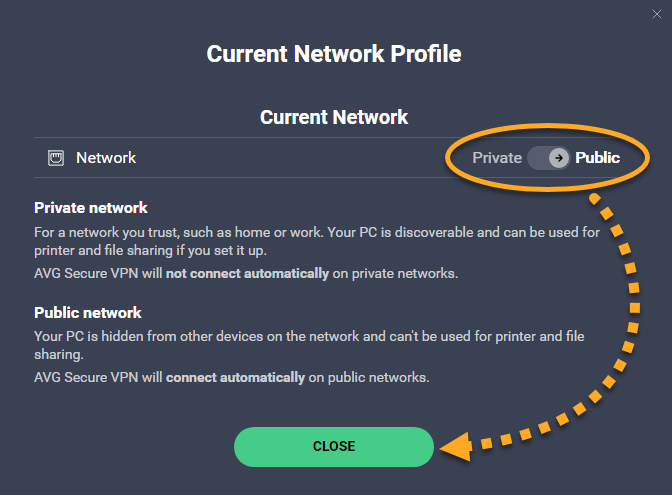
The current network is now defined according to your preferences.
Disable auto-connect
- Open AVG Secure VPN and go to
☰Menu ▸ Settings. - Select Network Security in the left panel.
- Untick the box next to Automatically when connected to the internet.
AVG Secure VPN no longer turns on automatically when your PC connects to a public network. To re-enable this option, refer to the Enable auto-connect section in this article.
- Open AVG Secure VPN and go to
☰Menu ▸ Preferences. - Select Network Security in the left panel.
- Untick the box next to Automatically when connected to the internet.
AVG Secure VPN no longer turns on automatically when your Mac connects to an unsecured network. To re-enable this option, refer to the Enable auto-connect section in this article.
- Open AVG Secure VPN and go to Settings (the gear icon) ▸ Auto Connect.
- Tap the green (On) slider at the top of the screen so that it changes to gray (Off).
AVG Secure VPN no longer turns on automatically. To re-enable this option, refer to the Enable auto-connect section in this article.
- Open AVG Secure VPN and go to Settings (the gear icon) ▸ Auto Connect.
- Select Never.
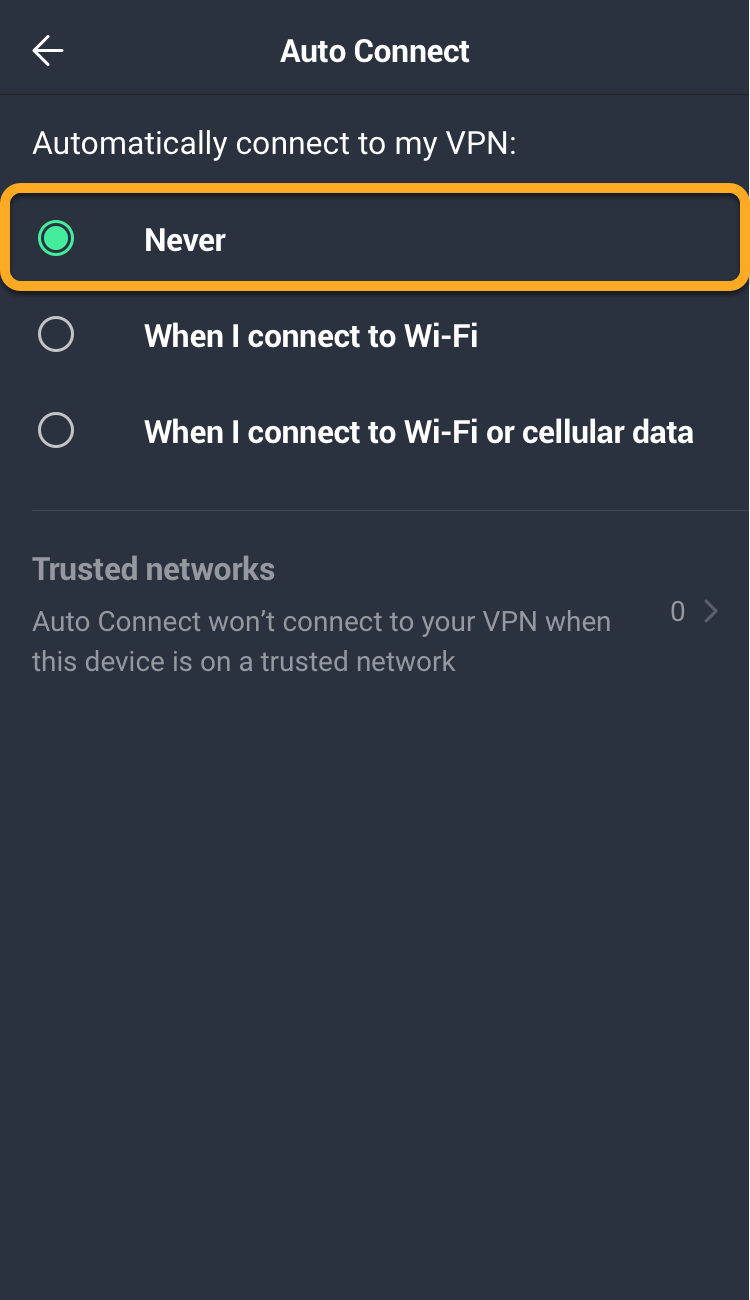
AVG Secure VPN no longer turns on automatically. To re-enable this option, refer to the Enable auto-connect section in this article.
Disable battery optimization
You can turn off the battery optimization setting for better VPN performance.
- Open AVG Secure VPN and go to Settings (the gear icon) ▸ Auto Connect.
- Tap Battery optimization setting.
- Tap Open settings to go to your device settings.
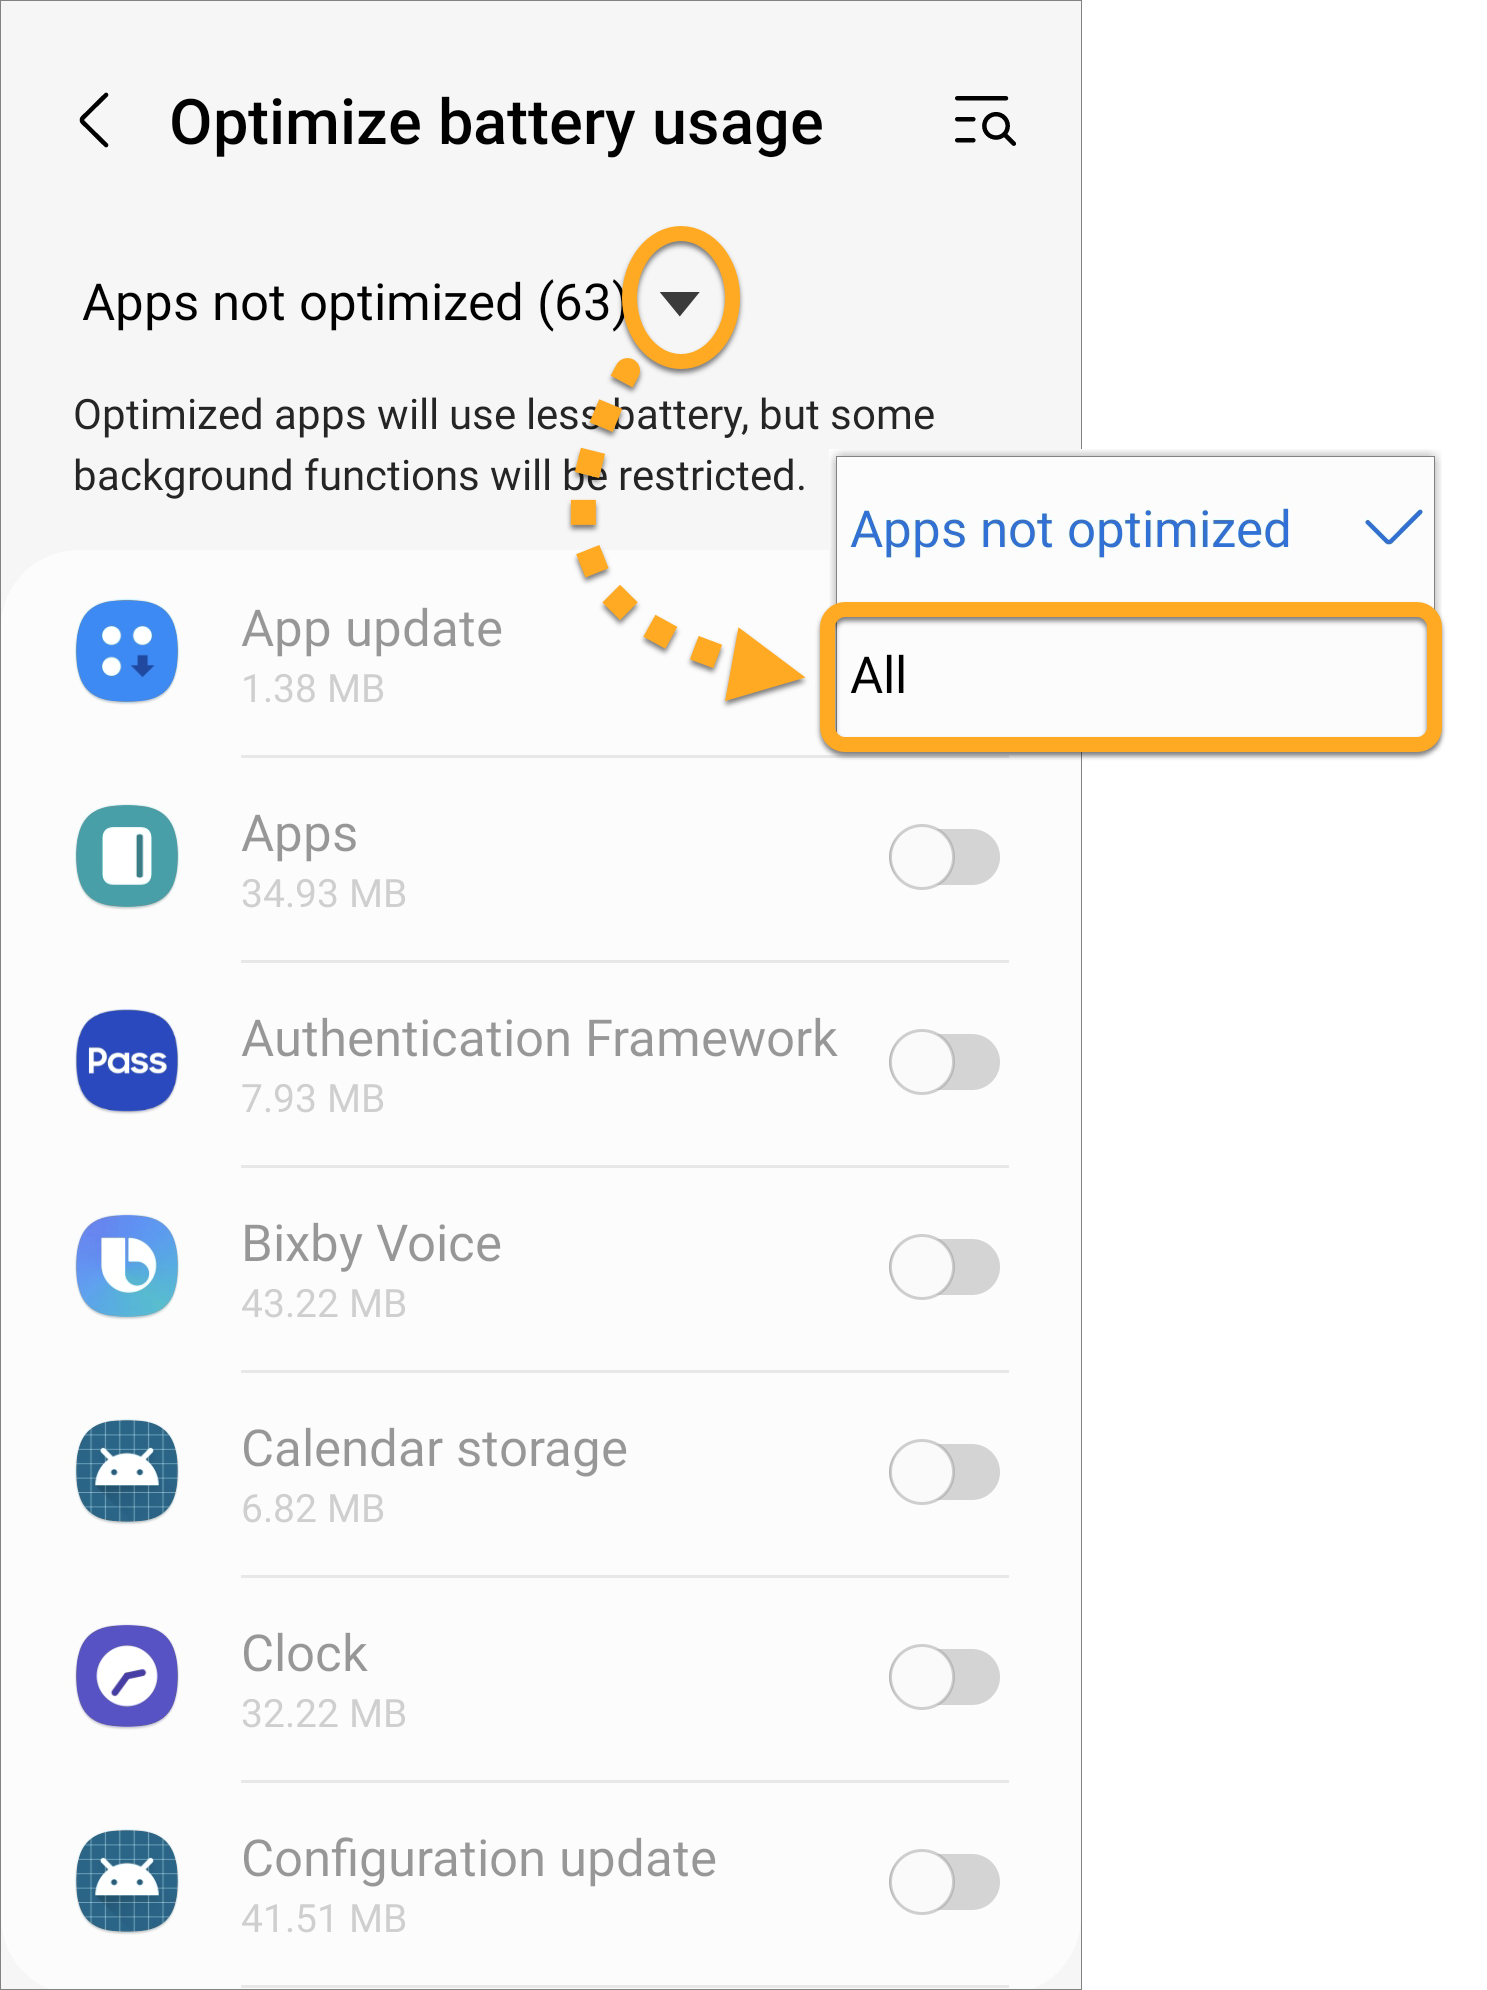
- Use the arrow to change the category from Apps not optimized to All.
- Scroll to AVG Secure VPN and tap the blue (ON) slider to gray (OFF).


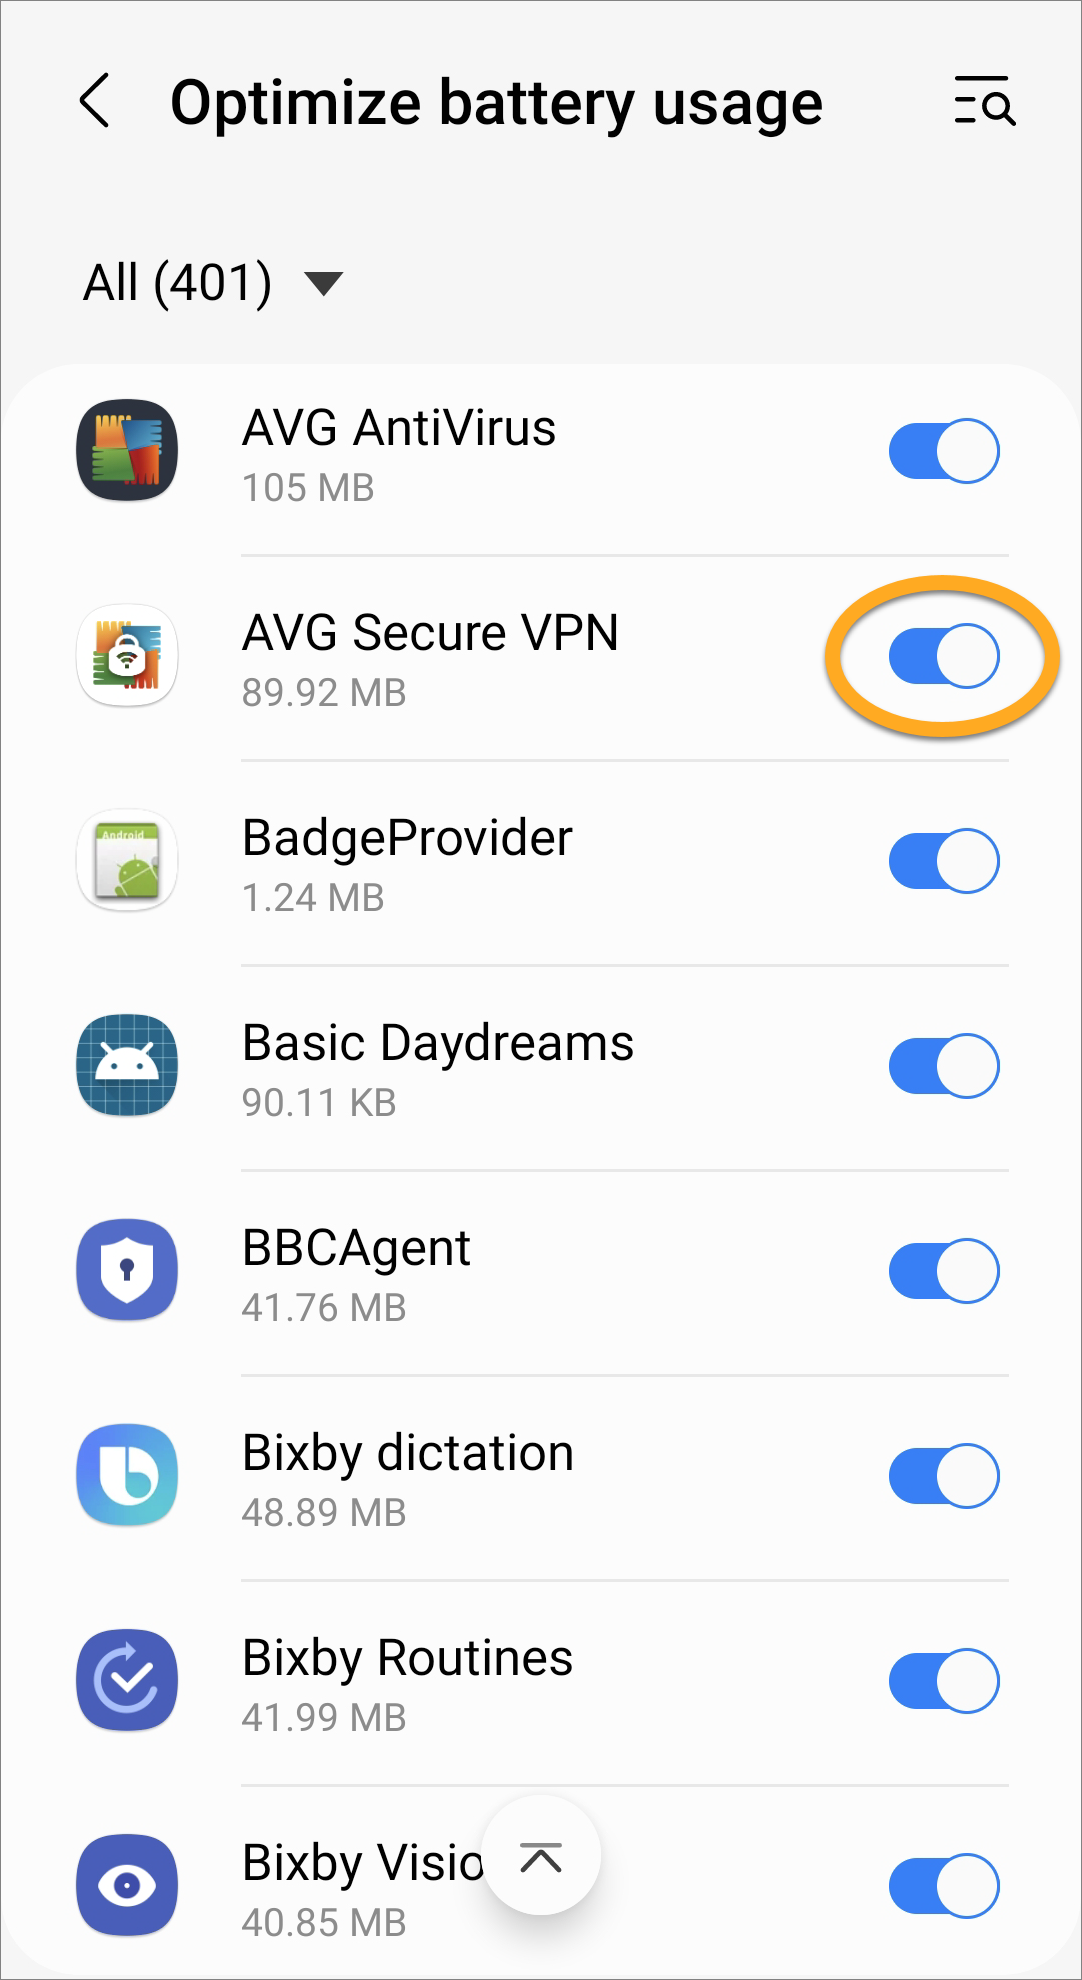
Battery optimization is now disabled.
- AVG Secure VPN 5.x for Windows
- AVG Secure VPN 1.x for Mac
- AVG Secure VPN 2.x for Android
- AVG Secure VPN 2.x for iOS
- Microsoft Windows 11 Home / Pro / Enterprise / Education
- Microsoft Windows 10 Home / Pro / Enterprise / Education - 32 / 64-bit
- Microsoft Windows 8.1 / Pro / Enterprise - 32 / 64-bit
- Microsoft Windows 8 / Pro / Enterprise - 32 / 64-bit
- Microsoft Windows 7 Home Basic / Home Premium / Professional / Enterprise / Ultimate - Service Pack 1, 32 / 64-bit
- Apple macOS 12.x (Monterey)
- Apple macOS 11.x (Big Sur)
- Apple macOS 10.15.x (Catalina)
- Apple macOS 10.14.x (Mojave)
- Apple macOS 10.13.x (High Sierra)
- Apple macOS 10.12.x (Sierra)
- Google Android 6.0 (Marshmallow, API 23) or higher
- Apple iOS 14.0 or higher