AVG BreachGuard is an advanced privacy solution that prevents your personal information from being exploited online for profit. This article explains how to start using AVG BreachGuard.
Enable browser protection
AVG BreachGuard scans your web browsers for weak, duplicated, or breached passwords. Additionally, the application offers personalized tips to protect your online privacy by scanning your browsing history and bookmarks.
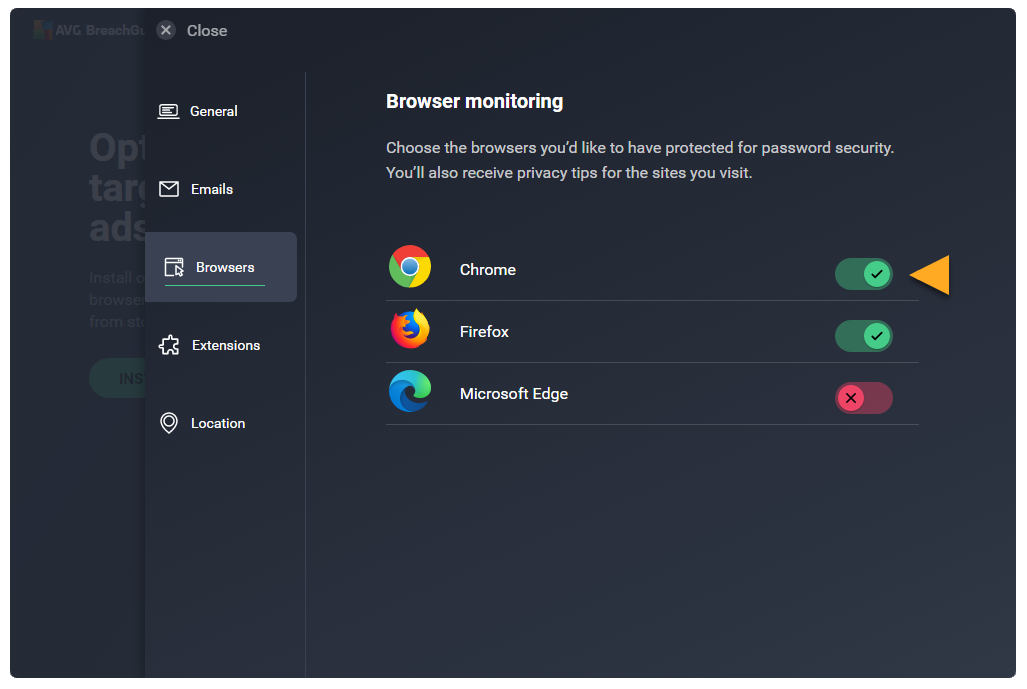
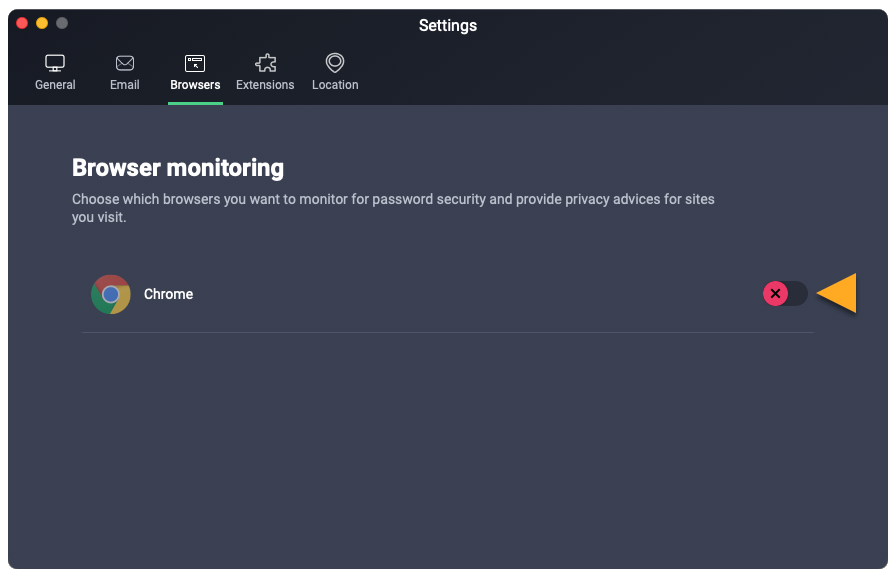
To ensure that AVG BreachGuard is protecting all of your installed browsers:
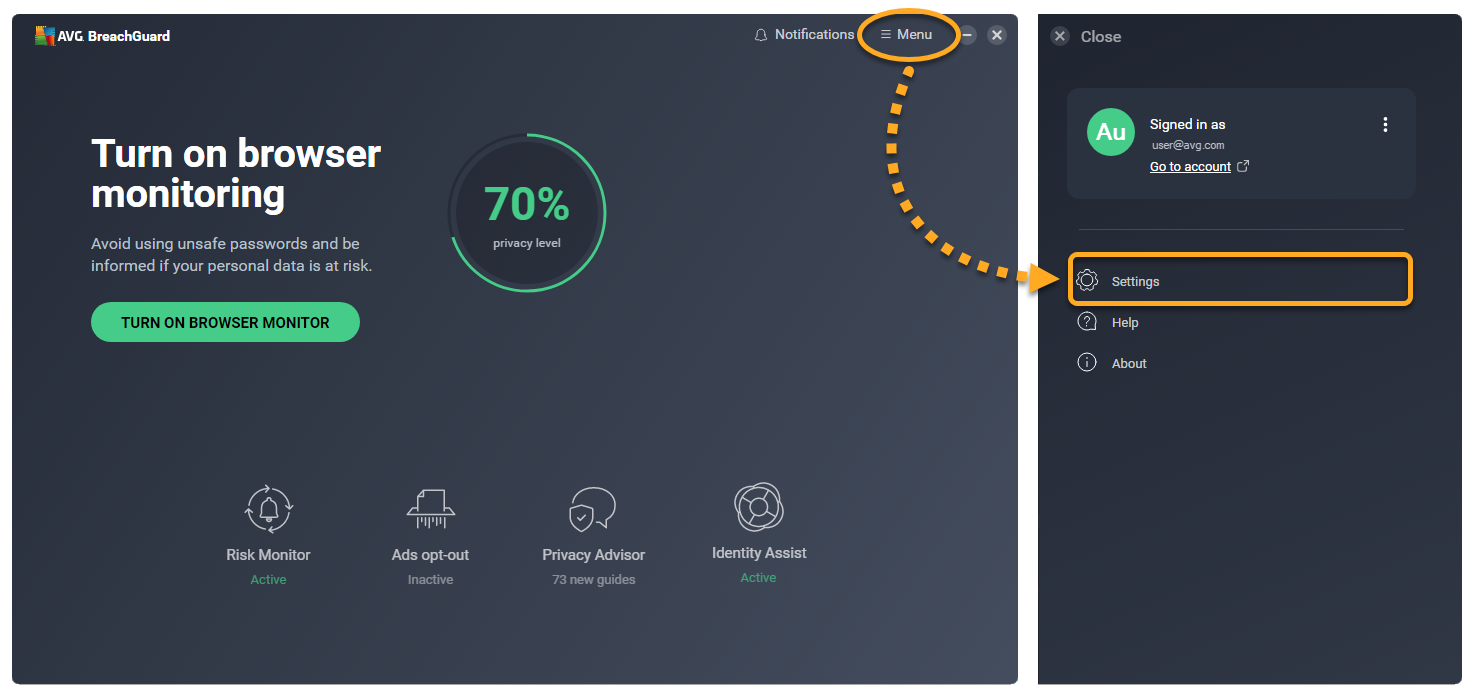
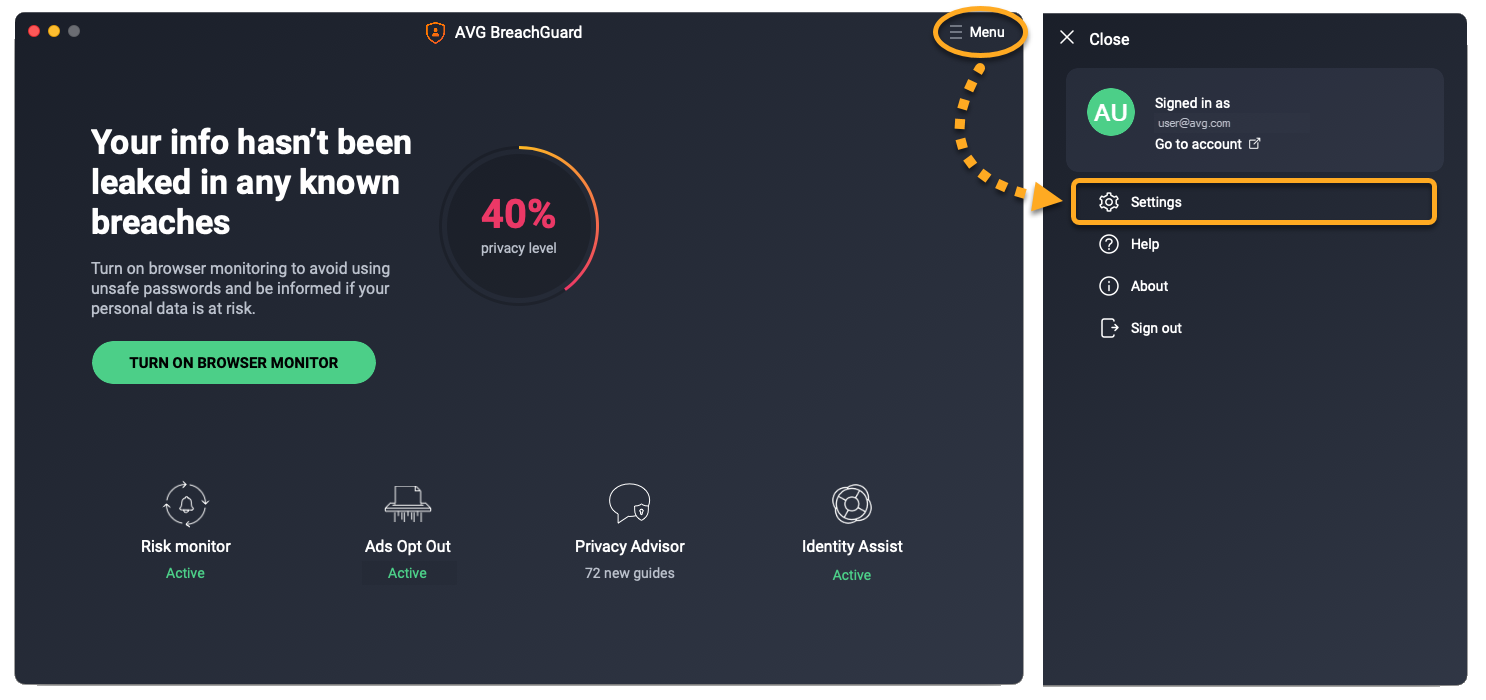
- Open AVG BreachGuard and go to
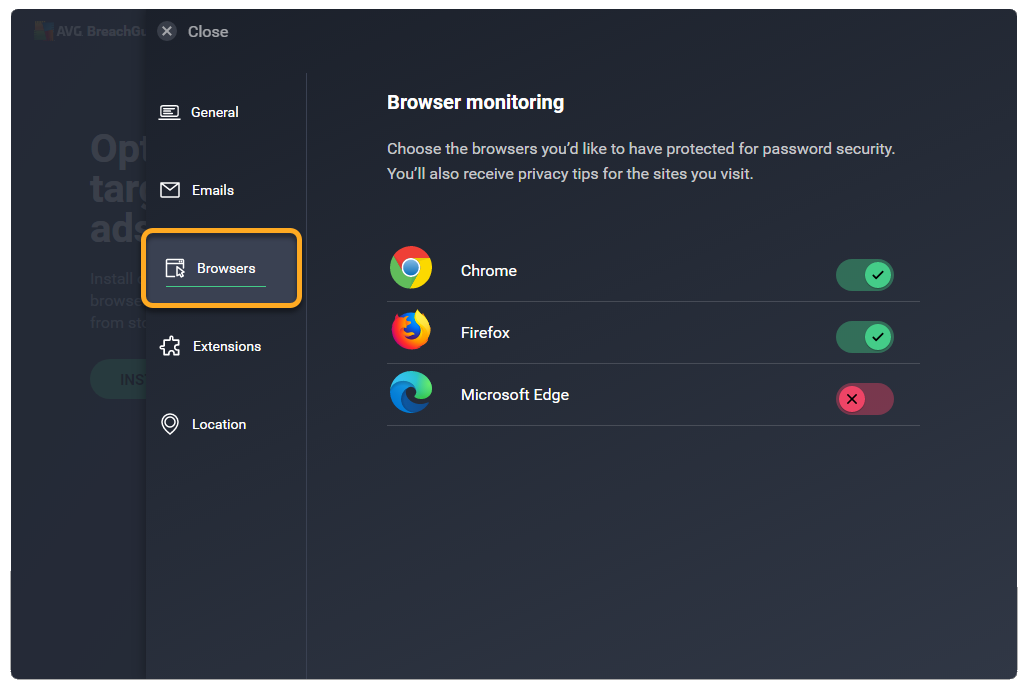
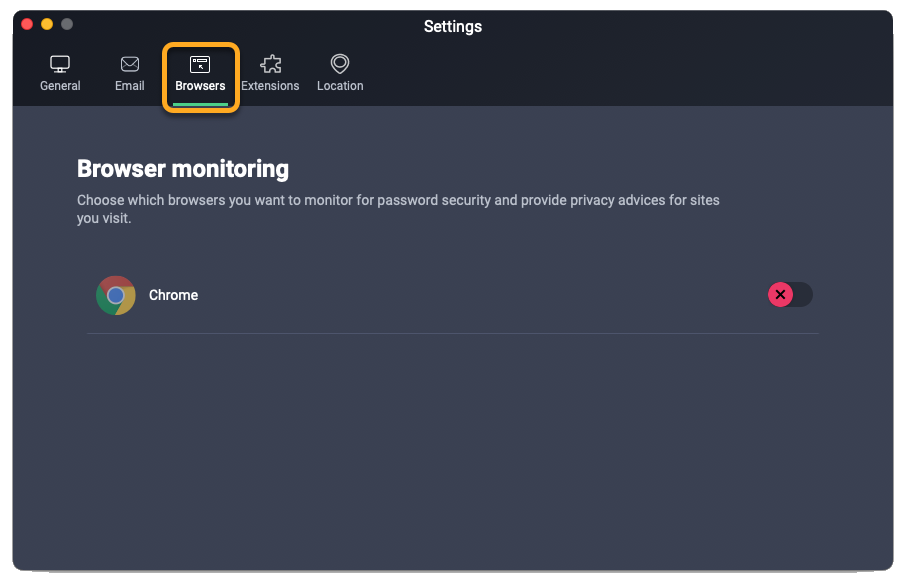
☰Menu ▸ Settings.
- Select Browsers in the left panel.
- Select the Browsers tab.
- Perform your preferred action:
- Start protecting: Click the red (OFF) slider next to a browser so that it changes to green (ON).
- Stop protecting: Click the green (ON) slider next to a browser so that it changes to red (OFF).
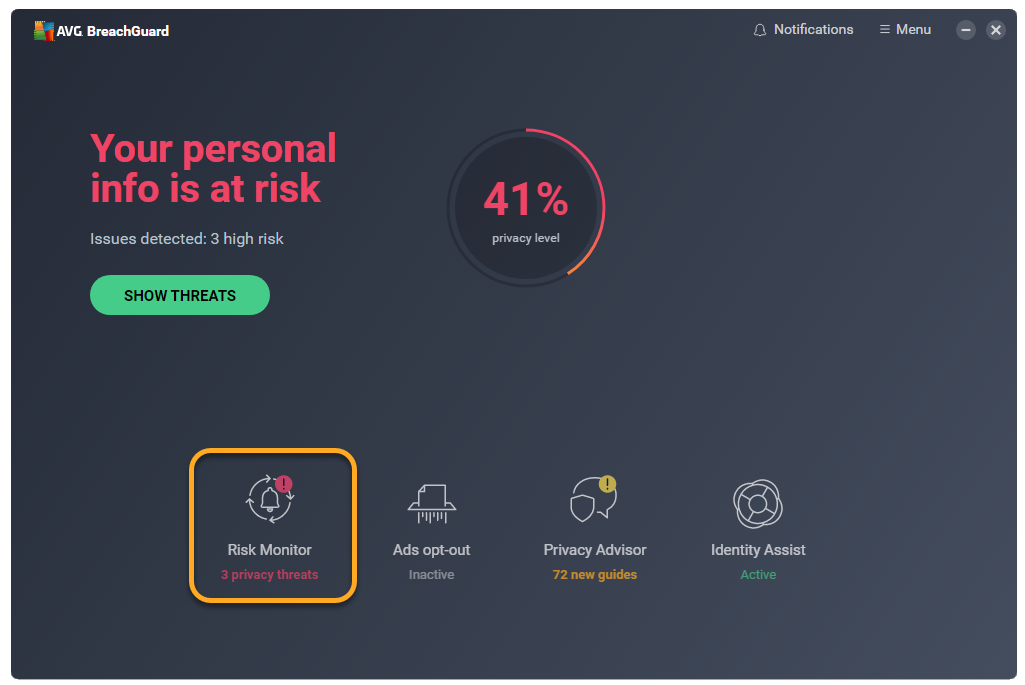
After you enable browser protection for a web browser, AVG BreachGuard immediately checks it for weak, duplicated, or breached passwords and notifies you about any found issues on the application dashboard. You can resolve these issues via the Risk Monitor tile.
Protect your online accounts
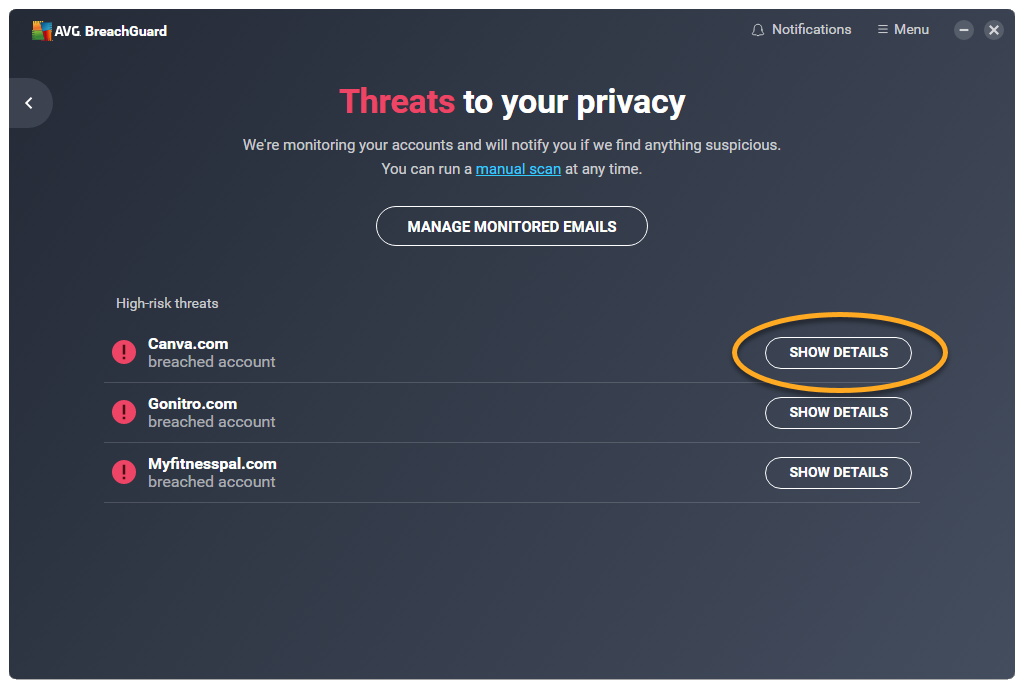
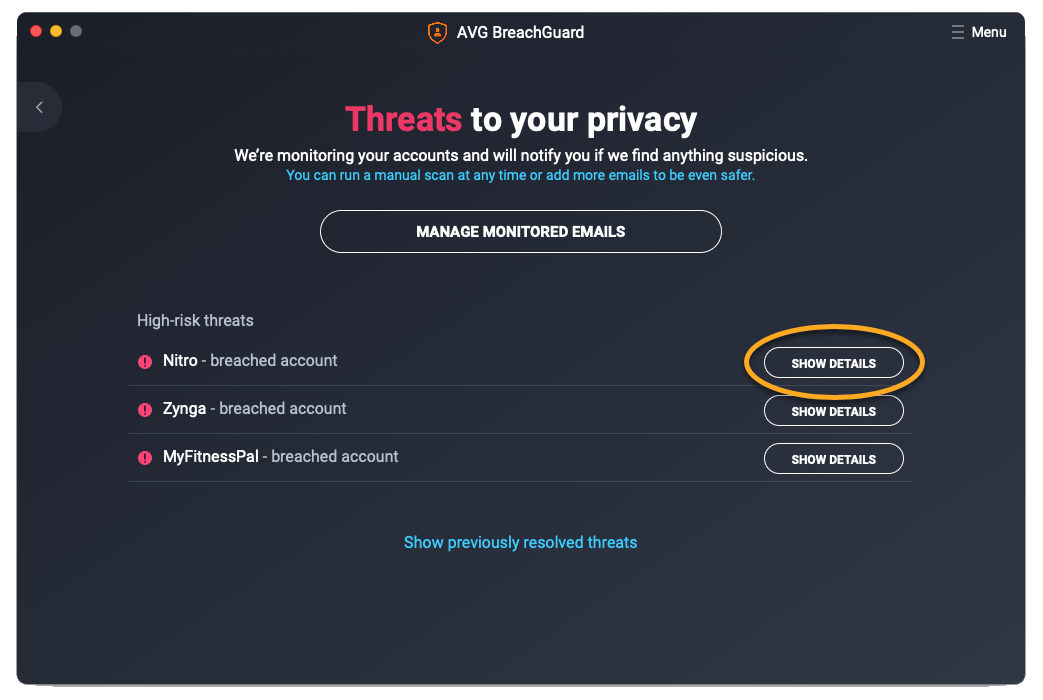
When AVG BreachGuard detects threats linked to your online accounts, the Risk Monitor tile shows the status: privacy threats.
To resolve detected threats:
- Open AVG BreachGuard and click Risk Monitor.
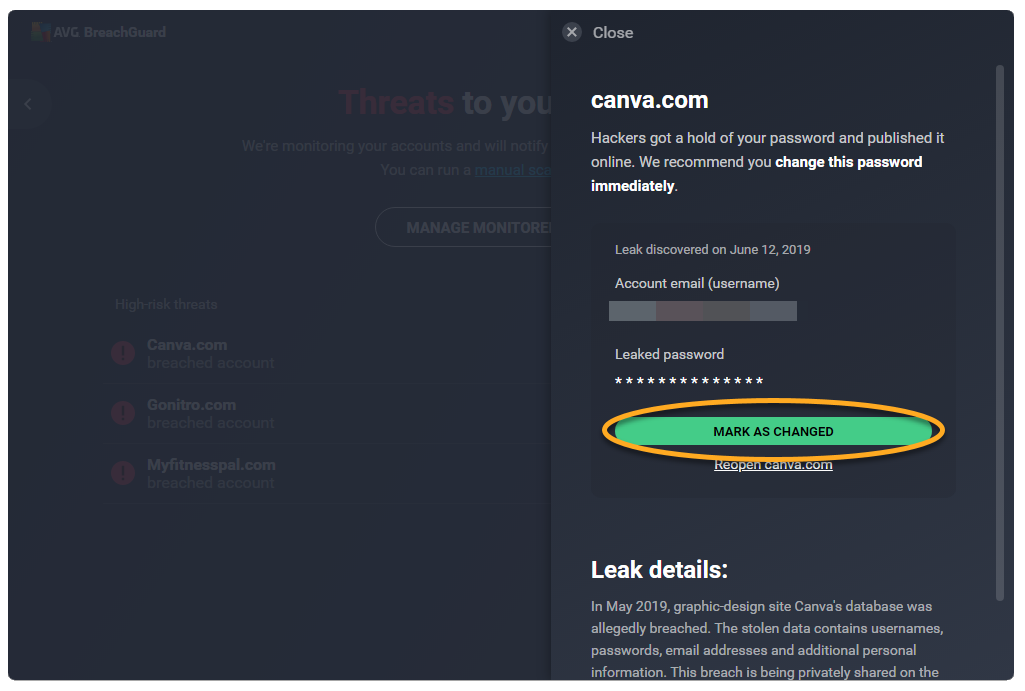
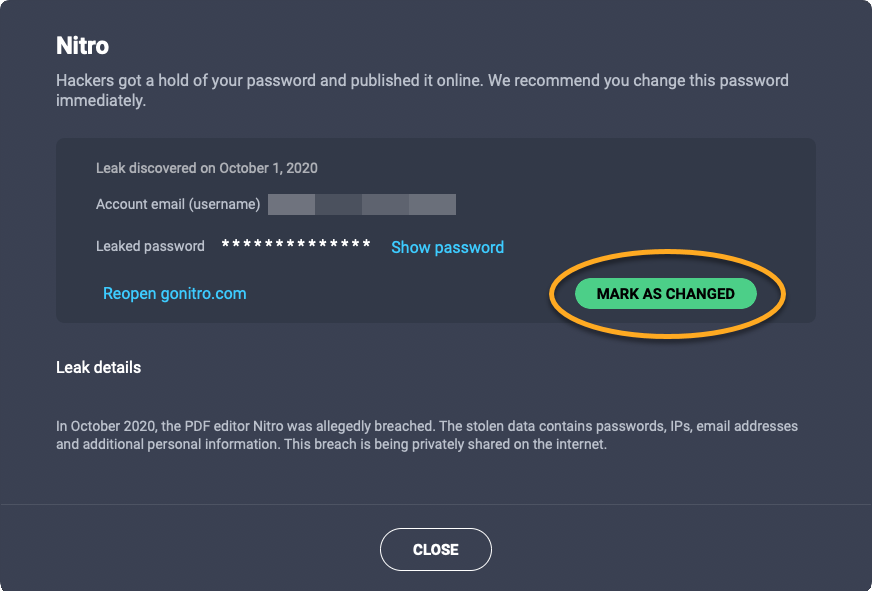
- AVG BreachGuard shows a list of your vulnerable or breached online accounts. You may see the following threat types:
- Breached account (High Risk Threat): Hackers and thieves can access this account because the login credentials were leaked online.
- Using breached password (High Risk Threat): This account is extremely vulnerable because the password was leaked online.
- Weak password: This account is vulnerable because the password does not meet our safe password criteria. For more information about how to create a safe password, refer to the following article: AVG BreachGuard - Frequently Asked Questions.
- Reused password: This account is vulnerable because the password is used to access more than one account.
- Click Show details next to a listed service to start resolving the detected threats.
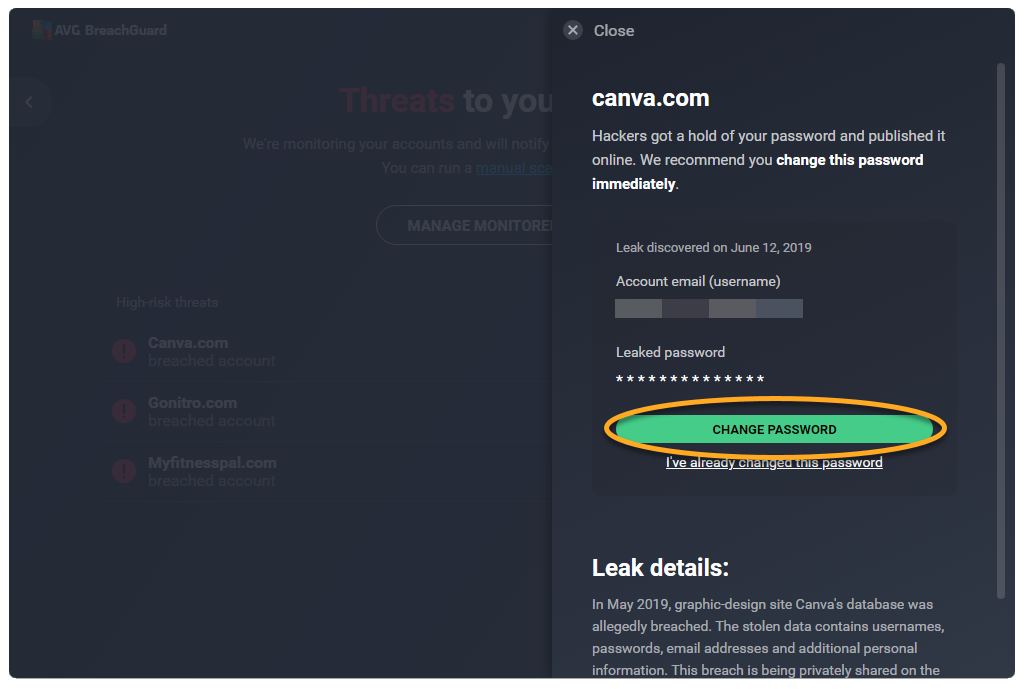
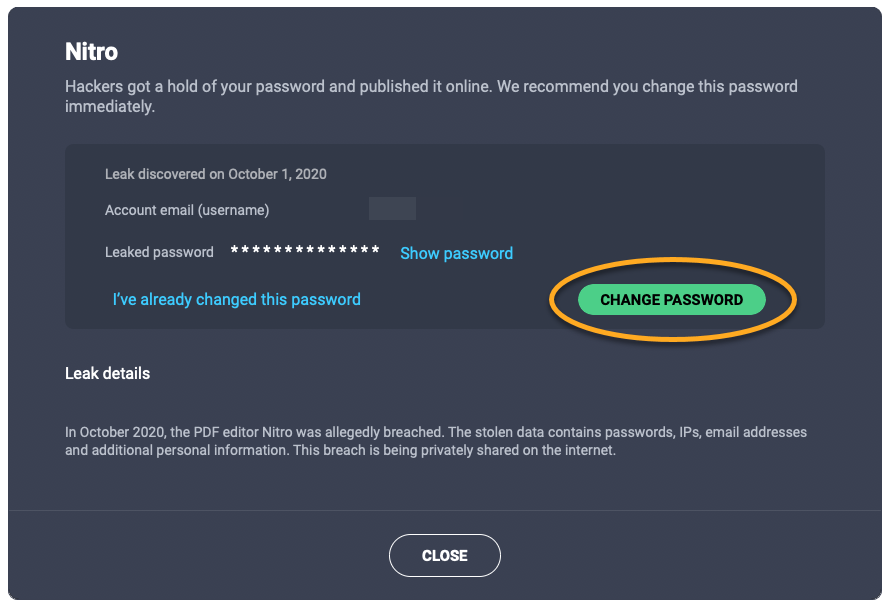
- When the side menu appears, click Change password to open the website for the relevant service in a new browser window.
- Click Change password to open the website for the relevant service in a new browser window.
- Sign in to the account using your current login credentials.
- Create a new strong password via your account settings. For more information about how to create a safe password, refer to the following article: AVG BreachGuard - Frequently Asked Questions.
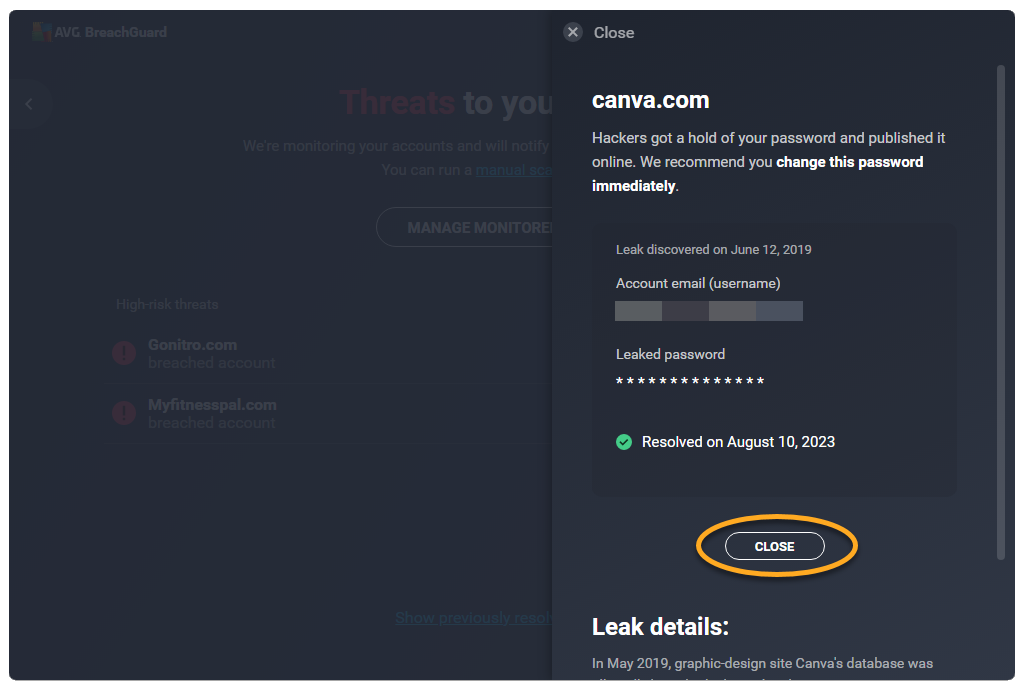
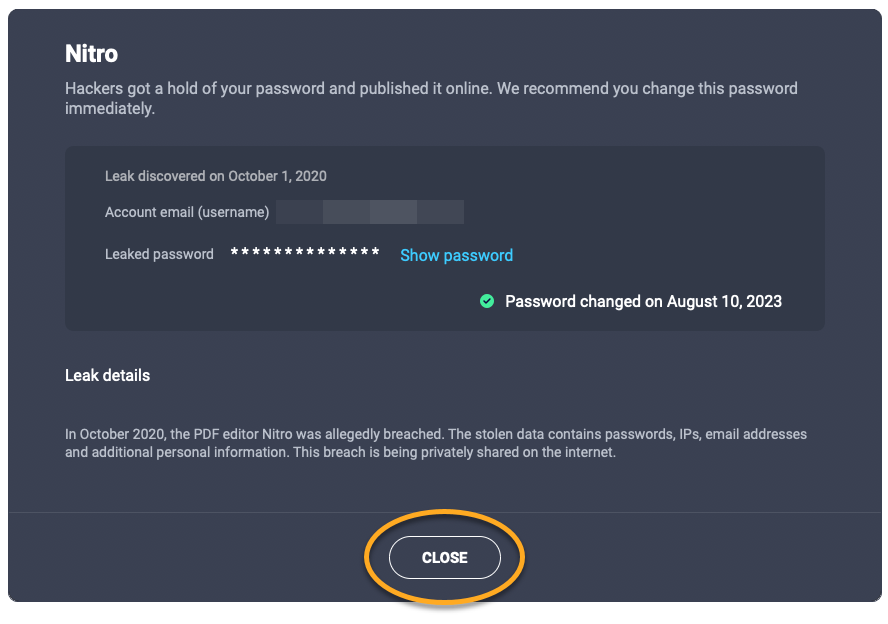
- After changing your password, return to AVG BreachGuard and click Mark as changed.
- Click Close.
- For each listed threat, click Show details, then follow steps 4-8 above.
Your online accounts are now secure. You are notified as soon as AVG detects any additional threats linked to your online accounts.
Add a new monitored email address
AVG BreachGuard continuously monitors the internet for data breaches involving your Monitored email accounts. You can add an unlimited number of monitored email accounts.
To add a new monitored email account:
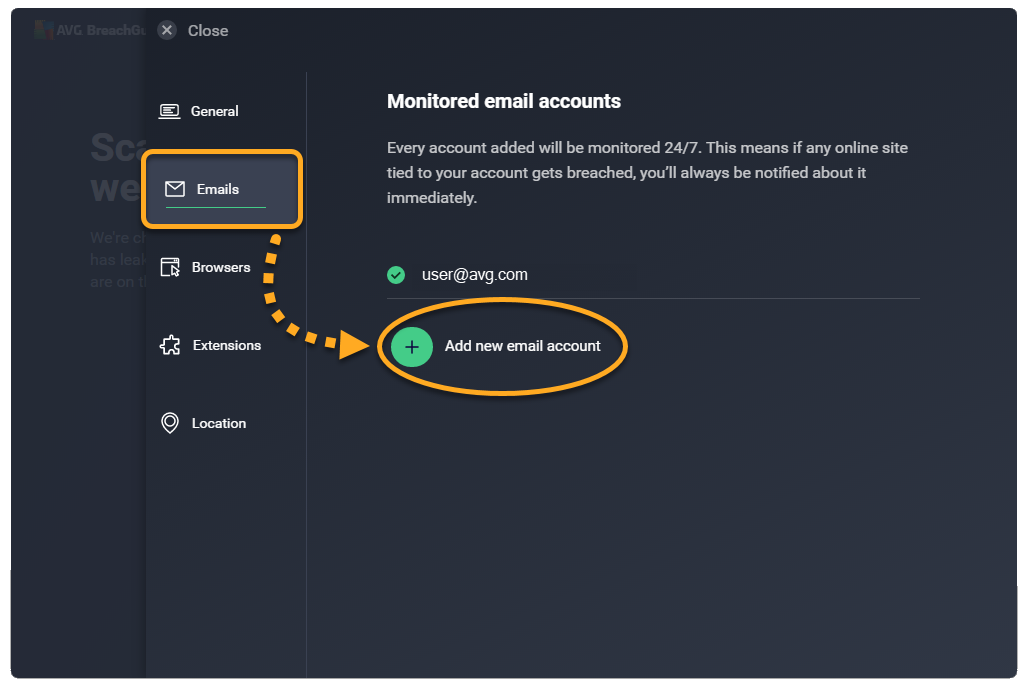
- Open AVG BreachGuard and go to
☰Menu ▸ Settings. - Select Emails in the left panel, then click Add new email account.
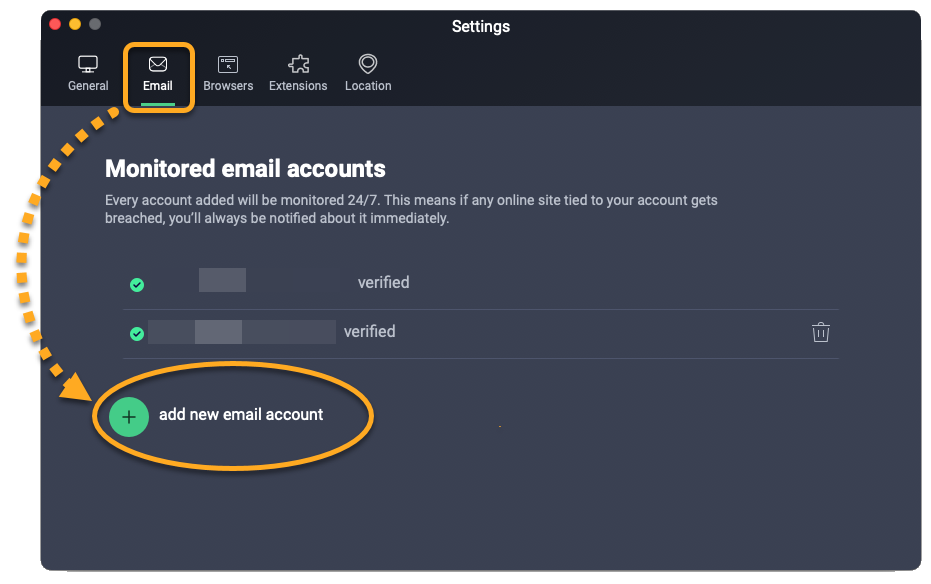
- Select the Email tab, then click add new email account.
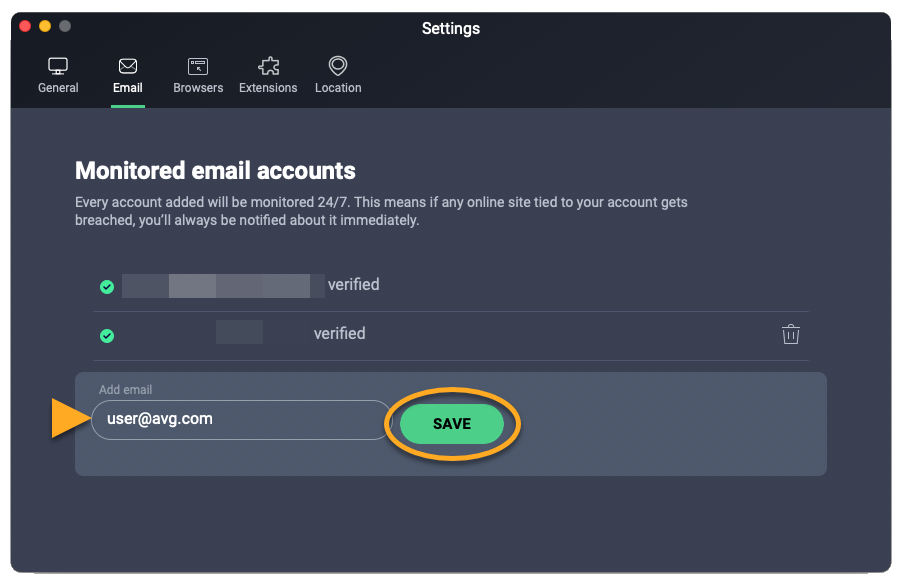
- Type your new email address into the Add email box and click Save. If the message check your inbox to verify appears next to the email address, open your email inbox and verify that the email address is really yours.
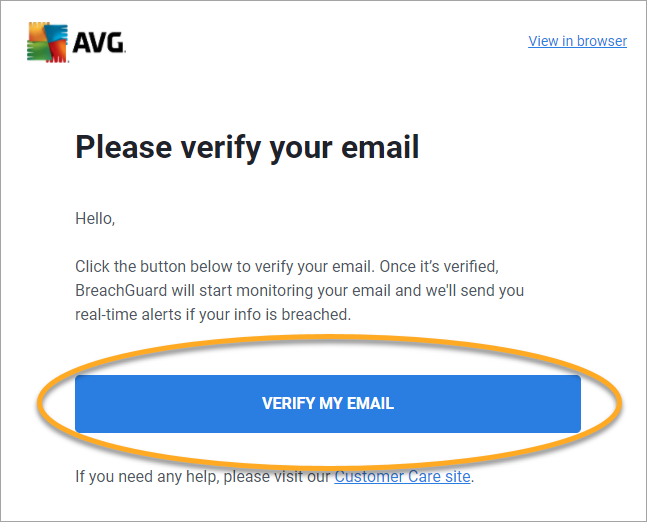
- Open your email inbox and locate the email from notification@mails.avg.com with the subject Please verify your email.
- Click the Verify my email link included in the email.


When you return to AVG BreachGuard, the new email account appears on your Monitored email accounts list with a green tick to show that it is verified.
AVG BreachGuard immediately checks for weak, duplicated, or breached passwords associated with this email address and notifies you about any found issues on the application dashboard. You can resolve these issues via the Risk Monitor tile.
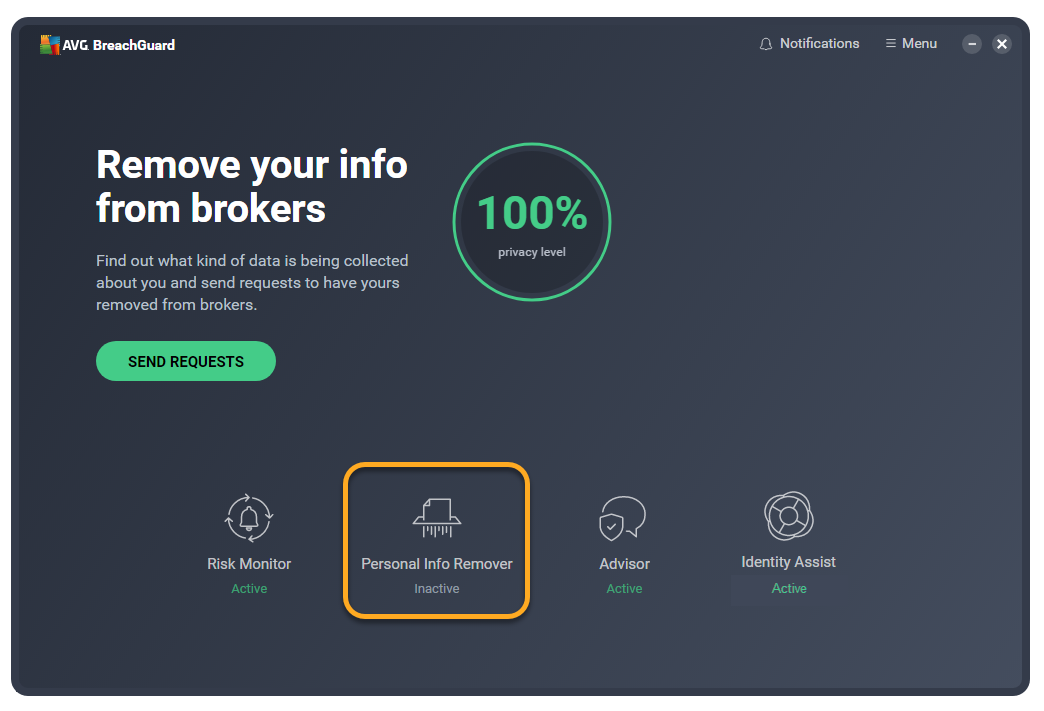
Send data removal requests
If your location is not set to the USA and you want to change it, refer to the section below.
Personal Info Remover simplifies the complex and time-consuming task of removing your personal info from data broker databases by submitting data removal requests to the data brokers on your behalf.
Follow the steps below to send your first removal requests:
- Open AVG BreachGuard and click the Personal Info Remover tile.
- In the Send removal requests form, fill out all required fields and click Send requests.
- In the Send removal requests form, fill out all required fields and click Send request.
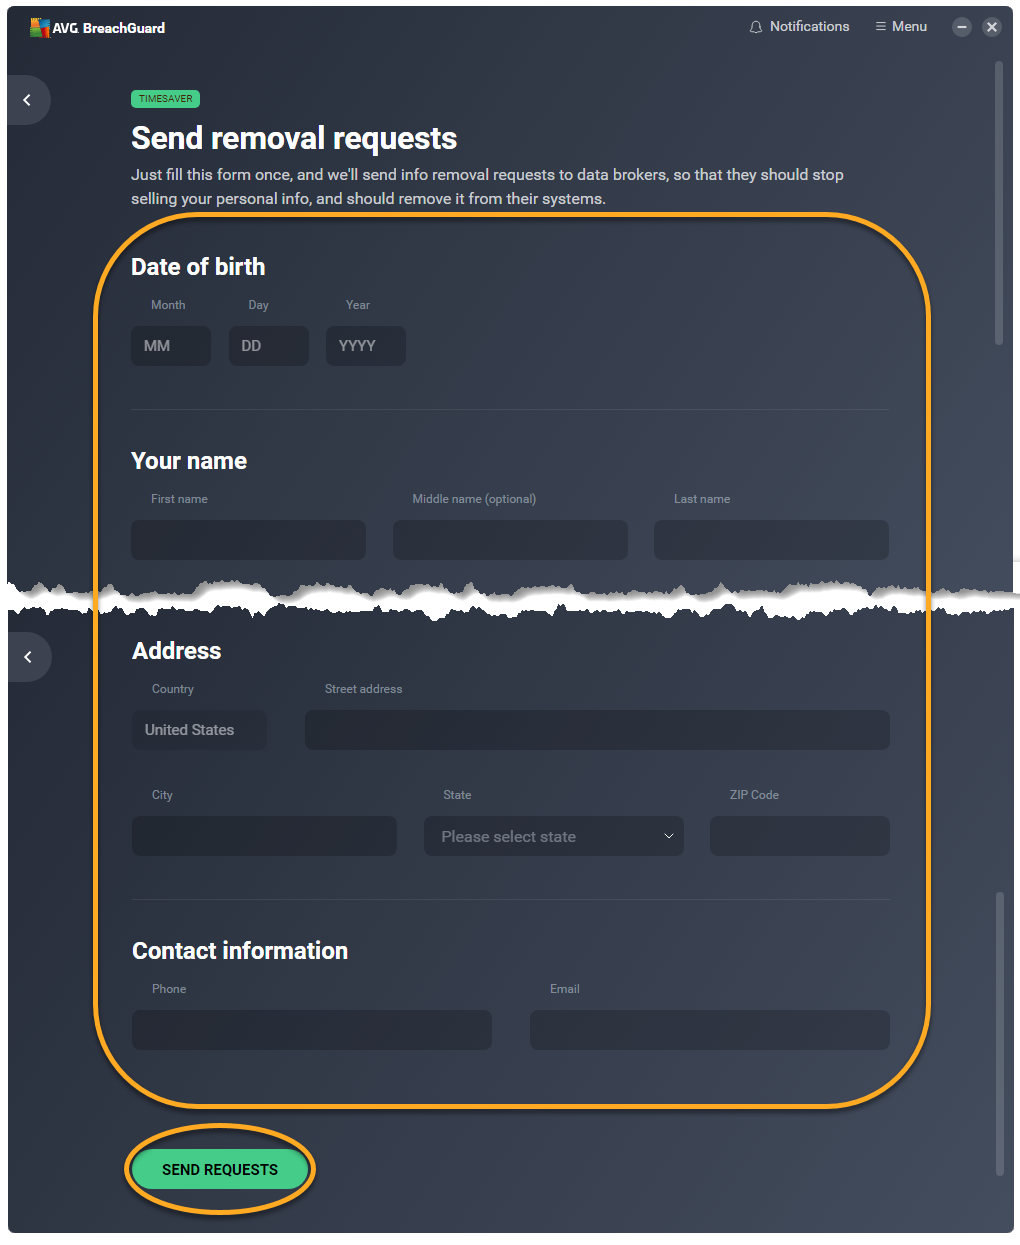
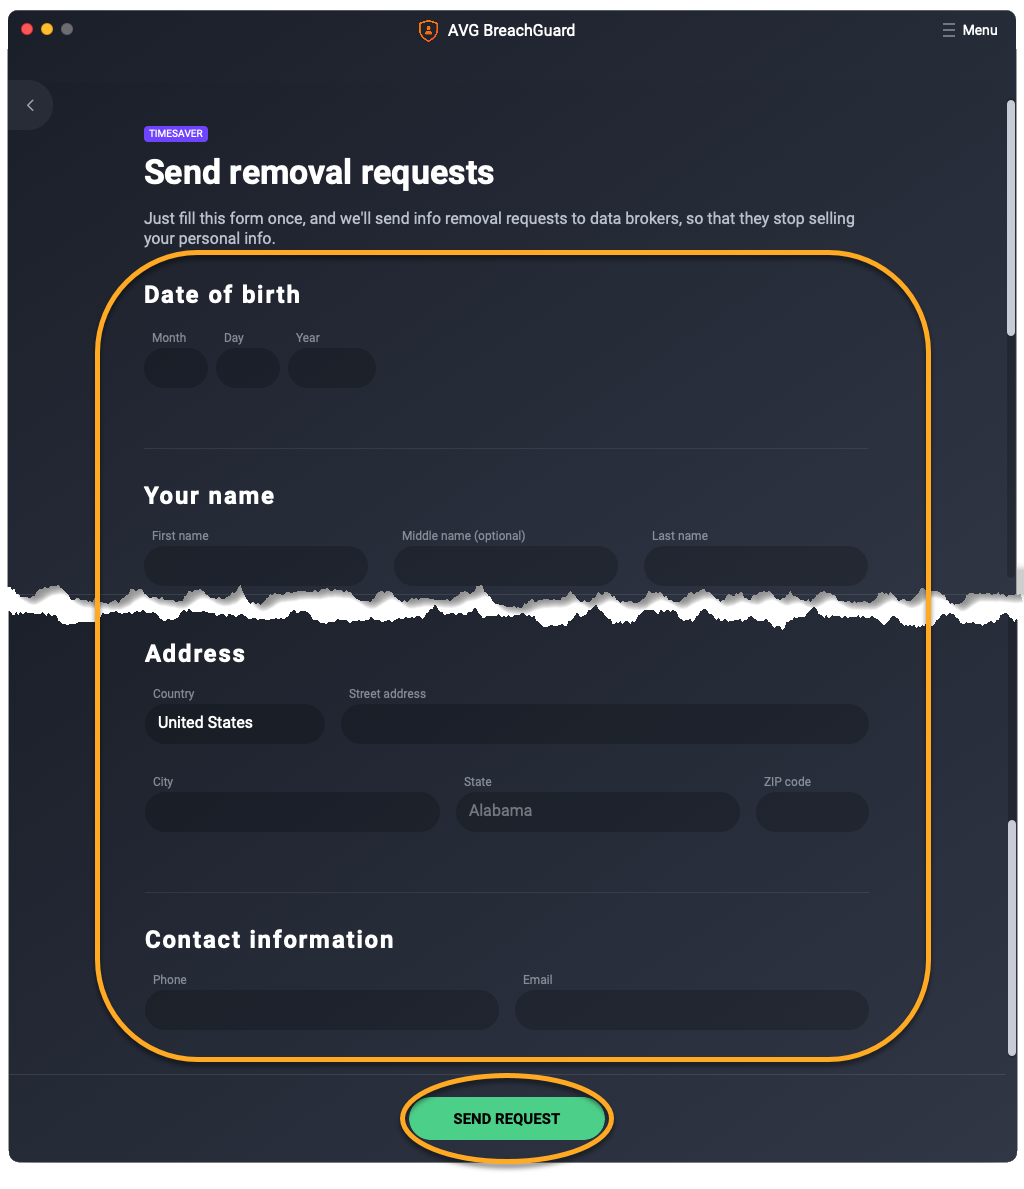
AVG immediately begins processing your removal requests. This process can take up to 48 hours.
AVG BreachGuard notifies you as soon as you need to send subsequent data removal requests. You may receive the following notifications:
- New data collectors: AVG BreachGuard has identified additional data brokers. Click the Personal Info Remover tile to submit new data removal requests.
- Re-run your requests: AVG BreachGuard recommends re-submitting data removal requests to all identified data brokers. This action is recommended every 3 months, because certain data brokers may start collecting your personal information again after removing it. Click the Personal Info Remover tile to re-submit the data removal requests.
Change your location
To set your location:
- Open AVG BreachGuard and go to
☰Menu ▸ Settings. - Select Location in the left panel.
- Select the Location tab.
- Use the drop-down menu to select your country.
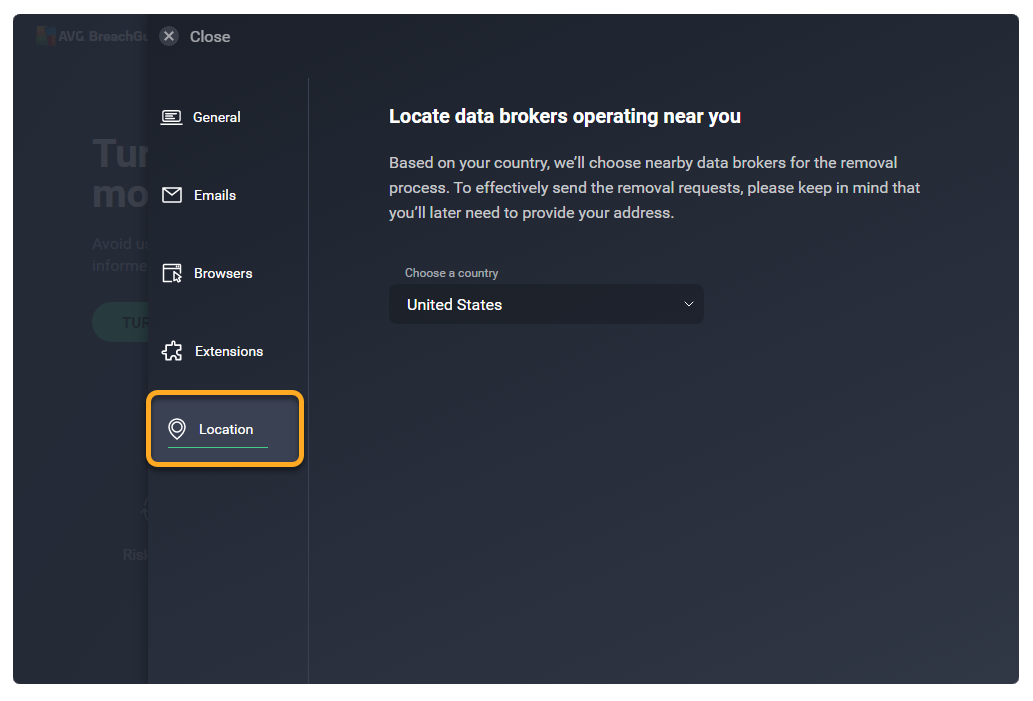
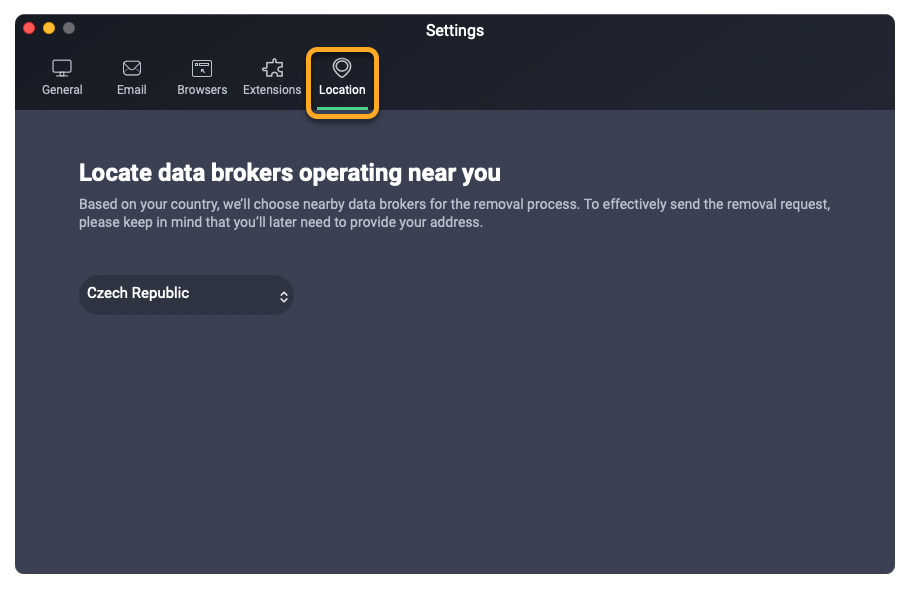
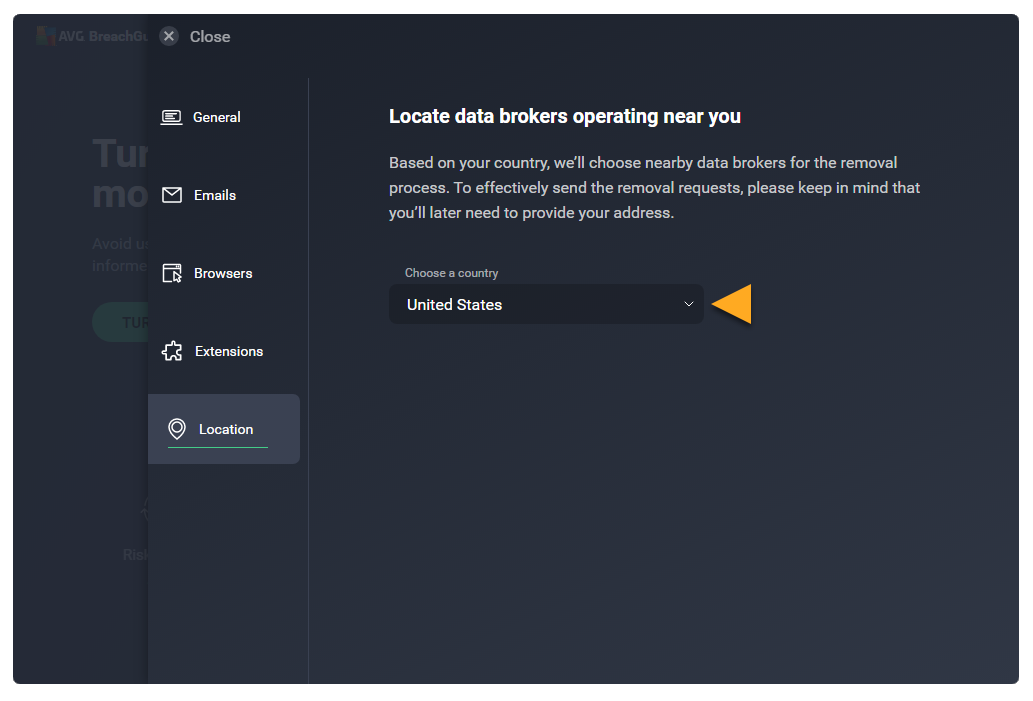
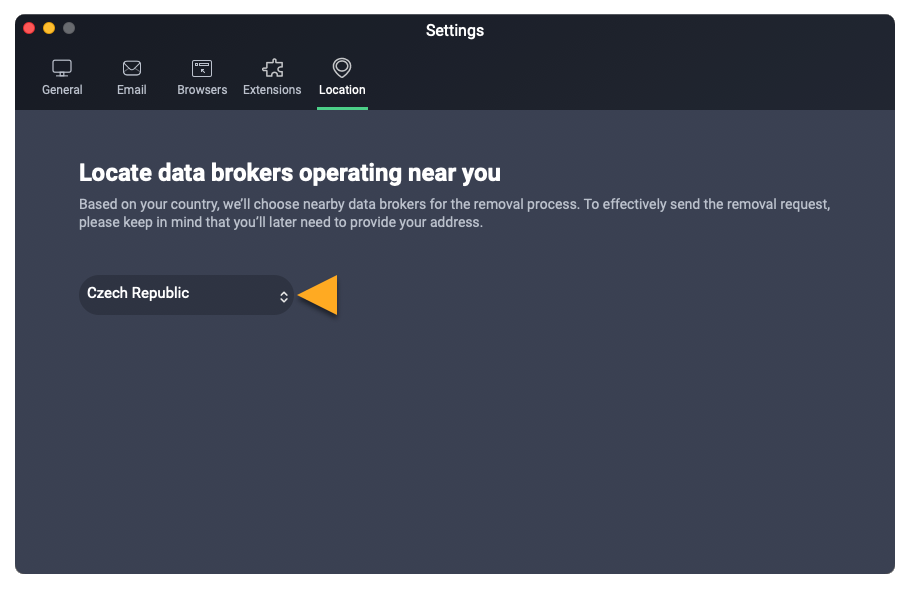
Your location is now set.
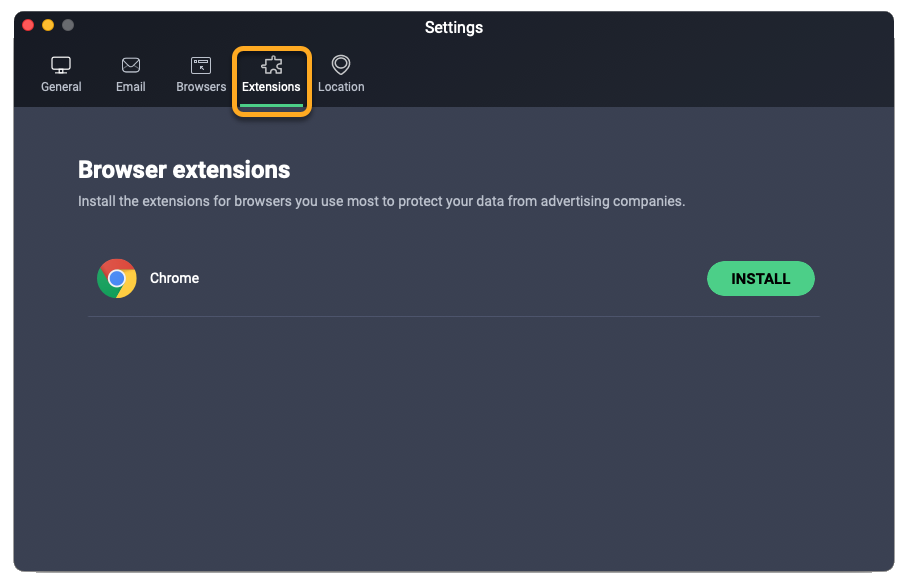
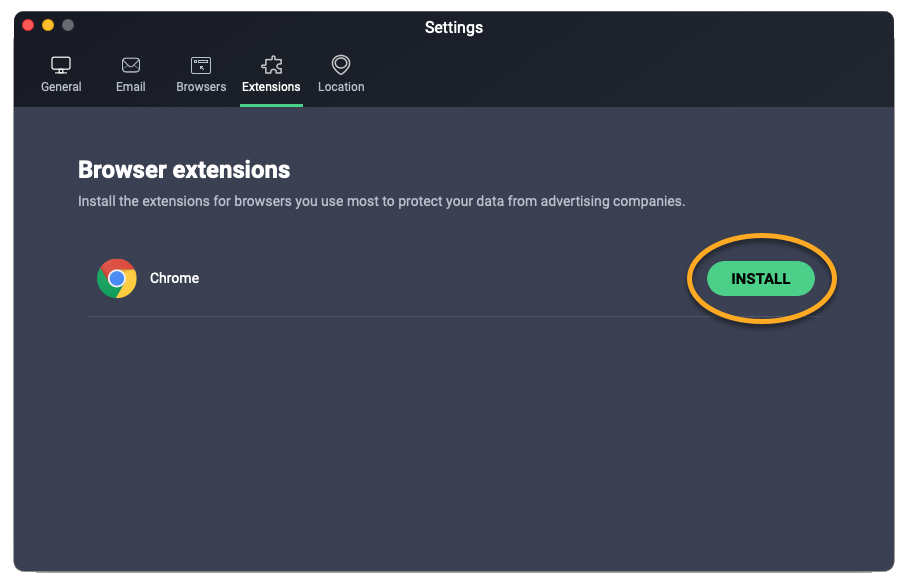
Install AVG Online Security
The AVG Online Security browser extension lets you control who has access to your private data, and warns you about malicious websites and phishing scams.
You can install AVG Online Security directly via the AVG BreachGuard application by following these steps:
- Open AVG BreachGuard and go to
☰Menu ▸ Settings. - Click Extensions in the left panel.
- Click the Extensions tab.
- Click Install next to your preferred web browser and follow the on-screen instructions to install AVG Online Security.
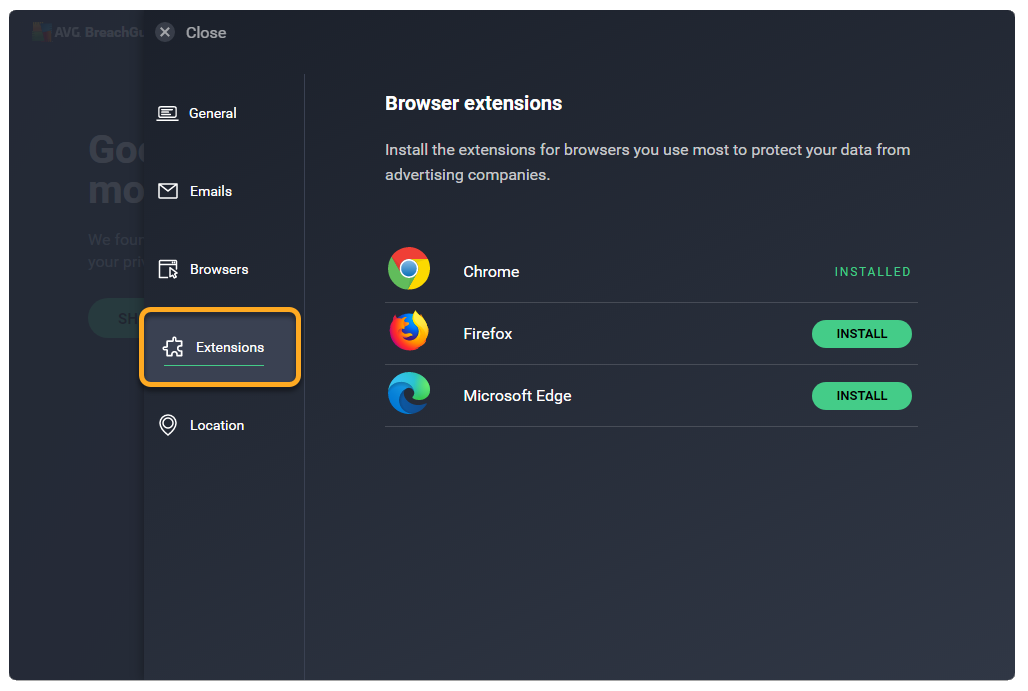
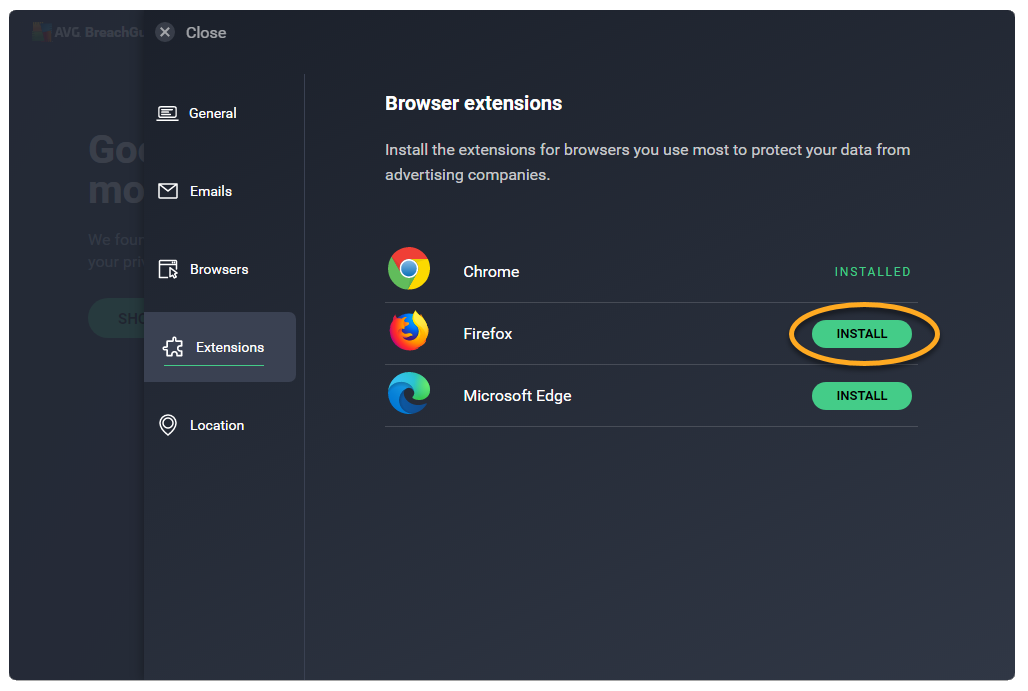
We recommend installing AVG Online Security in each of the browsers installed on your PC.
We recommend installing AVG Online Security in each of the browsers installed on your Mac.
To learn more about AVG Online Security, refer to the following article:
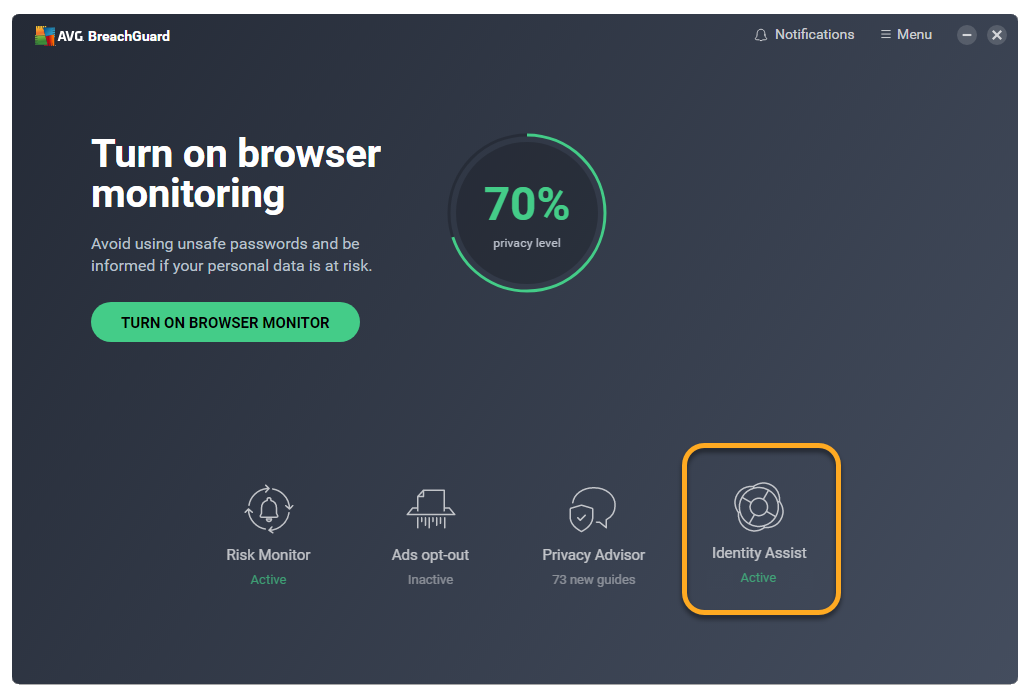
Learn about Identity Assist
The Identity Assist feature in AVG BreachGuard allows you to speak to one of our Identity Assist experts free of charge 7 days a week, 24 hours a day. Our experts offer two separate services depending on your needs:
- ScamAssist®: Our experts can investigate potentially fraudulent solicitations (including emails, letters, and phone calls) on your behalf.
- Identity Resolution: If you are a victim of identity theft, or you believe you may be vulnerable to identity theft, our experts can immediately take the appropriate action to remedy the situation.
To learn more about Identity Assist, click the Identity Assist tile on the AVG BreachGuard dashboard.

- Americas: Brazil, Canada, Mexico, and United States
- Europe: Austria, Belgium, Czech Republic, Denmark, Finland, France, Germany, Hungary, Italy, Netherlands, Norway, Poland, Spain, Sweden, Switzerland, and United Kingdom
For detailed information about Identity Assist and to learn how to use this service, refer to the following article:
Further recommendations
To learn more about about AVG BreachGuard, refer to the following article:
- AVG BreachGuard 23.x for Windows
- AVG BreachGuard 1.x for Mac
- Microsoft Windows 11 Home / Pro / Enterprise / Education
- Microsoft Windows 10 Home / Pro / Enterprise / Education - 32 / 64-bit
- Microsoft Windows 8.1 / Pro / Enterprise - 32 / 64-bit
- Microsoft Windows 8 / Pro / Enterprise - 32 / 64-bit
- Microsoft Windows 7 Home Basic / Home Premium / Professional / Enterprise / Ultimate - Service Pack 1, 32 / 64-bit
- Apple macOS 13.x (Ventura)
- Apple macOS 12.x (Monterey)
- Apple macOS 11.x (Big Sur)
- Apple macOS 10.15.x (Catalina)
- Apple macOS 10.14.x (Mojave)
- Apple macOS 10.13.x (High Sierra)