What is a browser hijacker?
A browser hijacker is malicious software that changes a browser’s behavior, settings, or appearance without user consent. A hijacked browser creates advertising revenue for the hijacker and can facilitate more dangerous activities such as data collection and keystroke logging.
The browser hijacker is not really a virus in the full sense of the word. A browser hijacker can also redirect your searches towards other pages, and it can be very annoying to have it on your computer. AVG AntiVirus is a great malware removal application, but they may not remove the hijacker because it is often installed by the user with administrator permission. This often happens during bundled software downloads and subsequent installations. Hence, unwanted software and/or add-ons hijack the browser.
Remove a browser hijacker
Follow the steps below to resolve the issue:
- Ensure your AVG Antivirus application is up to date by following the steps in this article: Updating AVG AntiVirus.
- Reset the affected web browser to its default settings by following the steps in this article: Resetting your internet browser to default settings.
- Check that there is no unwanted URL in the Target value of the web browser desktop shortcut by completing the following steps:
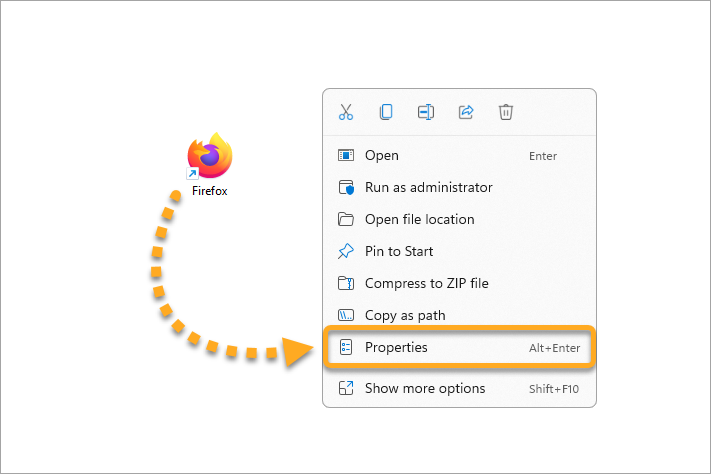
- Right-click the web browser desktop shortcut and select Properties.

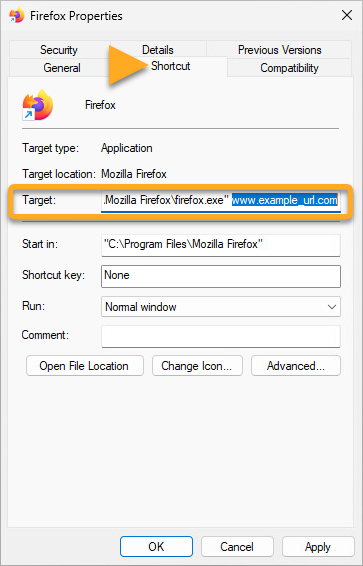
- Ensure the Shortcut tab is selected. In the Target field, delete any unwanted URL.
- Click Apply and OK to save the changes.
- Right-click the web browser desktop shortcut and select Properties.
- Delete everything in the Temp folder by completing the following steps:
- Close all running programs on your Windows PC.
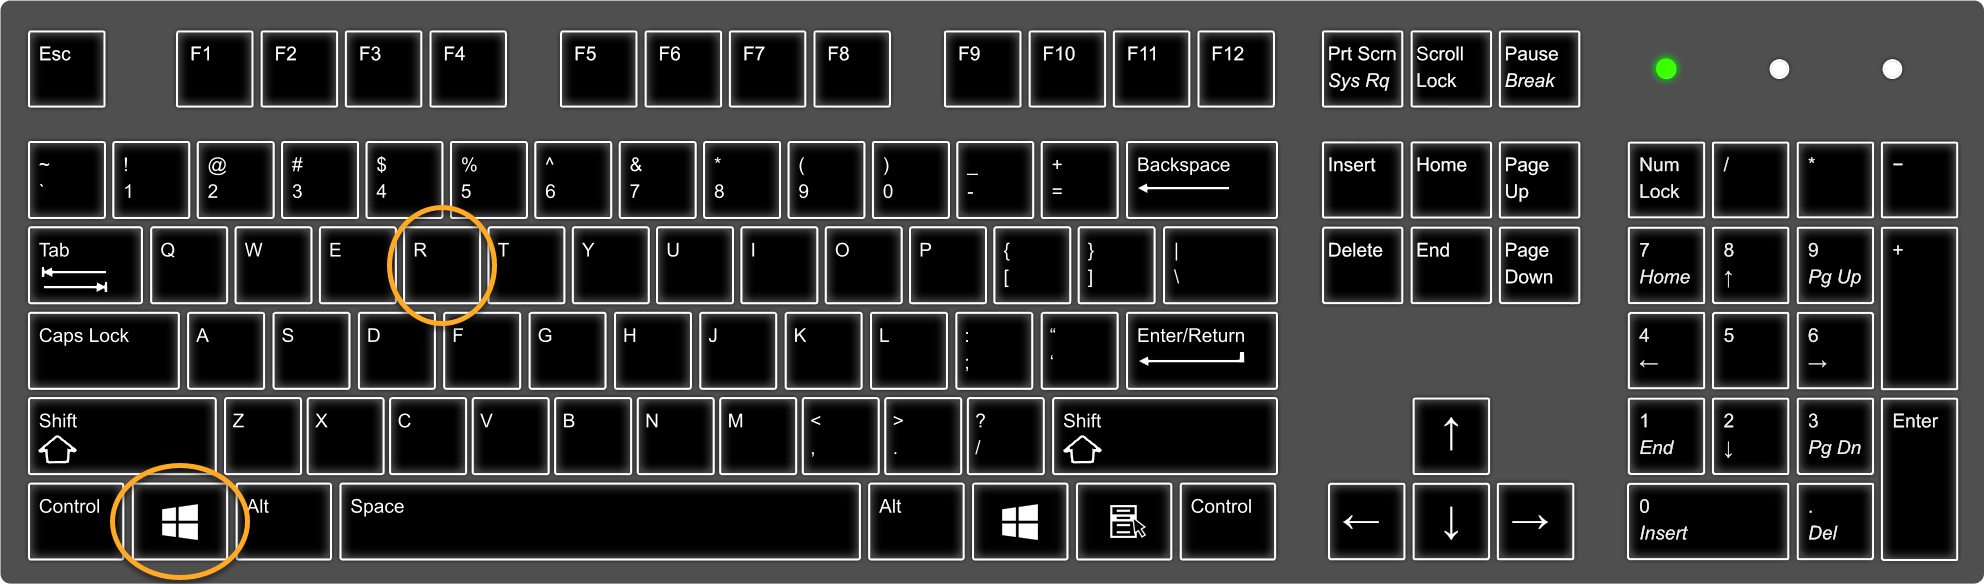
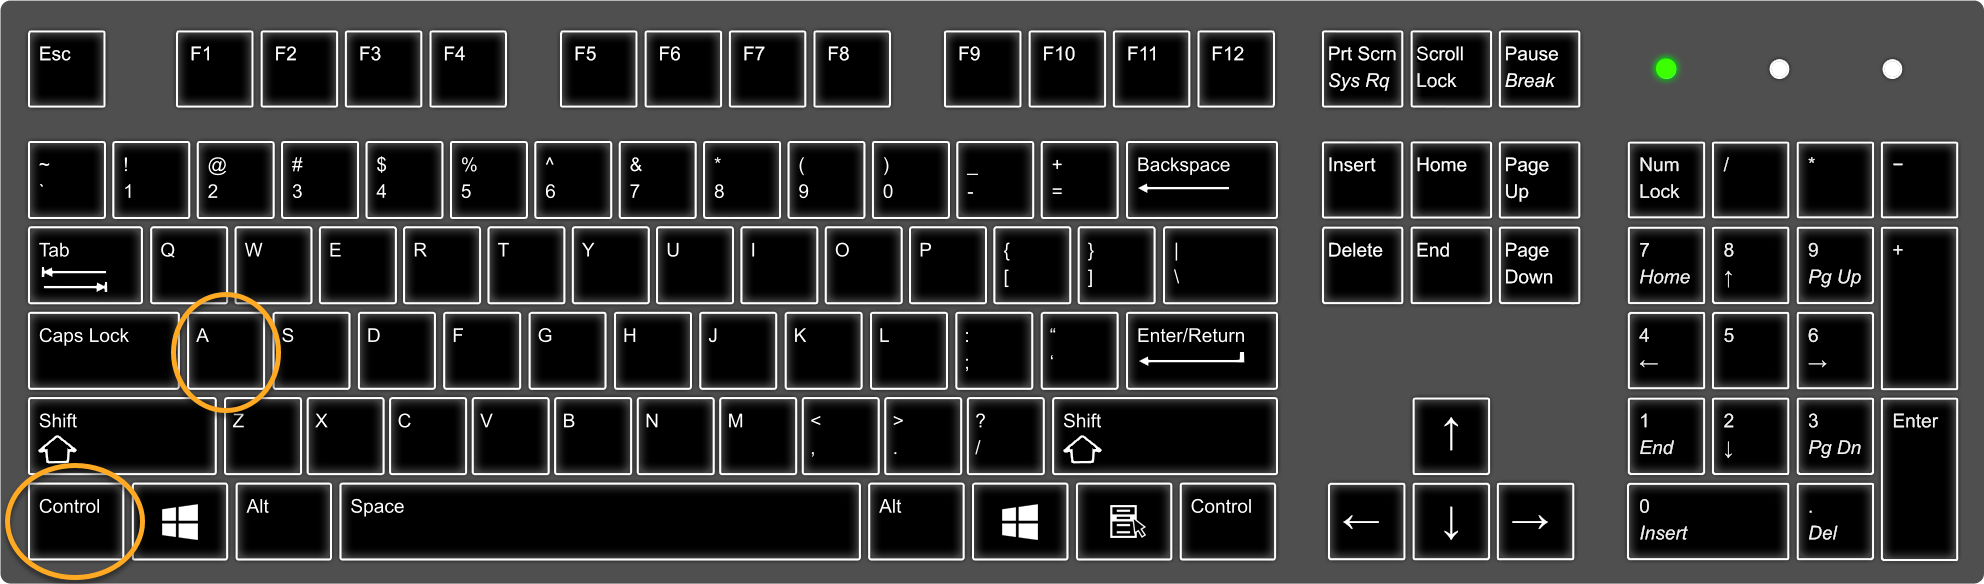
- On your keyboard, press the
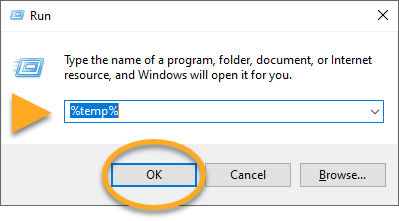
Winkey andRkey simultaneously. - Type %temp% into the Run box that appears, then click OK.
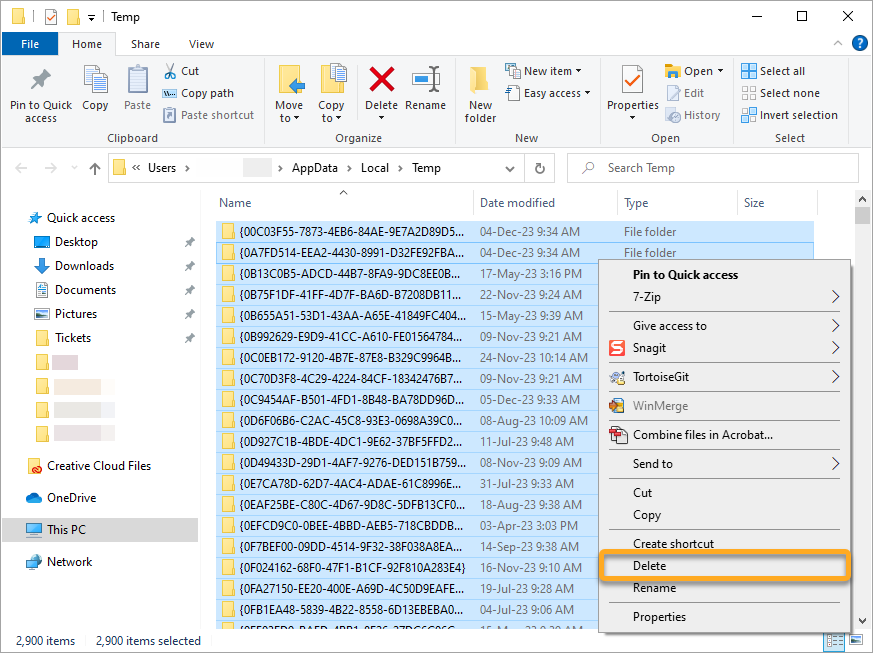
- On your keyboard, press the
Ctrlkey andAkey simultaneously. - Right-click on the selected files and click Delete to delete all files in the temporary folder.
If you receive a message that some files cannot be deleted, please select Apply to all ▸ Ignore.
- Uninstall all recently installed unknown programs by completing the following steps:
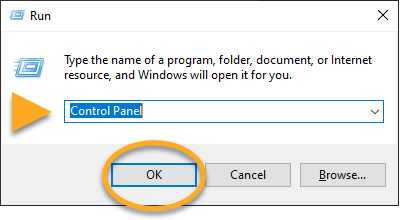
- On your keyboard, press the
Winkey andRkey simultaneously. - Type Control Panel into the Run box that appears, then click OK.
- If your default view is set as Category, select Uninstall a program in the Programs panel. ...or if your default view is set as Icons, select Programs and Features.
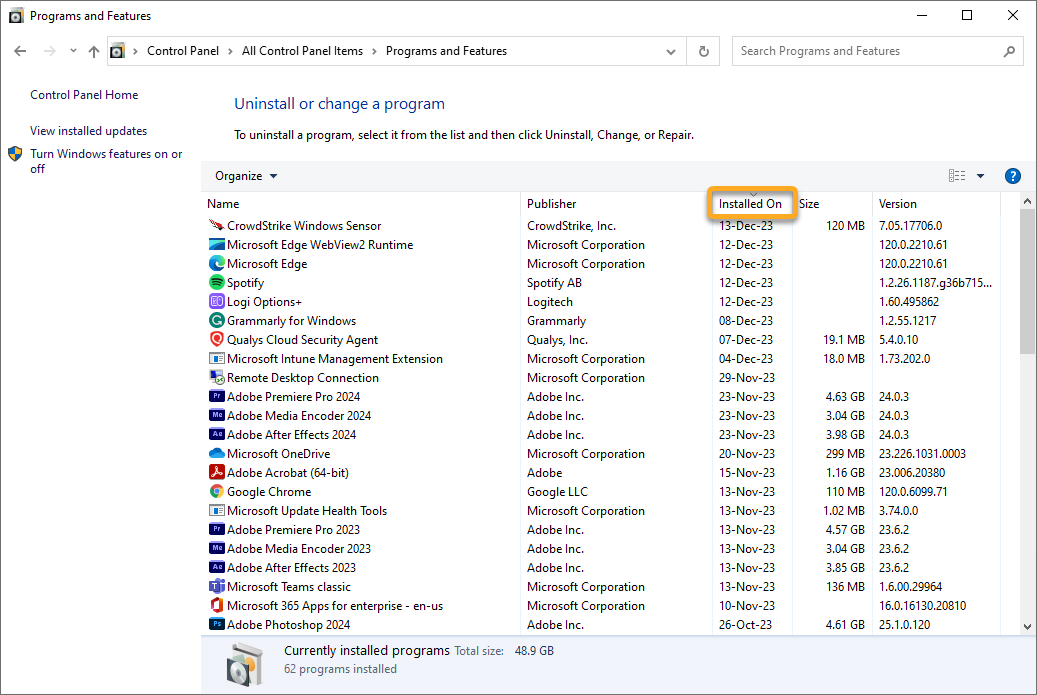
- Click Installed On to sort the programs by the most recent date of installation.
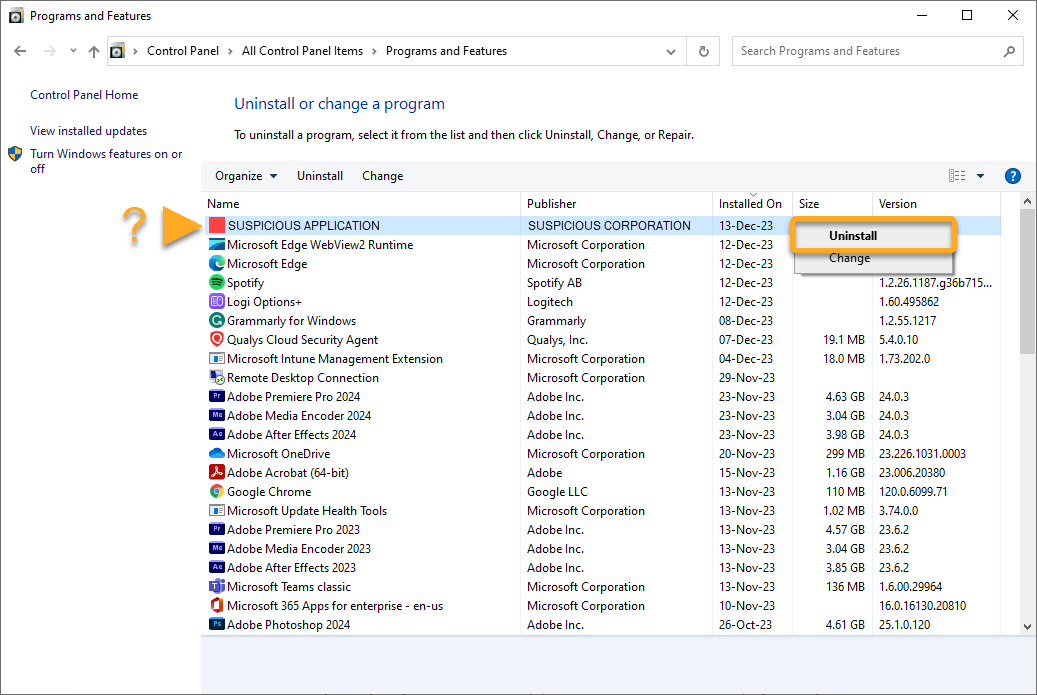
- Uninstall any recently installed unknown programs from unknown publishers by right-clicking in the relevant program panel and selecting Uninstall.
- On your keyboard, press the
- Enable the PUP scan in AVG Antivirus by completing the following steps:
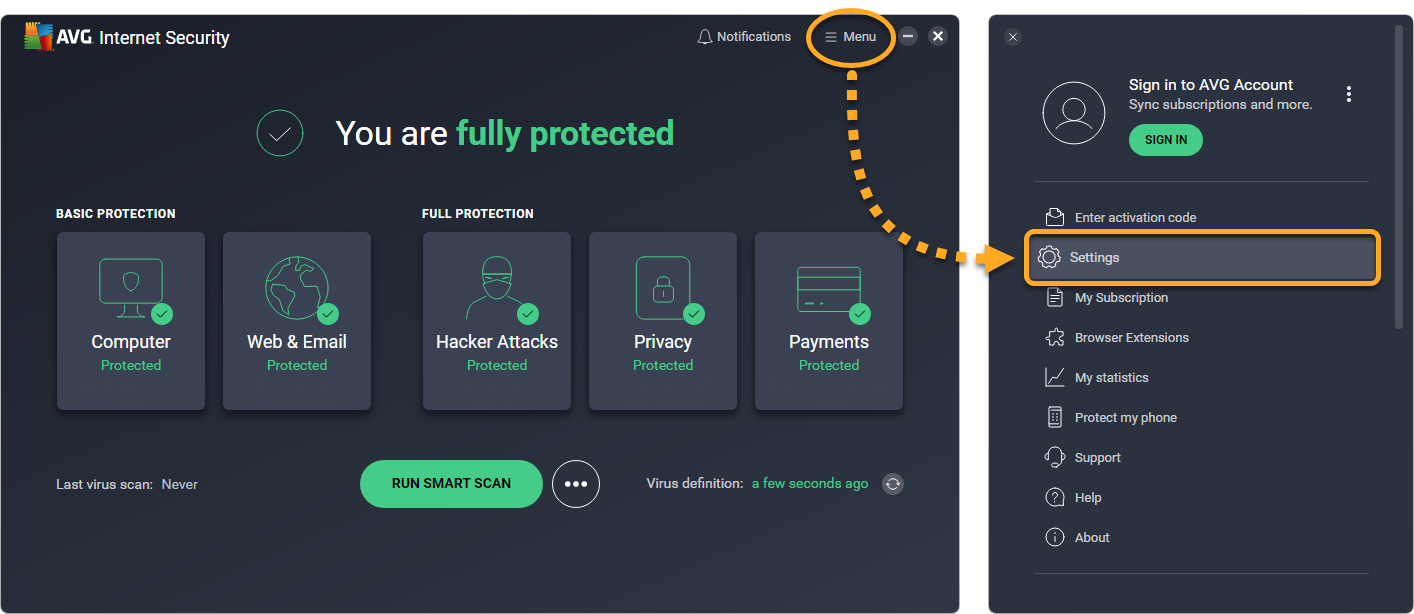
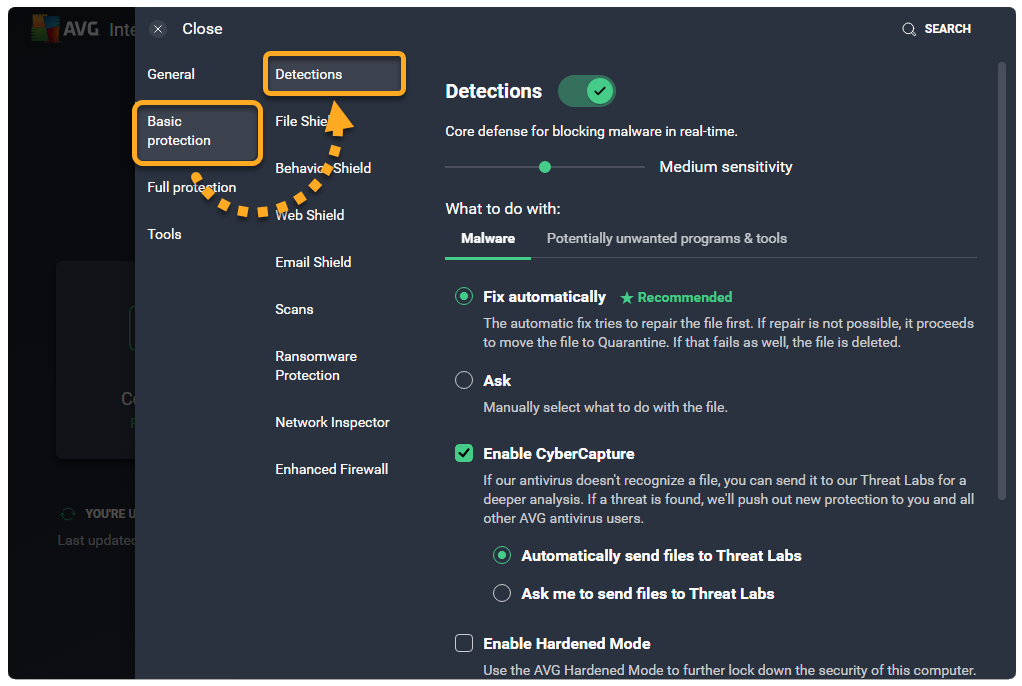
- Open AVG Antivirus and go to
☰Menu ▸ Settings. - Select Basic Protection ▸ Detections.
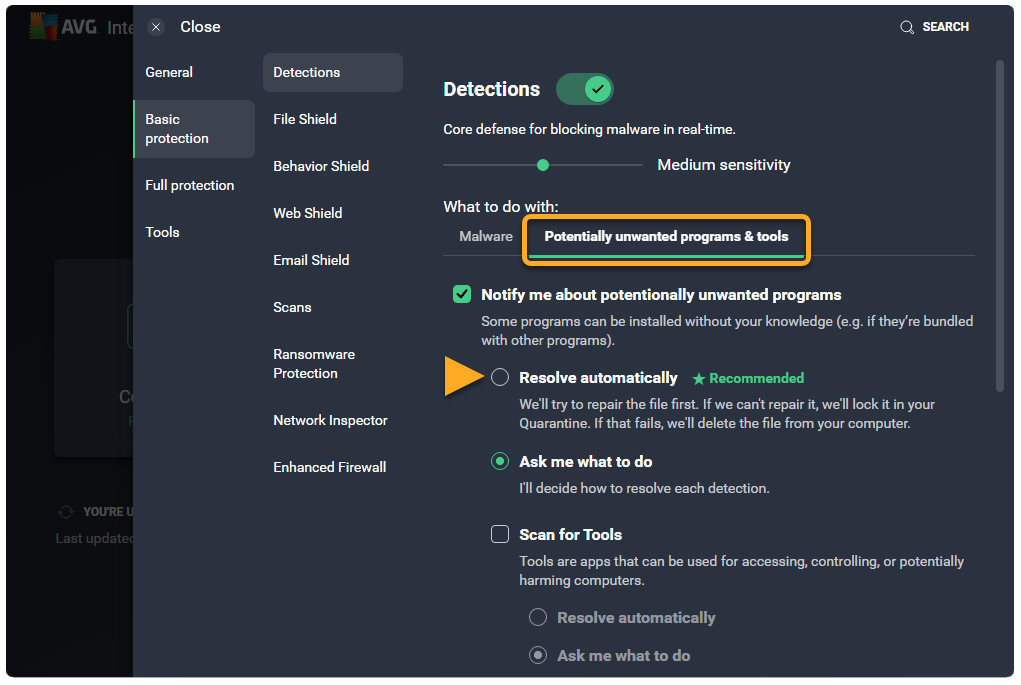
- Under Potentially unwanted programs & tools tick the circle next to Resolve automatically to enable it.
- Open AVG Antivirus and go to
- Set up a Boot Time Scan in AVG Antivirus to run on the next reboot by completing the following steps:
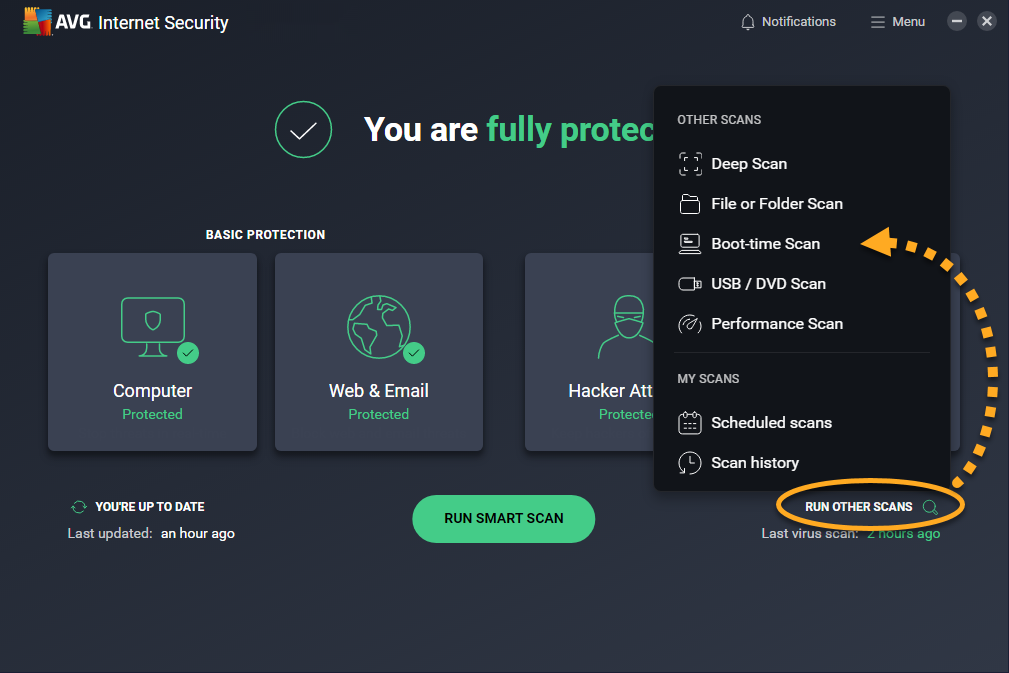
- Open AVG Antivirus and select Run other scans ▸ Boot-time Scan.
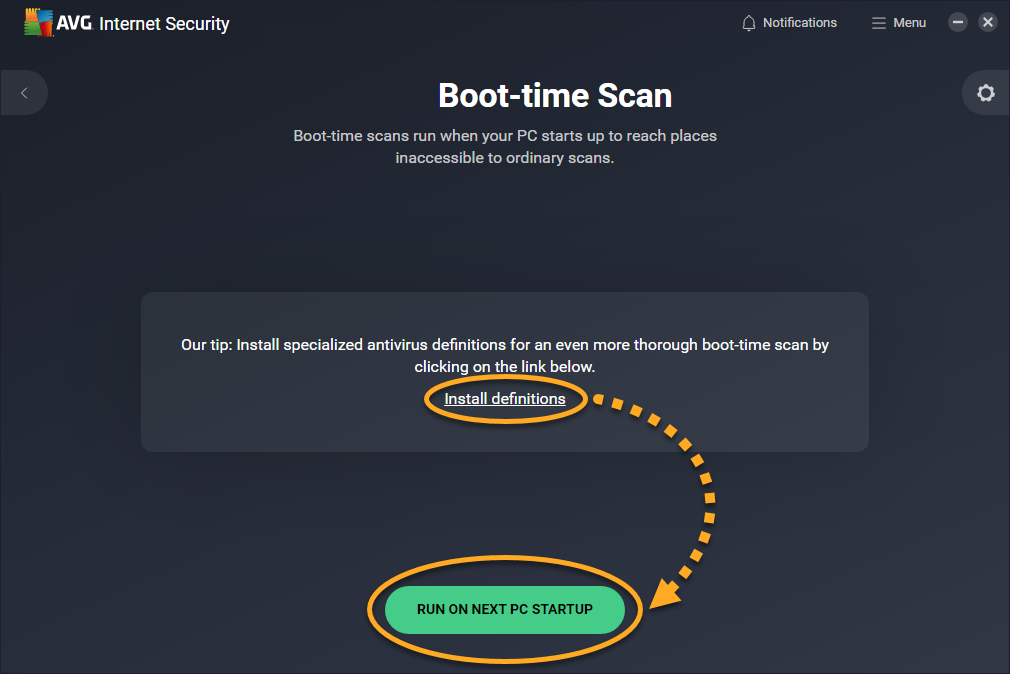
- Click Install definitions, then click Run on next PC startup.
When you click Install definitions on the Boot-Time Scan screen, AVG Antivirus downloads all virus definitions from a cloud database. If you skip installing specialized definitions, Boot-Time Scan scans your PC based only on the last virus definitions that were downloaded. If Install definitions is not displayed on the Boot-Time Scan screen, your virus definitions are up to date.
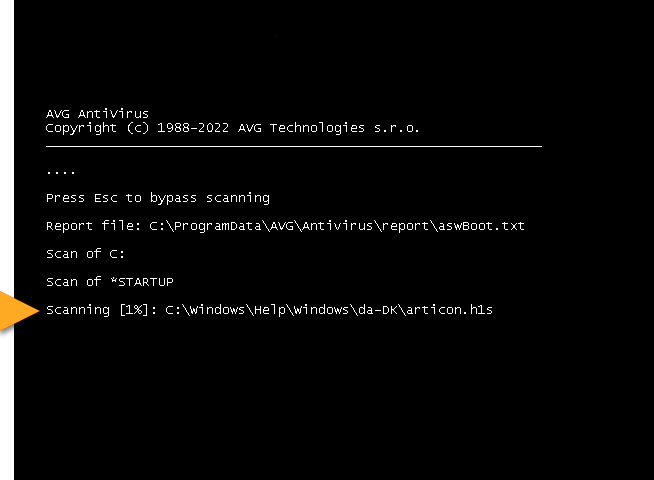
- Restart your Windows PC. When the system restarts, a Boot-Time Scan progress screen appears. The scan usually takes several minutes, but the duration varies depending on the speed of your system and the number of files being scanned. To skip the scan, press the
Esckey on your keyboard. - For any detected threat, AVG Antivirus applies the action specified in your application settings. If you disabled automatic actions and threats are detected, select your preferred action from the list of options.
- When the scan is complete, Windows continues booting up.
- Open AVG Antivirus and select Run other scans ▸ Boot-time Scan.

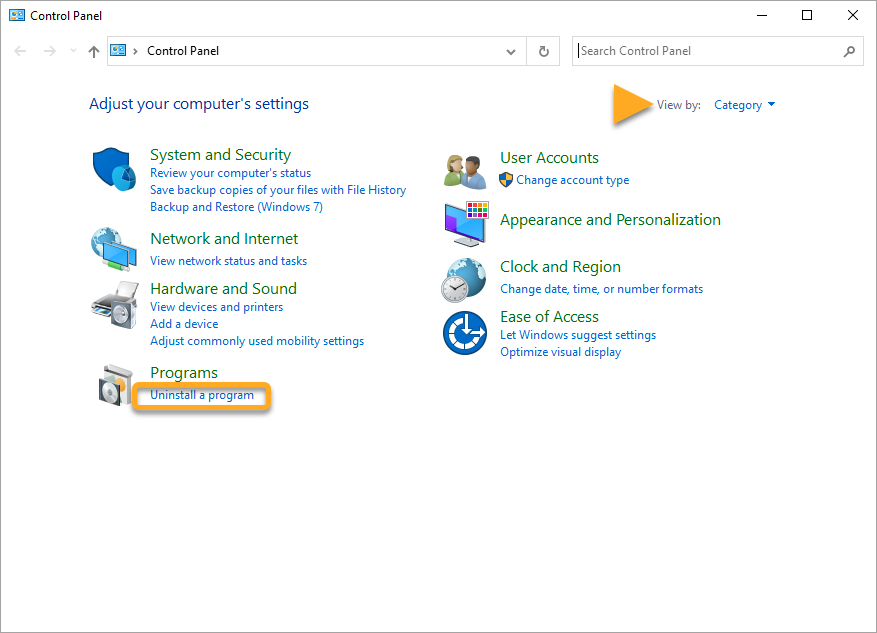 ...or if your default view is set as Icons, select Programs and Features.
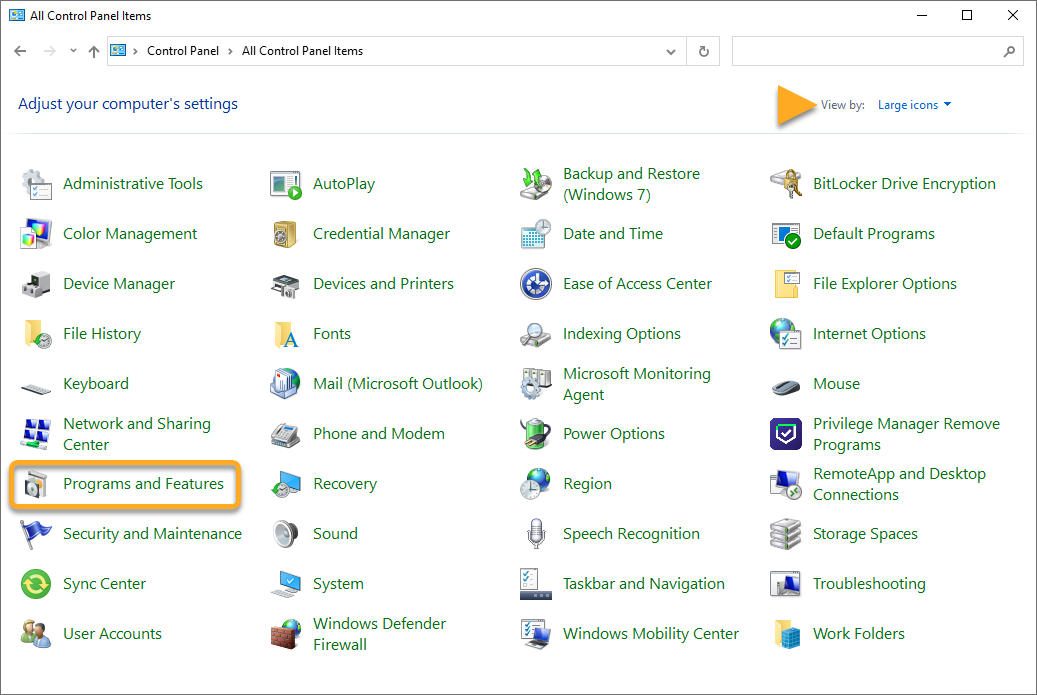
 To skip the scan, press the
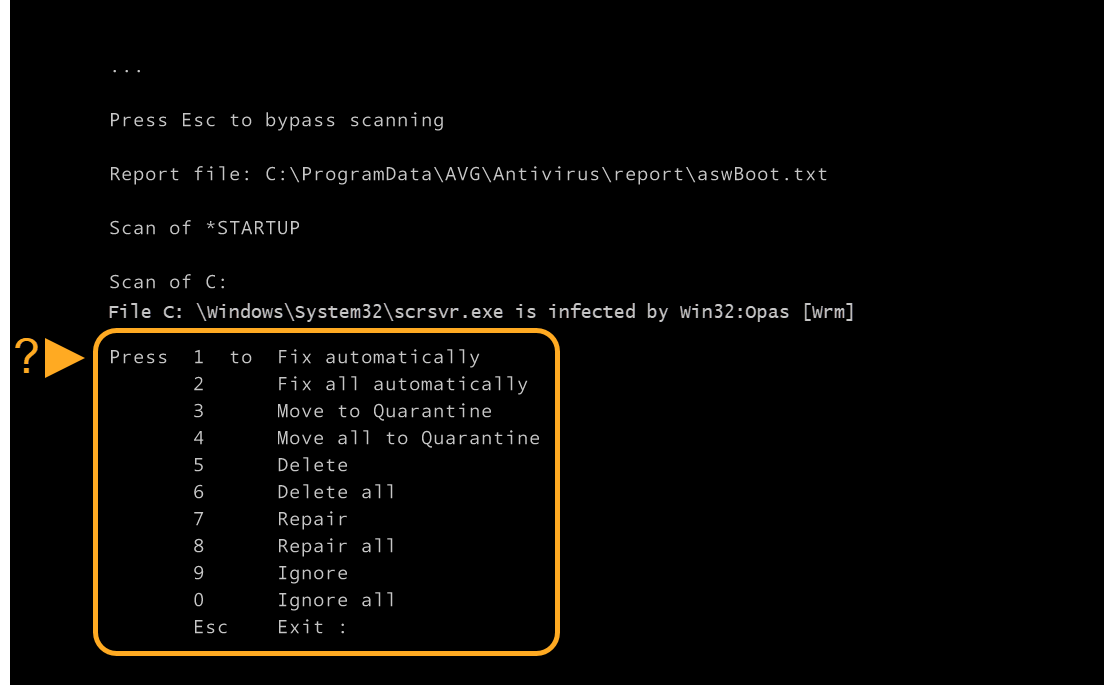
Troubleshooting
If you have completed all of the steps above but you are still experiencing issues, please contact AVG Support.
- AVG Internet Security 23.x for Windows
- AVG AntiVirus FREE 23.x for Windows
- Microsoft Windows 11 Home / Pro / Enterprise / Education
- Microsoft Windows 10 Home / Pro / Enterprise / Education - 32 / 64-bit
- Microsoft Windows 8.1 / Pro / Enterprise - 32 / 64-bit
- Microsoft Windows 8 / Pro / Enterprise - 32 / 64-bit
- Microsoft Windows 7 Home Basic / Home Premium / Professional / Enterprise / Ultimate - Service Pack 1 with Convenient Rollup Update, 32 / 64-bit