This article explains how to resolve the issue if Network Inspector in AVG AntiVirus shows the following alert:
- Remote Desktop vulnerability found
Description
Remote Desktop Protocol (RDP), commonly called Remote Desktop, allows you to connect to your PC from any location. If you see the alert above after running a Network Inspector scan in AVG AntiVirus, we have found that your PC's Remote Desktop settings are not secure. This is due to an exposed port forwarding rule on your router and disabled Network Level Authentication on your PC.
An attacker could connect to your PC and use known vulnerabilities in Microsoft's Remote Desktop Protocol to execute malicious code, or plant malware. An attacker may also attempt to access protected areas of your PC by repeatedly guessing the password (known as a brute-force attack).
Additionally, if port forwarding is enabled on your router, your PC may be exposed to the Internet, increasing the risk of remote access attempts.
Solution
Disable the port forwarding rule
To mitigate the risk, it is advisable to access your router's settings and delete or turn off the port forwarding rule that directs internet traffic to your PC. Select your router brand for detailed instructions:
ASUS
- Enter your router’s IP address (usually 192.168.1.1 or 192.168.0.1) in your browser.
- Enter your router username and password. If you do not know your login credentials, contact the party who provided the router. This is normally your Internet Service Provider (ISP).
- Go to Advanced Settings ▸ WAN ▸ Virtual Server / Port Forwarding tab.
- Find the forwarding rule for port 3389 and untick or delete it.
- Save your changes.
Belkin
- Enter your router’s IP address (usually 192.168.1.1 or 192.168.0.1) in your browser.
- Enter your router username and password. If you do not know your login credentials, contact the party who provided the router. This is normally your Internet Service Provider (ISP).
- Go to Configuration ▸ Security.
- Go to Single Port Forwarding or Port Range Forwarding.
- Find the forwarding rule for port 3389 and untick or delete it.
- Save your changes.
Cisco
- Enter your router’s IP address (usually 192.168.1.1 or 192.168.0.1) in your browser.
- Enter your router username and password. If you do not know your login credentials, contact the party who provided the router. This is normally your Internet Service Provider (ISP).
- Go to Firewall ▸ Port Forwarding.
- Find the forwarding rule for port 3389 and untick or delete it.
- Save your changes.
D-Link
- Enter your router’s IP address (usually 192.168.1.1 or 192.168.0.1) in your browser.
- Enter your router username and password. If you do not know your login credentials, contact the party who provided the router. This is normally your Internet Service Provider (ISP).
- Go to the Advanced tab and select Port Forwarding or Virtual Server.
- Find the forwarding rule for port 3389 and untick or delete it.
- Save your changes.
Huawei
- Enter your router’s IP address (usually 192.168.1.1 or 192.168.0.1) in your browser.
- Enter your router username and password. If you do not know your login credentials, contact the party who provided the router. This is normally your Internet Service Provider (ISP).
- Go to the Advanced Settings tab and select NAT or Port Forwarding.
- Find the forwarding rule for port 3389 and untick or delete it.
- Save your changes.
Linksys
- Enter your router’s IP address (usually 192.168.1.1 or 192.168.0.1) in your browser.
- Enter your router username and password. If you do not know your login credentials, contact the party who provided the router. This is normally your Internet Service Provider (ISP).
- Go to the Applications & Gaming ▸ Port Range Forwarding.
- Find the forwarding rule for port 3389 and untick or delete it.
- Save your changes.
NETGEAR
- Enter your router’s IP address (usually 192.168.1.1 or 192.168.0.1) in your browser.
- Enter your router username and password. If you do not know your login credentials, contact the party who provided the router. This is normally your Internet Service Provider (ISP).
- Go to the Advanced ▸ Advanced Setup ▸ Port Forwarding/Port Triggering.
- Find the forwarding rule for port 3389 and untick or delete it.
- Save your changes.
TP-Link
- Enter your router’s IP address (usually 192.168.1.1 or 192.168.0.1) in your browser.
- Enter your router username and password. If you do not know your login credentials, contact the party who provided the router. This is normally your Internet Service Provider (ISP).
- Go to the Forwarding ▸ Virtual Servers or NAT Forwarding.
- Find the forwarding rule for port 3389 and untick or delete it.
- Save your changes.
TRENDnet
- Enter your router’s IP address (usually 192.168.1.1 or 192.168.0.1) in your browser.
- Enter your router username and password. If you do not know your login credentials, contact the party who provided the router. This is normally your Internet Service Provider (ISP).
- Go to the Advanced Setup ▸ Port Forwarding.
- Find the forwarding rule for port 3389 and untick or delete it.
- Save your changes.
Enable Network Level Authentication
While this action addresses the immediate threat, it does not completely resolve the issue. The Network Inspector will continue to issue warnings unless you also enable Network Level Authentication, as explained below. You can resolve this issue by enabling Network Level Authentication on your PC. This ensures that any connection attempts must be authenticated before they can establish a session with the server.
Follow the steps below to enable Network Level Authentication on your PC:
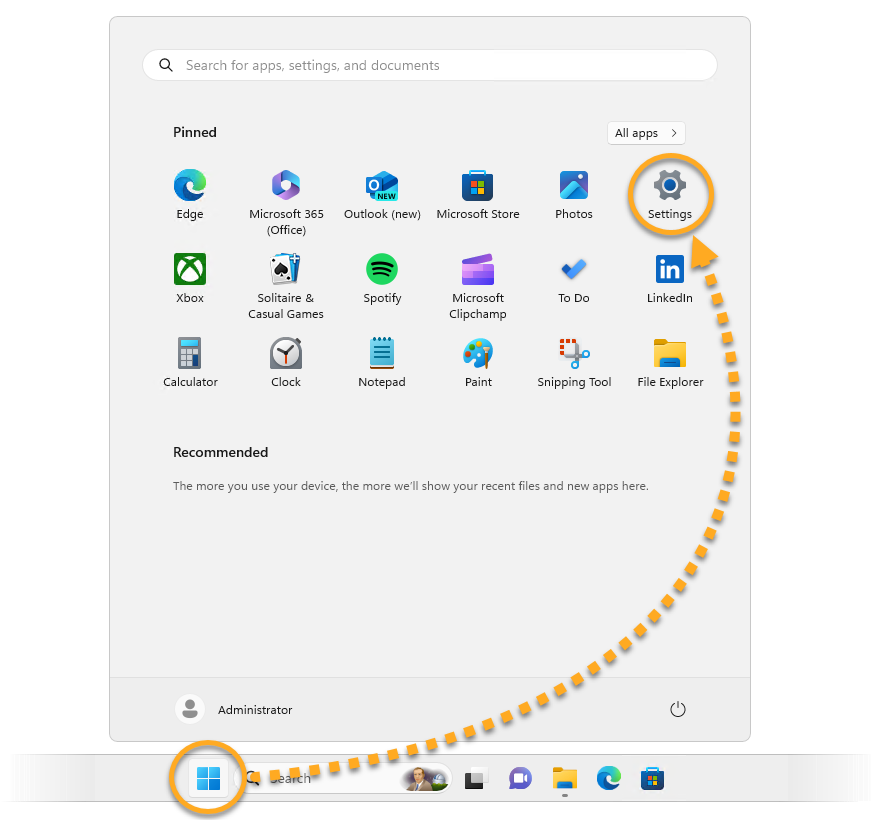
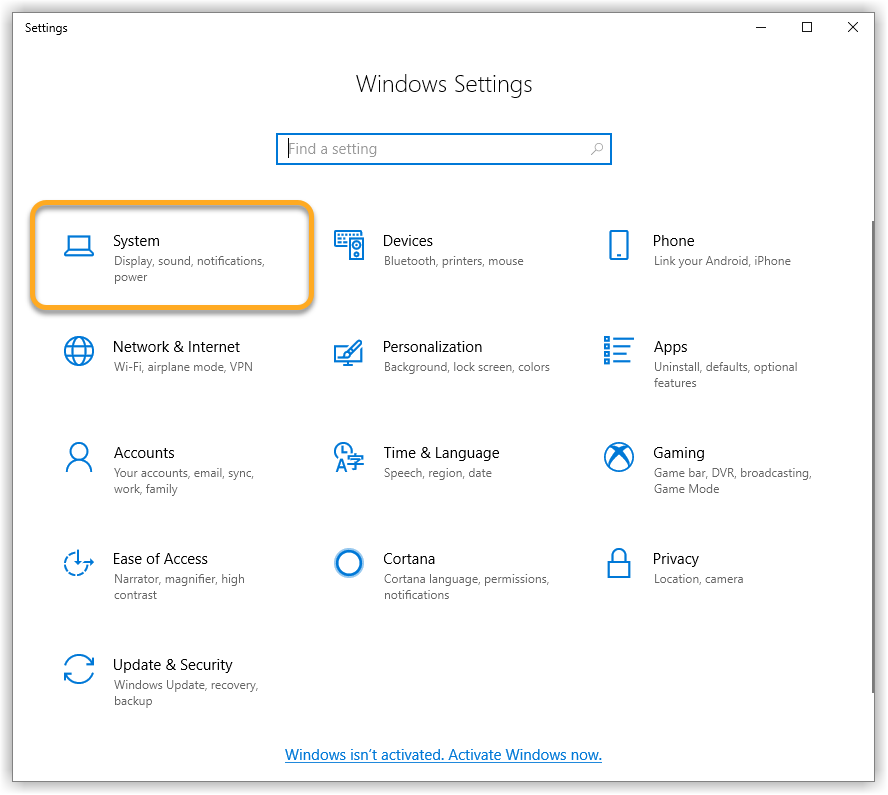
- Click the Windows
 Start button and select Settings (the gear icon).
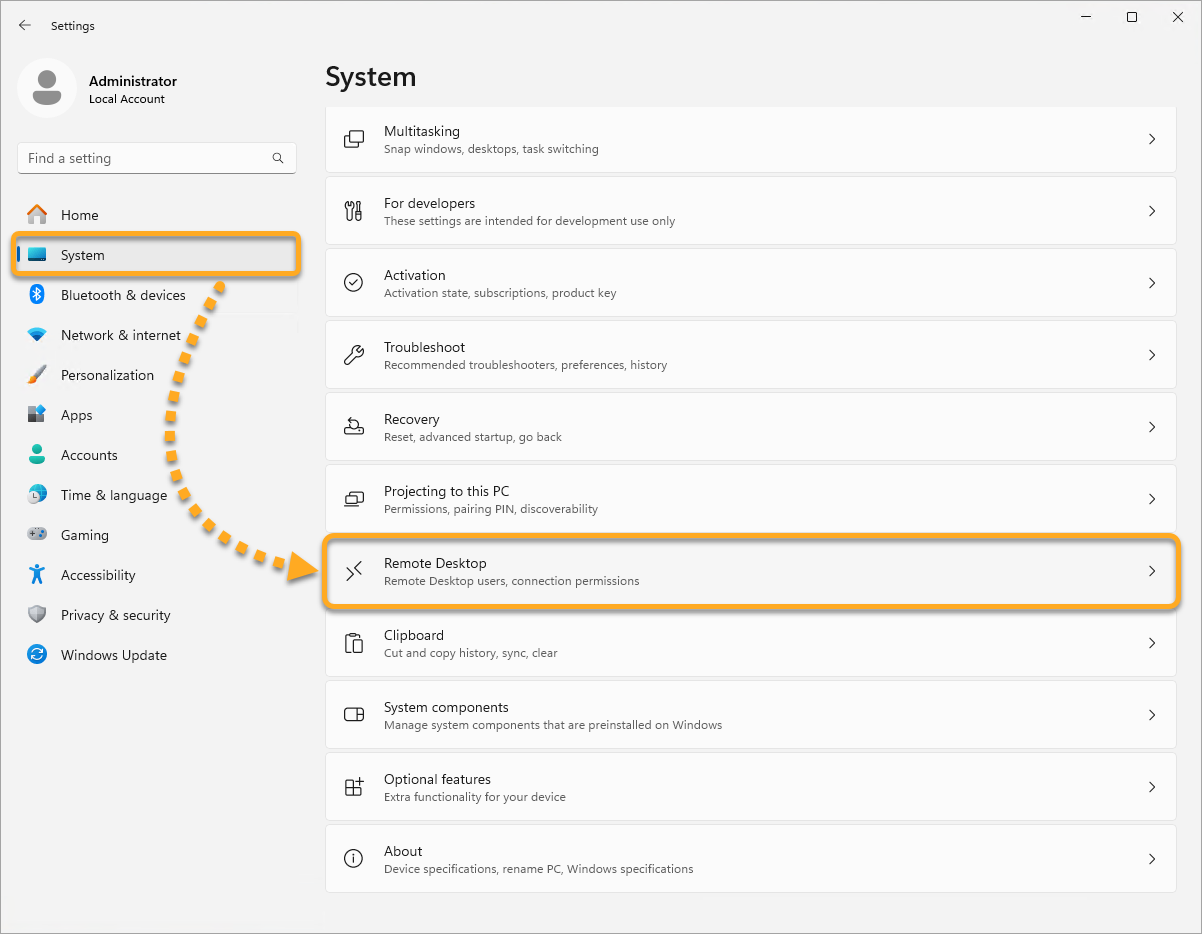
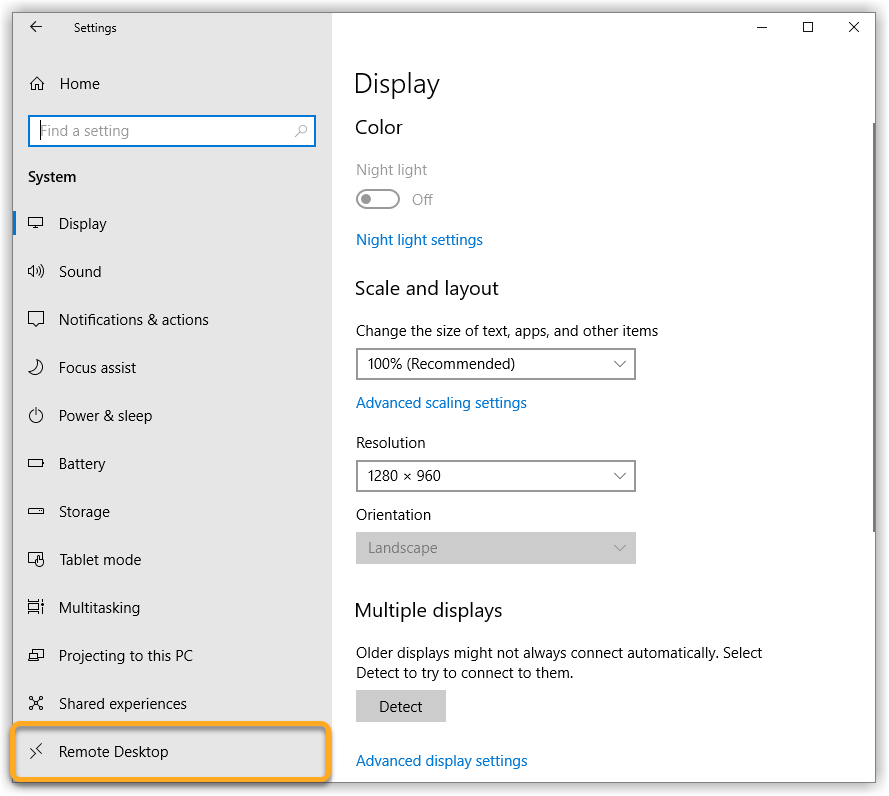
 - Select System in the left panel, then select the Remote Desktop tile.
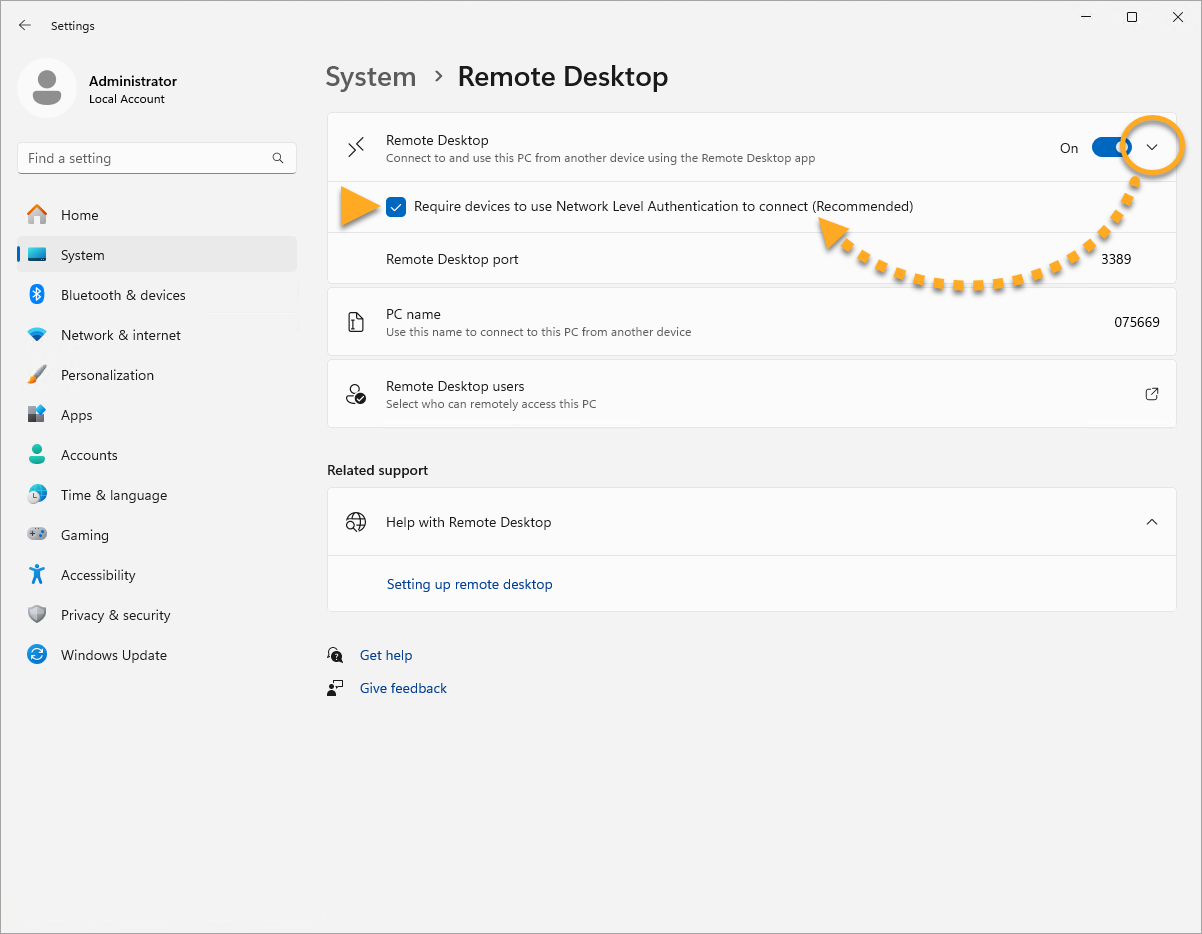
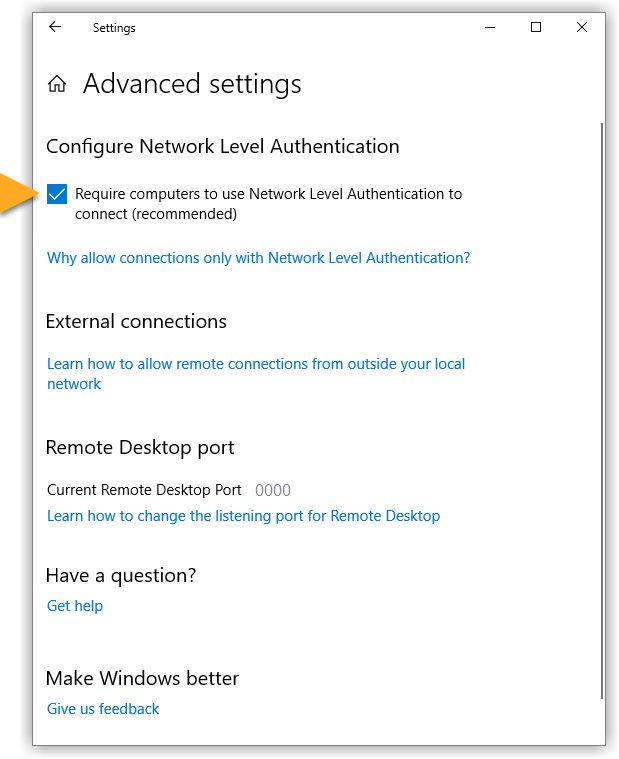
- Click the arrow beside the Remote Desktop slider and tick the box next to Require devices to use Network Level Authentication to connect (Recommended).
The steps to enable Network Level Authentication vary according to your version of Windows 10. Follow the relevant steps below:
Later versions of Windows 10
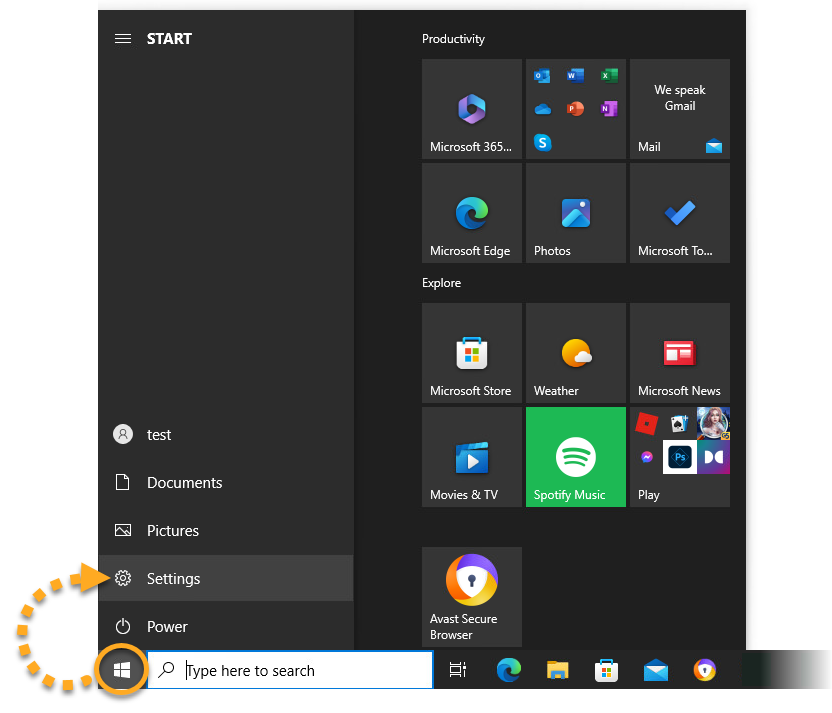
- Click the Windows Start button and select Settings (the gear icon).
- Select the System tile.
- Click Remote Desktop in the left panel.
- Click Advanced settings.
- Tick the box next to Require computers to use Network Level Authentication to connect (recommended).

Network Level Authentication is now enabled, and your PC is protected against unwanted connections via Remote Desktop.
Earlier versions of Windows 10
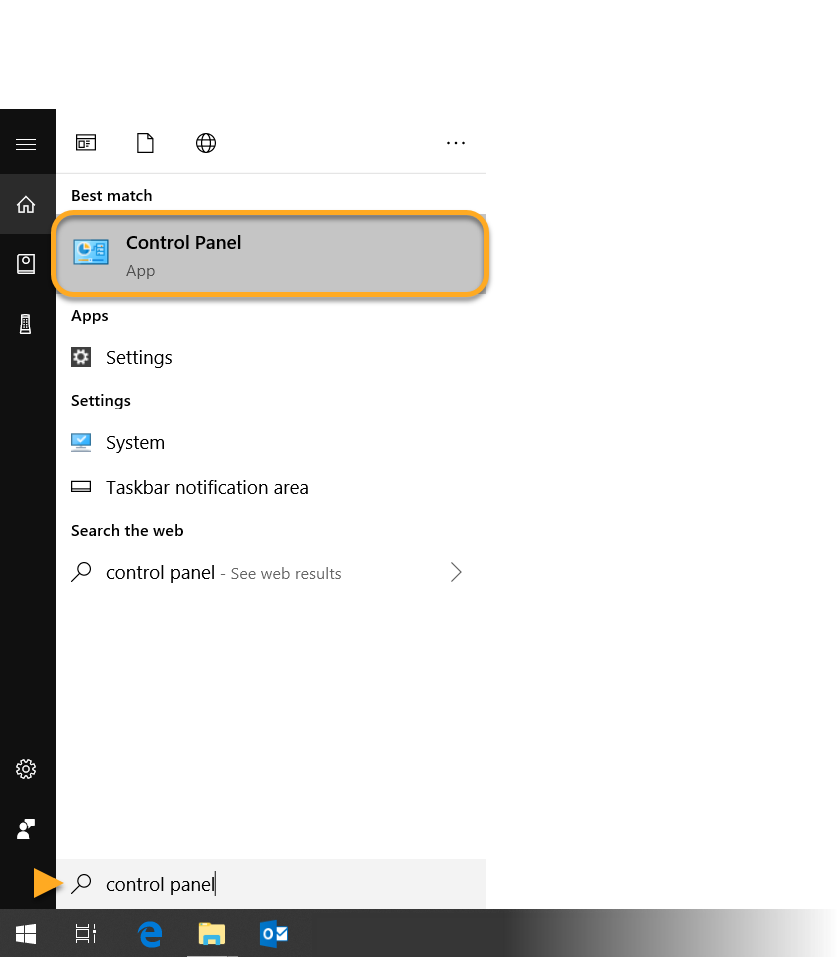
- Click the Windows Start button, start typing
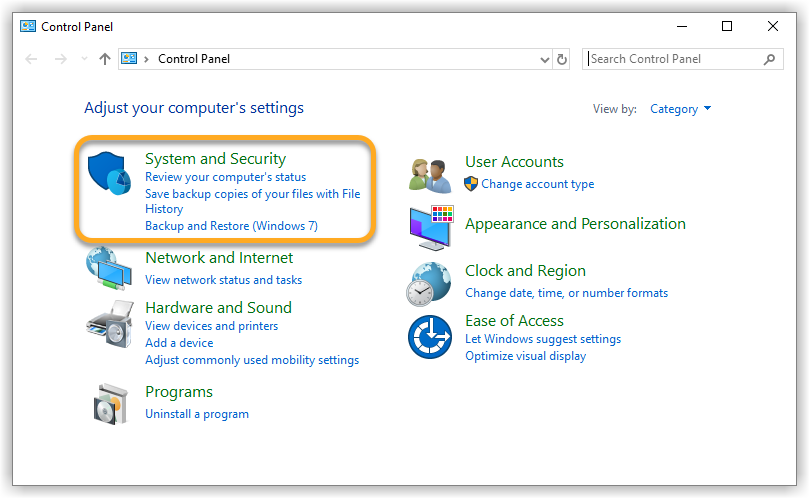
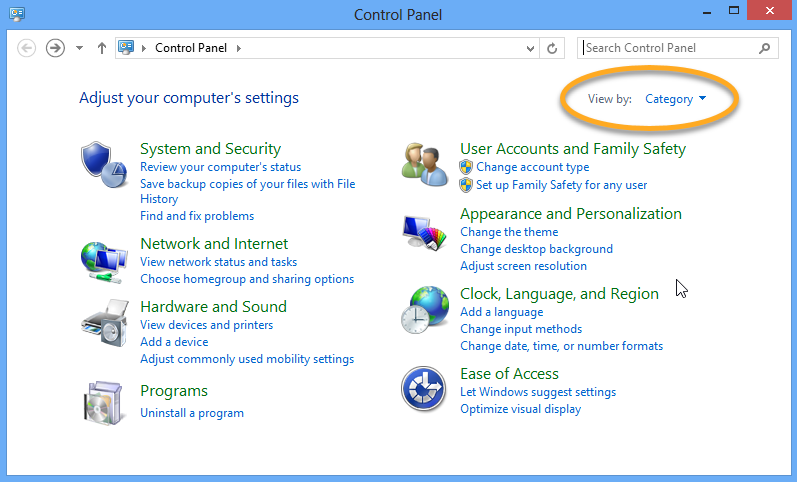
control panelto open the search box, then select Control Panel from the search results. - Next to View by, ensure you are using the Category view.
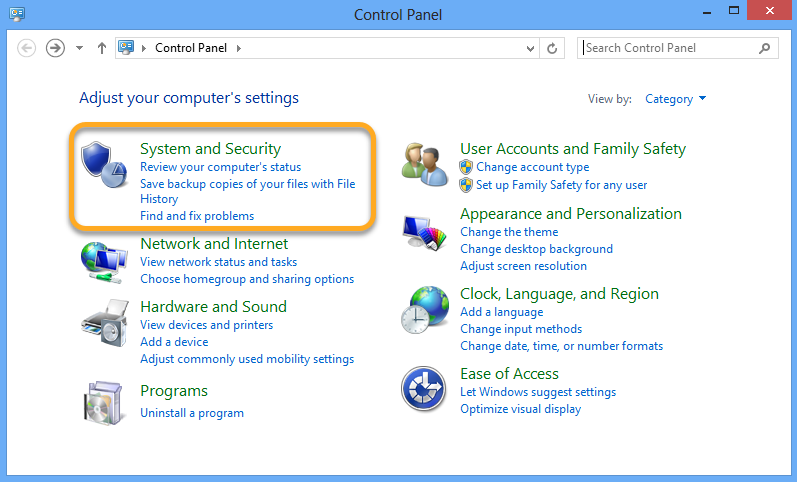
- Select the System and Security tile.
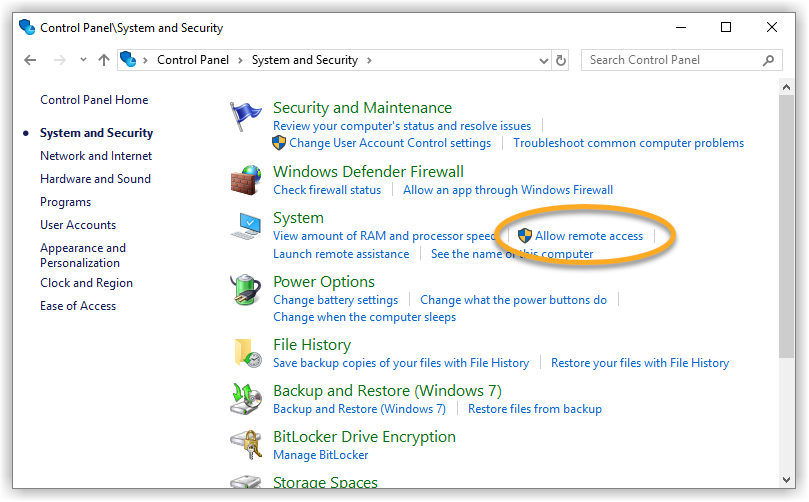
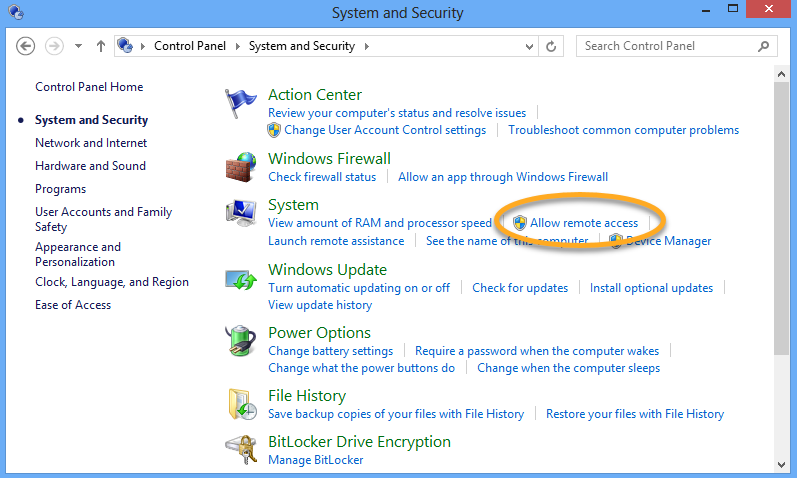
- Under System, select Allow remote access.
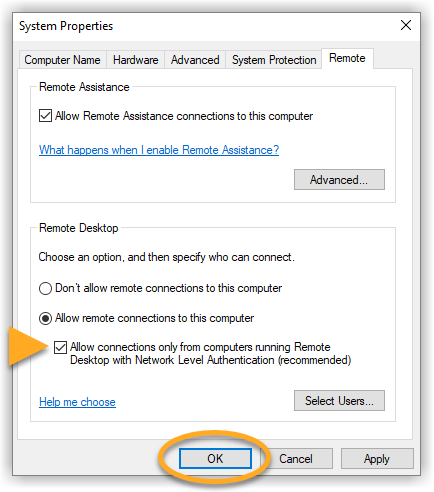
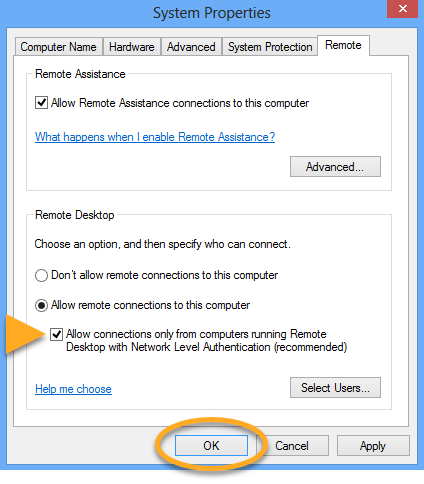
- Under Allow remote connections to this computer, ensure the box next to Allow connections only from computers running Remote Desktop with Network Level Authentication (recommended) is ticked. Then click OK.

Network Level Authentication is now enabled, and your PC is protected against unwanted connections via Remote Desktop.
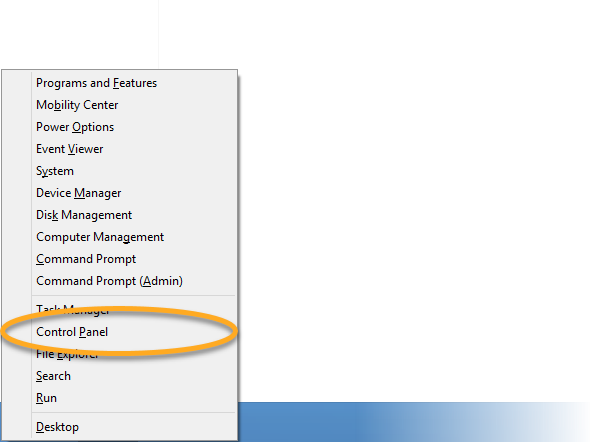
- On your keyboard, press the
Xkey simultaneously, then select Control Panel from the menu that appears. - Next to View by, ensure you are using the Category view.
- Select the System and Security tile.
- Under System, select Allow remote access.
- Under Allow remote connections to this computer, ensure the box next to Allow connections only from computers running Remote Desktop with Network Level Authentication (recommended) is ticked. Then click OK.
Network Level Authentication is now enabled, and your PC is protected against unwanted connections via Remote Desktop.
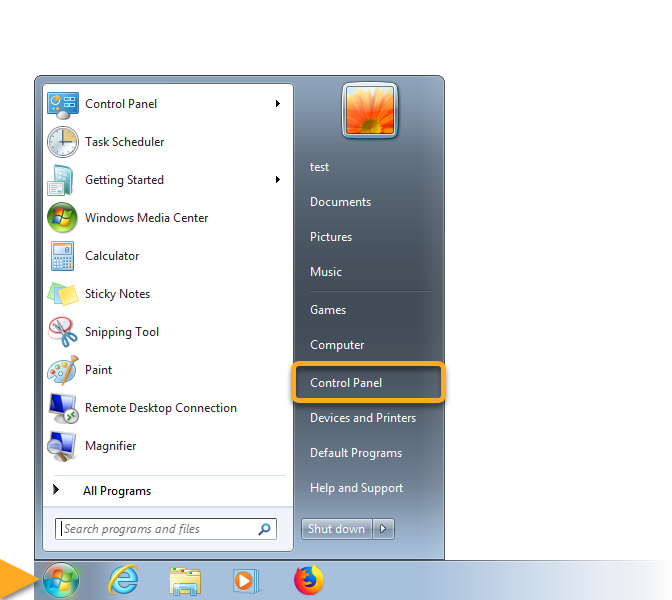
- Click the Windows Start button and select Control Panel.
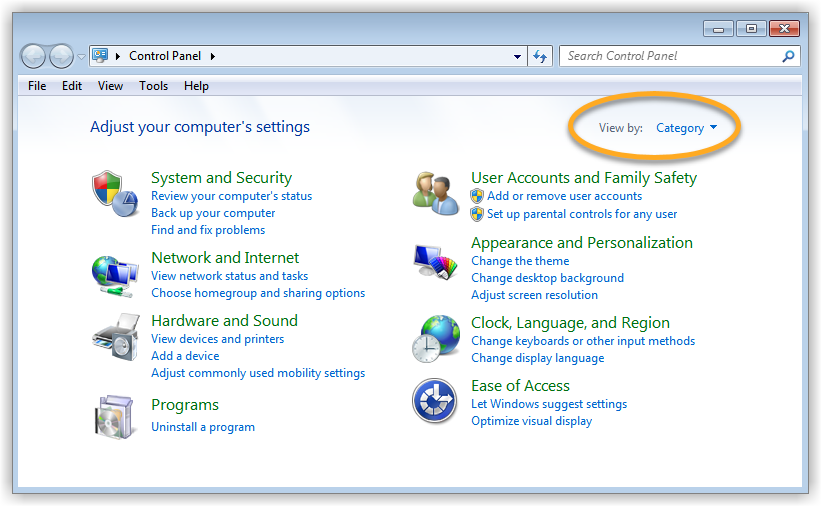
- Next to View by, ensure you are using the Category view.
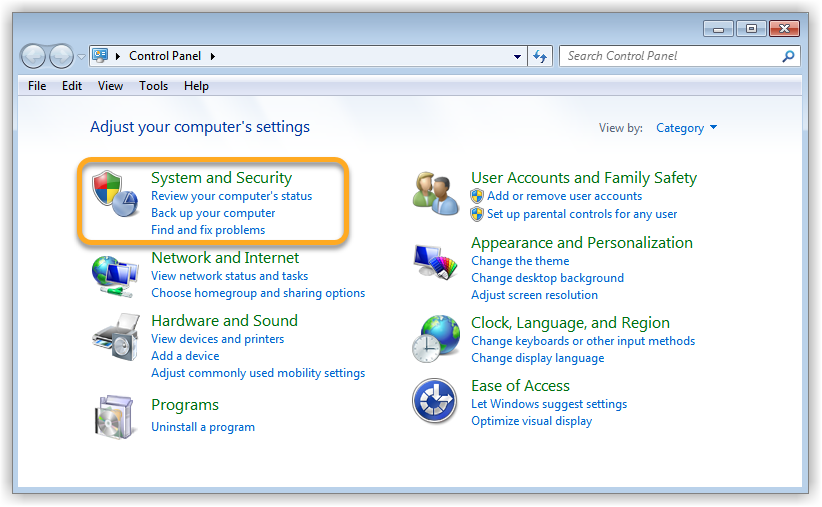
- Select the System and Security tile.
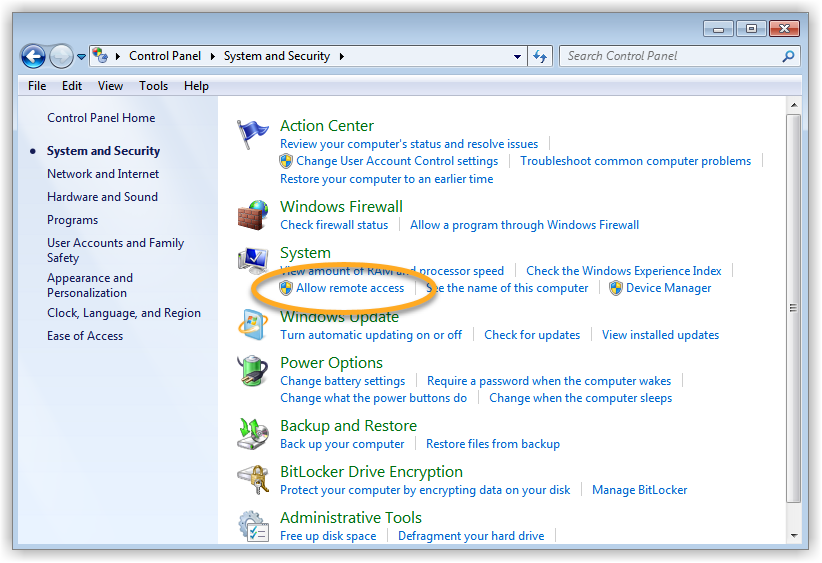
- Under System, select Allow remote access.
- Ensure that Allow connections only from computers running Remote Desktop with Network Level Authentication (more secure) is selected. Then click OK.

Network Level Authentication is now enabled, and your PC is protected against unwanted connections via Remote Desktop.
- AVG Internet Security
- AVG AntiVirus Free
- Windows