AVG Mobile Security is a security app for iOS designed to protect your privacy online, securely store your photos, scan Wi-Fi networks for vulnerabilities, and alert you if any of your personal data linked to your email address has been leaked online.
After installing AVG Mobile Security, the app scans your Wi-Fi network and prompts you to resolve any detected issues. Refer to the sections in this article for instructions on using AVG Mobile Security.
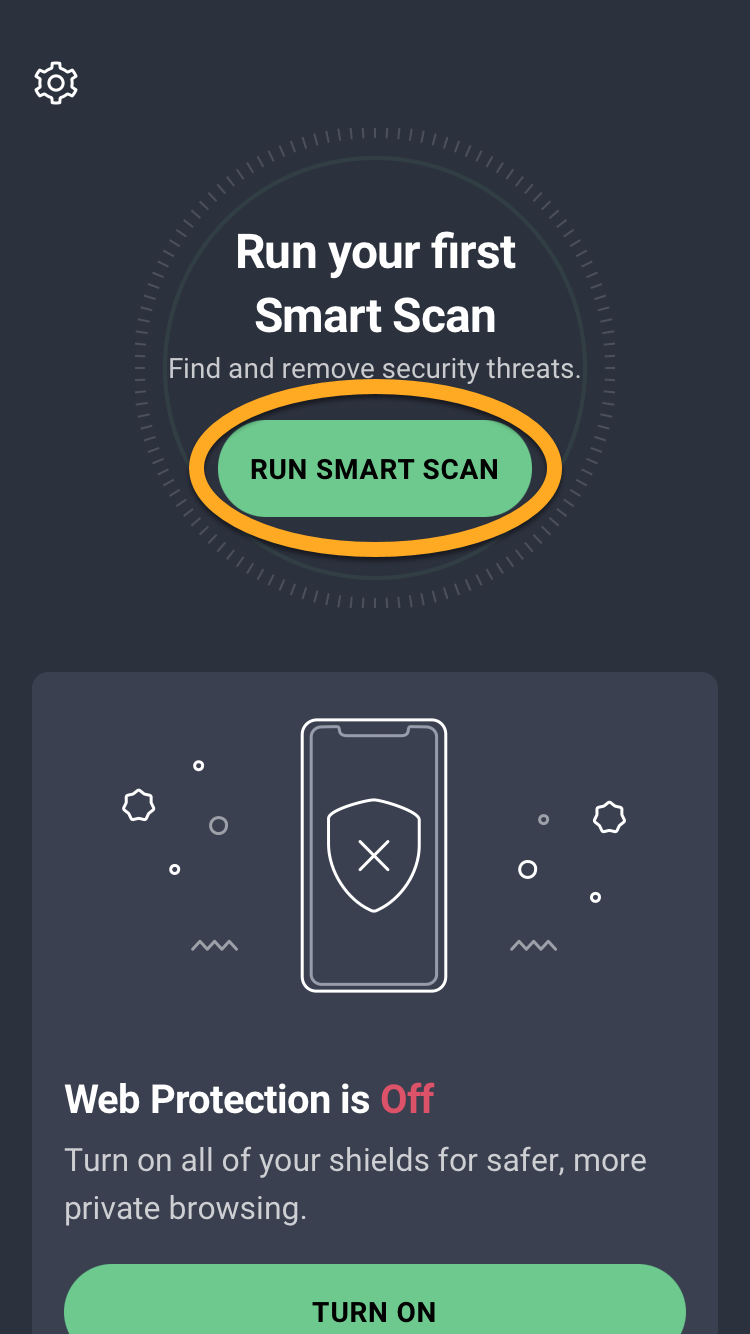
Run a Smart Scan
When you open AVG Mobile Security, you have the option to run a Smart Scan, which checks your device for any potential threats. To start the scan:
- Tap the AVG Mobile Security icon on the Home screen of your device. The app opens.

- Tap Run smart scan on the main AVG Mobile Security screen.
- Tap Resolve and follow the on-screen instructions to resolve any issues found.
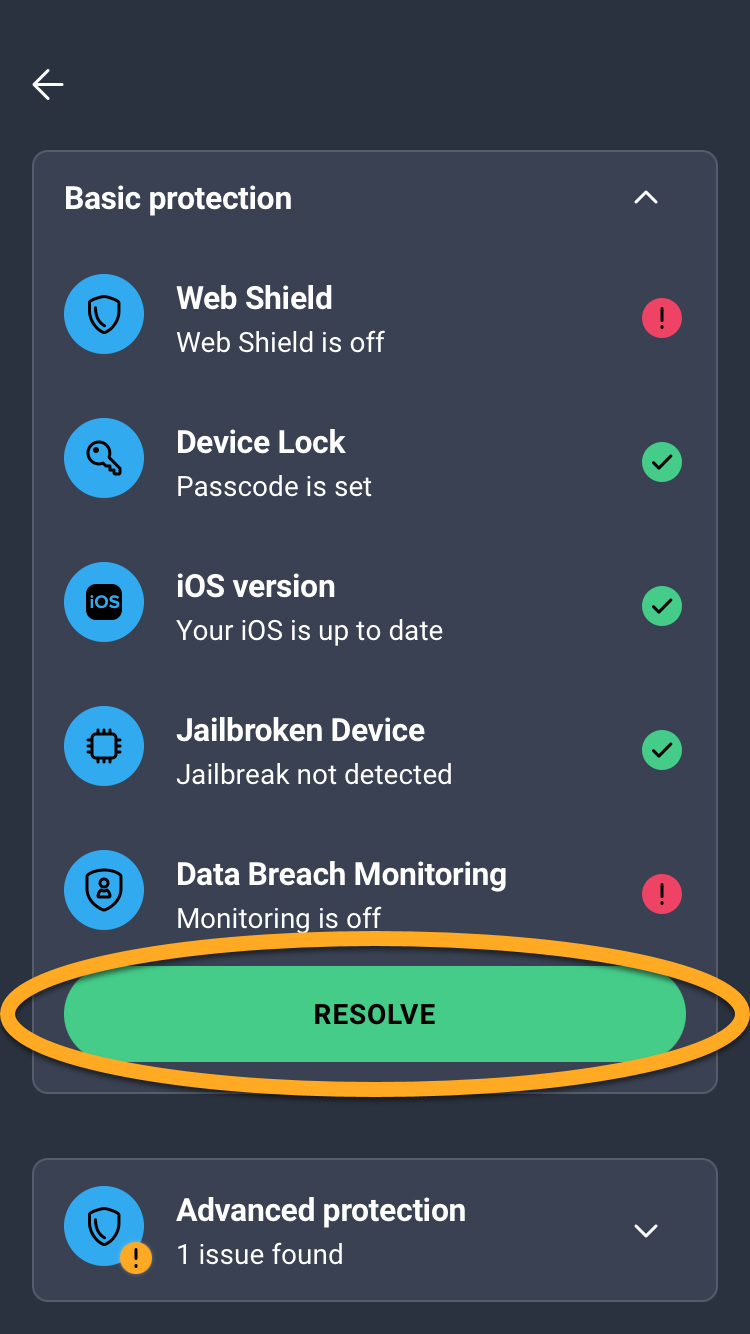
For detailed instructions on how to solve the found issues, refer to the sections below.
Turn on Web Shield
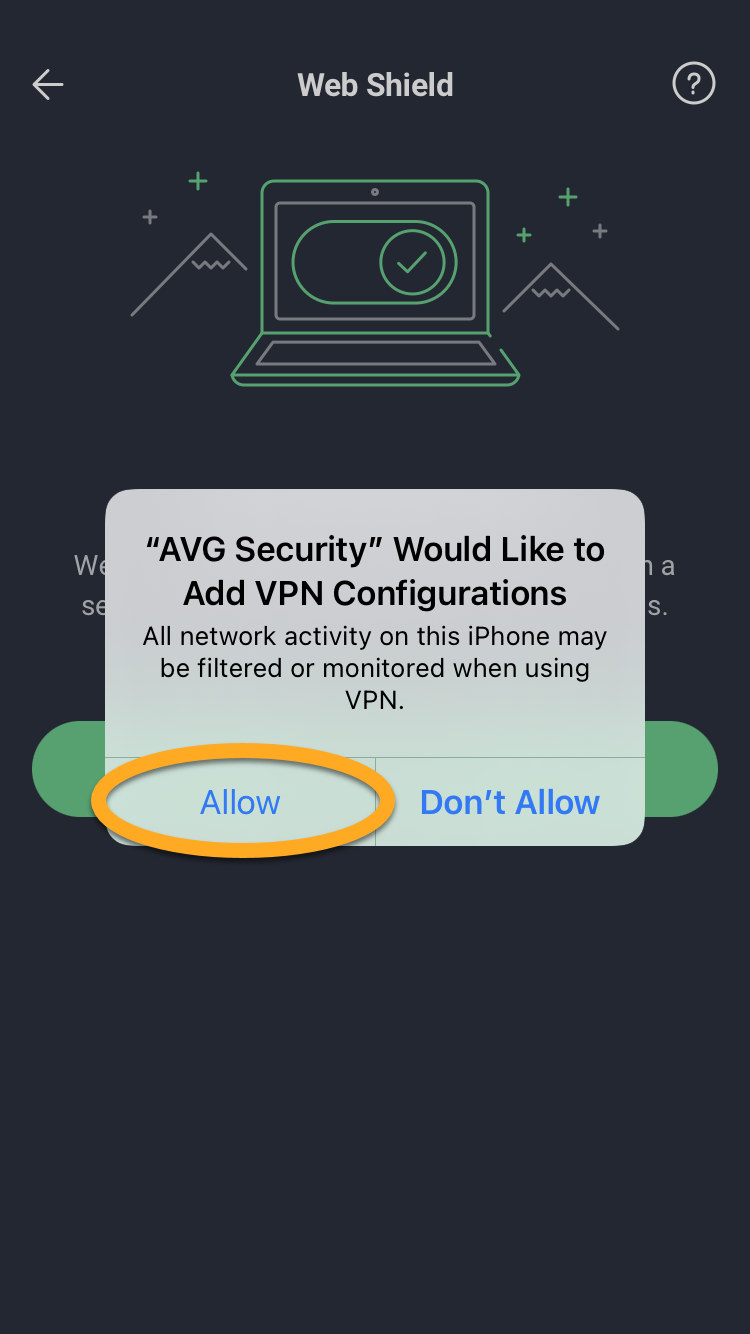
Web Shield runs in the background while you browse the internet. When Web Shield is enabled, AVG Mobile Security blocks fake websites that are trying to trick you by impersonating legitimate sites. A local VPN (Virtual Private Network) is required to enable this feature. To enable Web Shield:
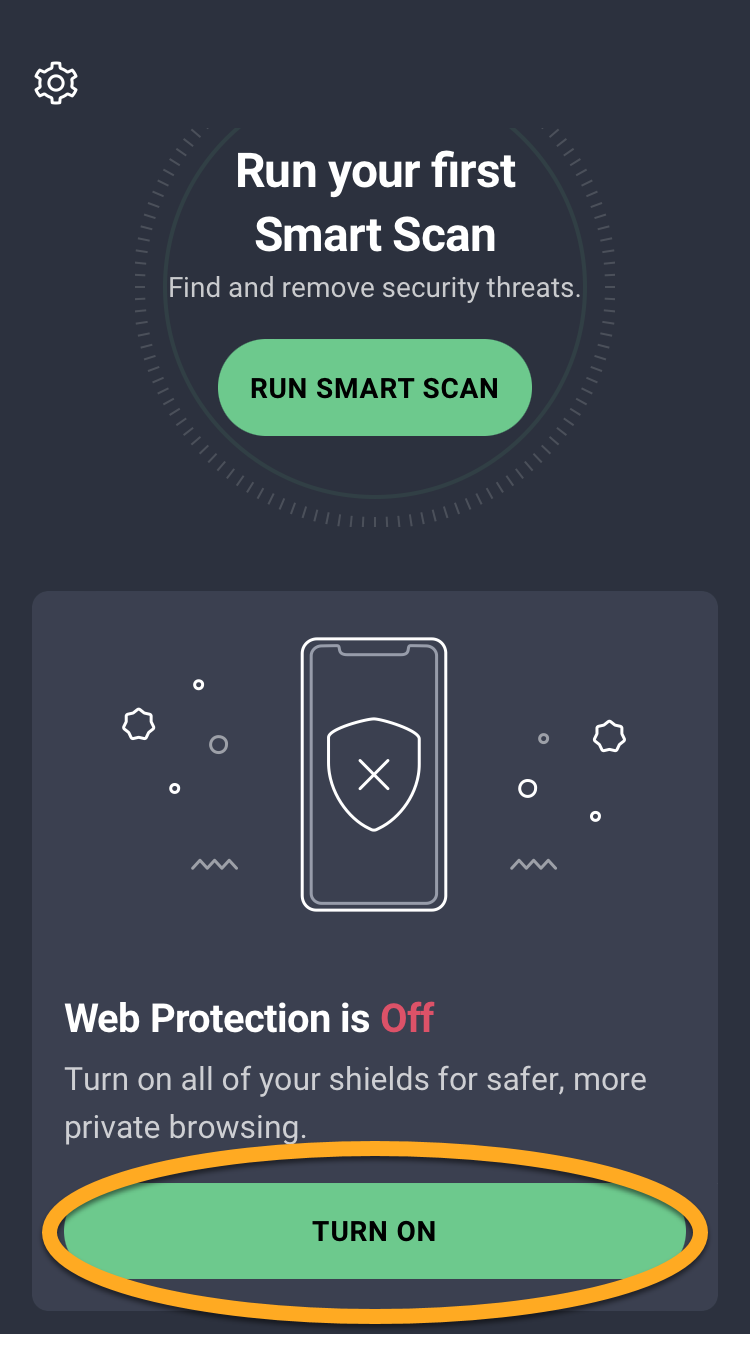
- Tap the AVG Mobile Security icon on the Home screen of your device. The app opens.
- Under Your browsing is not secured/Web Protection is Off, tap Turn on.
- Tap Next twice, then tap Enable.
- If prompted, tap Allow to add VPN Configurations.
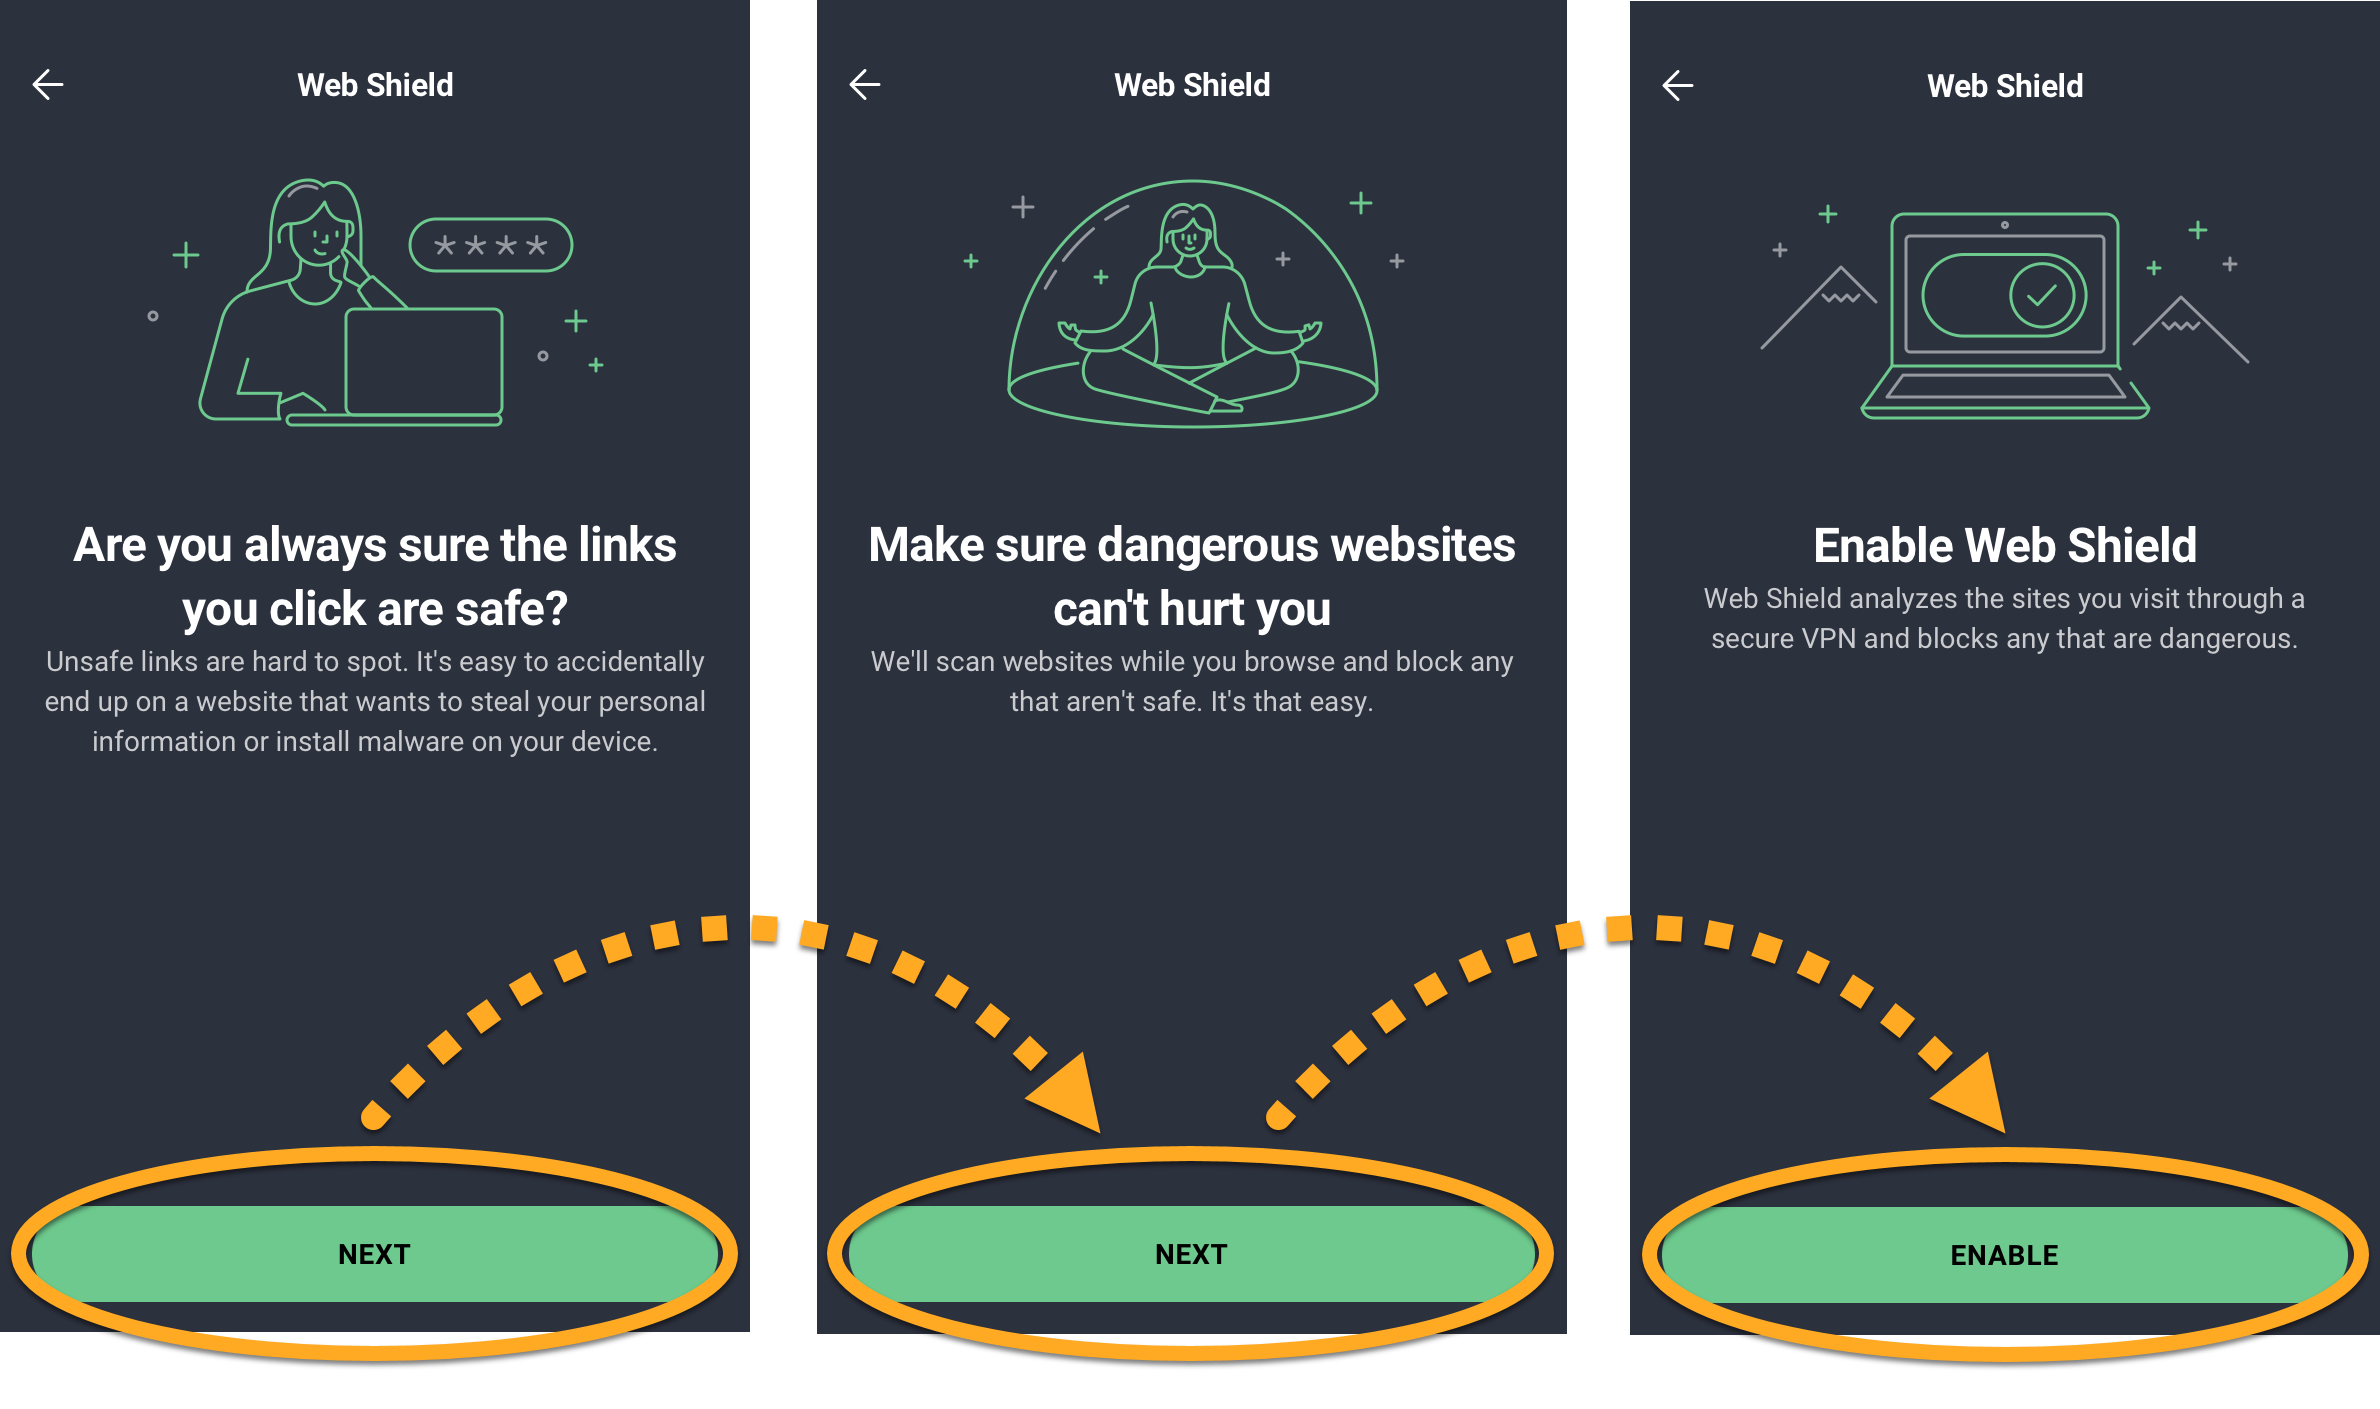
Web Shield is now enabled.
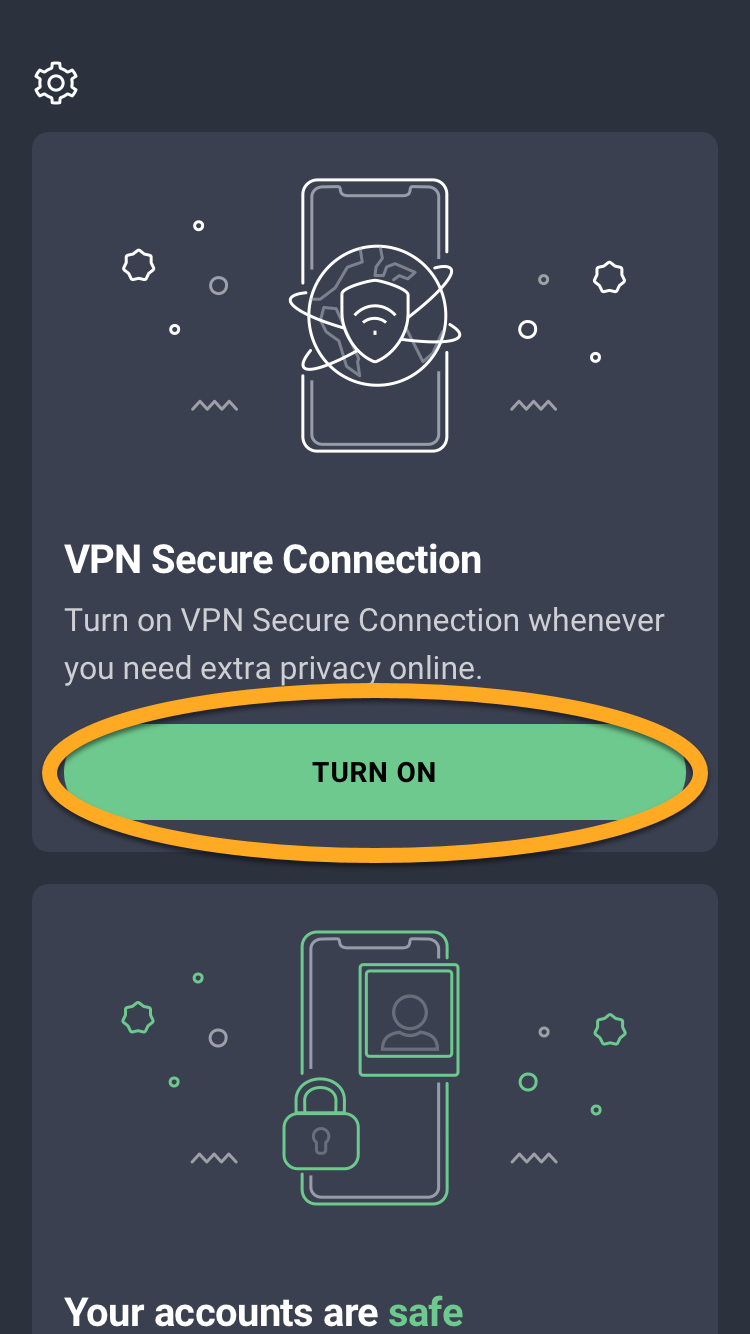
Enable VPN Secure Connection
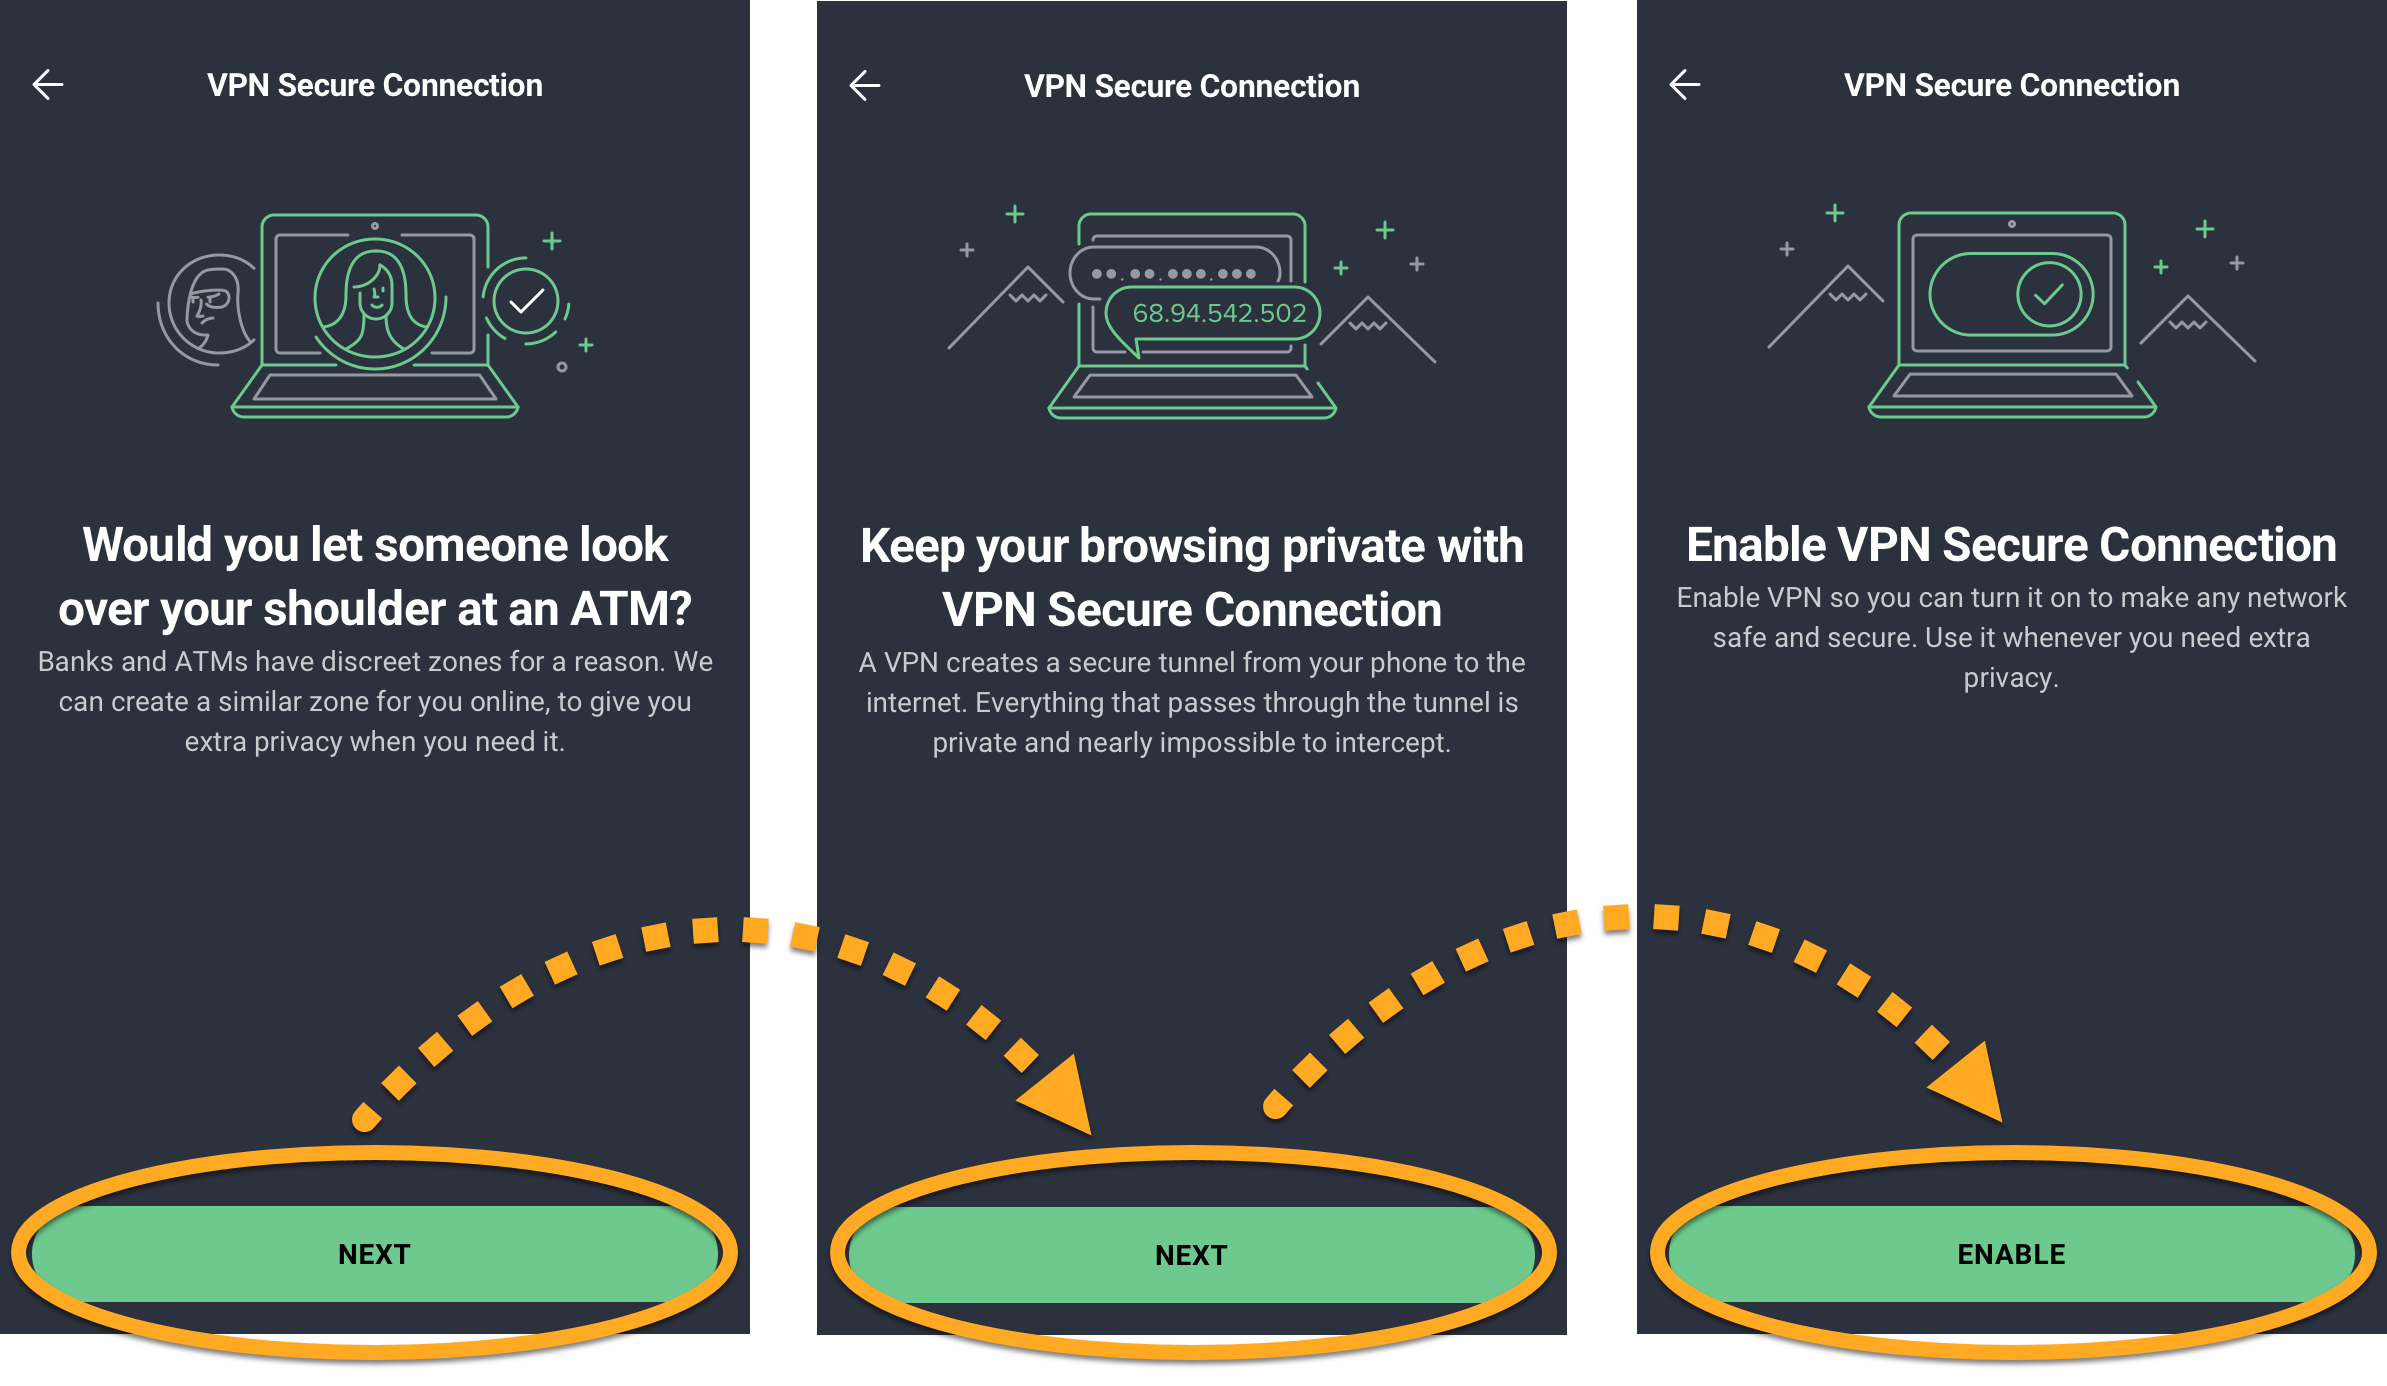
VPN Secure Connection (previously called Wi-Fi Protection) uses a VPN (Virtual Private Network) to ensure no one can spy on your online activity. A VPN connection protects the data you upload and download from the internet, secures data sent from your device, and keeps your internet activity completely private. To activate VPN Secure Connection:
- Tap the AVG Mobile Security icon on the Home screen of your device. The app opens.
- Under VPN Secure Connection, tap Turn on.
- Tap Next twice, then tap Enable.
- If prompted, tap Allow to add VPN Configurations.
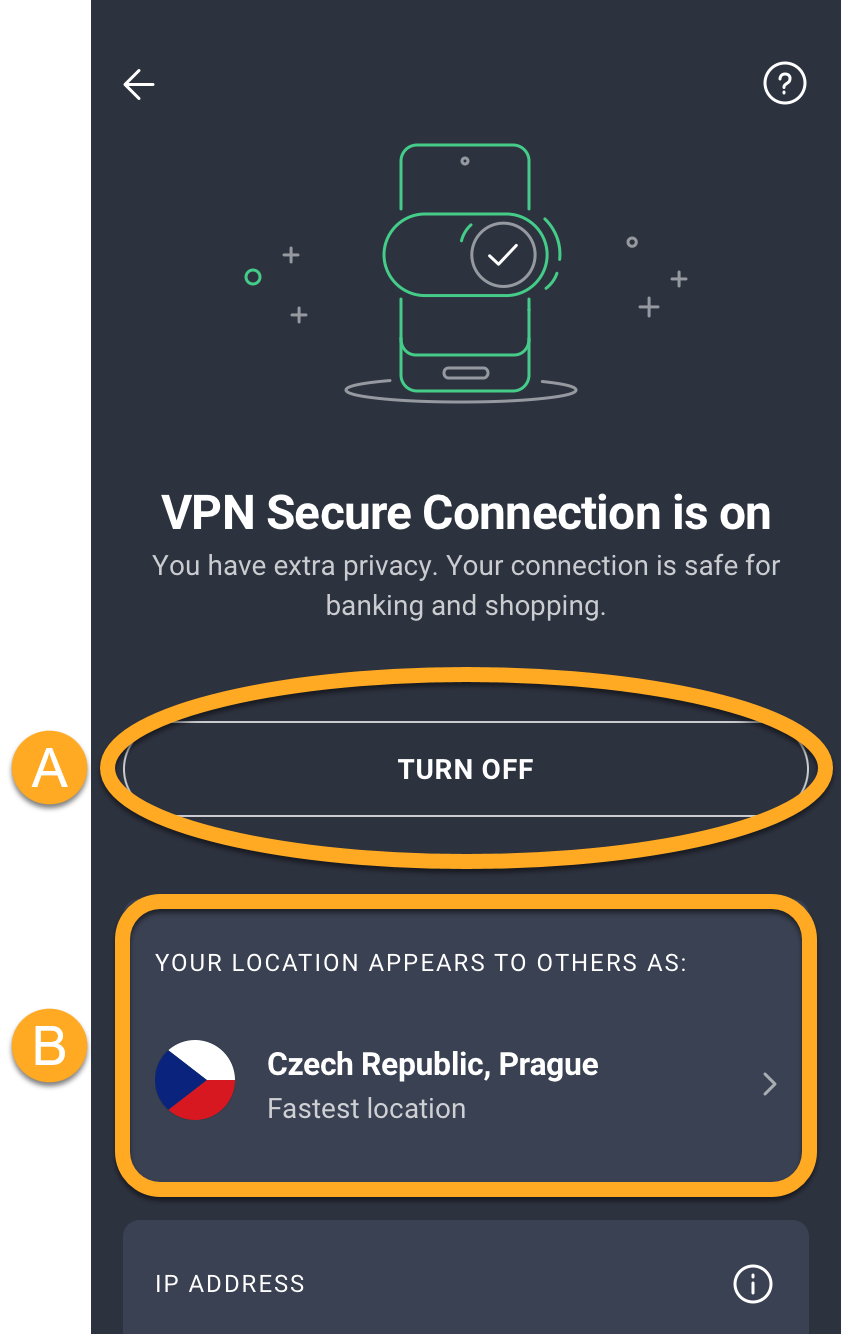
VPN Secure Connection is activated and connected to the closest server location.
The following options are also available via VPN Secure Connection screen:
- Turn off VPN: To temporarily turn off the VPN, tap Turn off on the VPN Secure Connection screen.
- Change location: You can connect to servers in any of our available locations. Tap the Server location tile, and select a different location from the list.
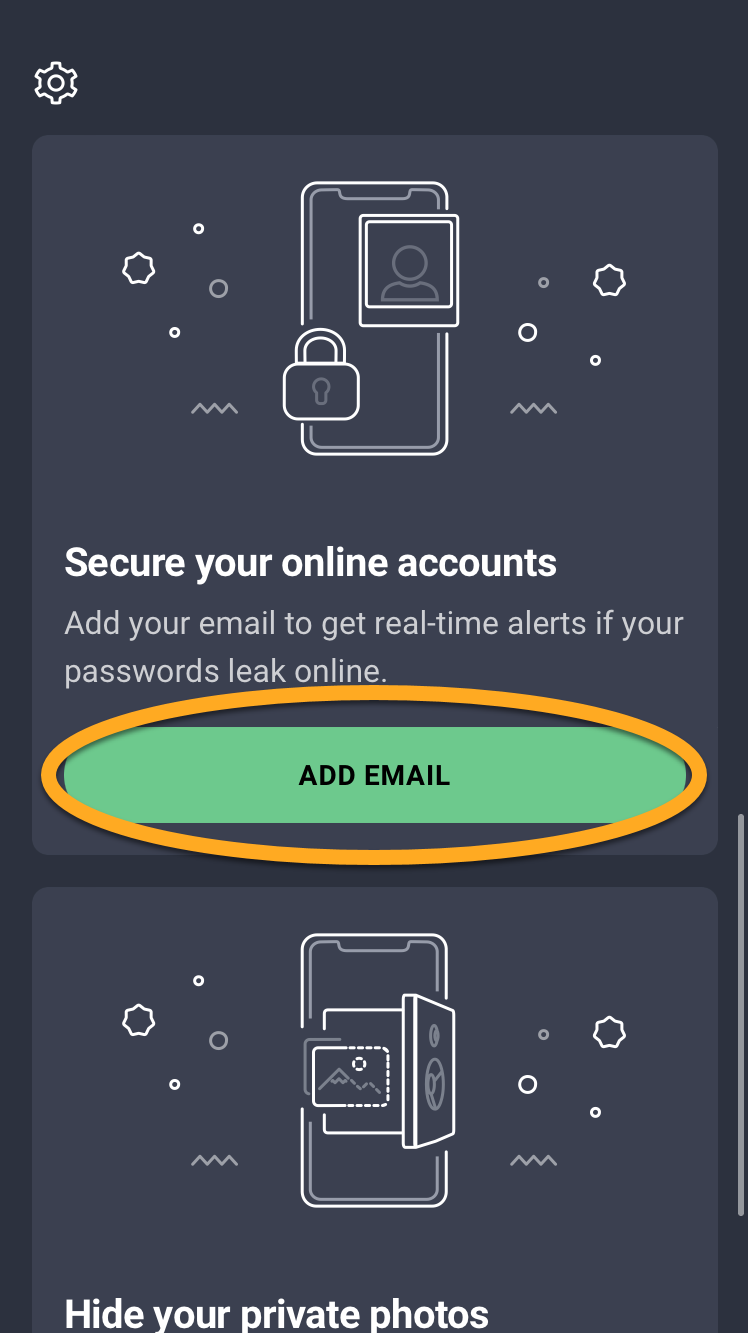
Activate Data Breach Monitoring
The Data Breach Monitoring feature protects your online accounts by checking if any of your personal information linked to your email address has been leaked online. To activate Data Breach Monitoring:
- Tap the AVG Mobile Security icon on the Home screen of your device. The app opens.
- Under Secure your online accounts, tap Add email.
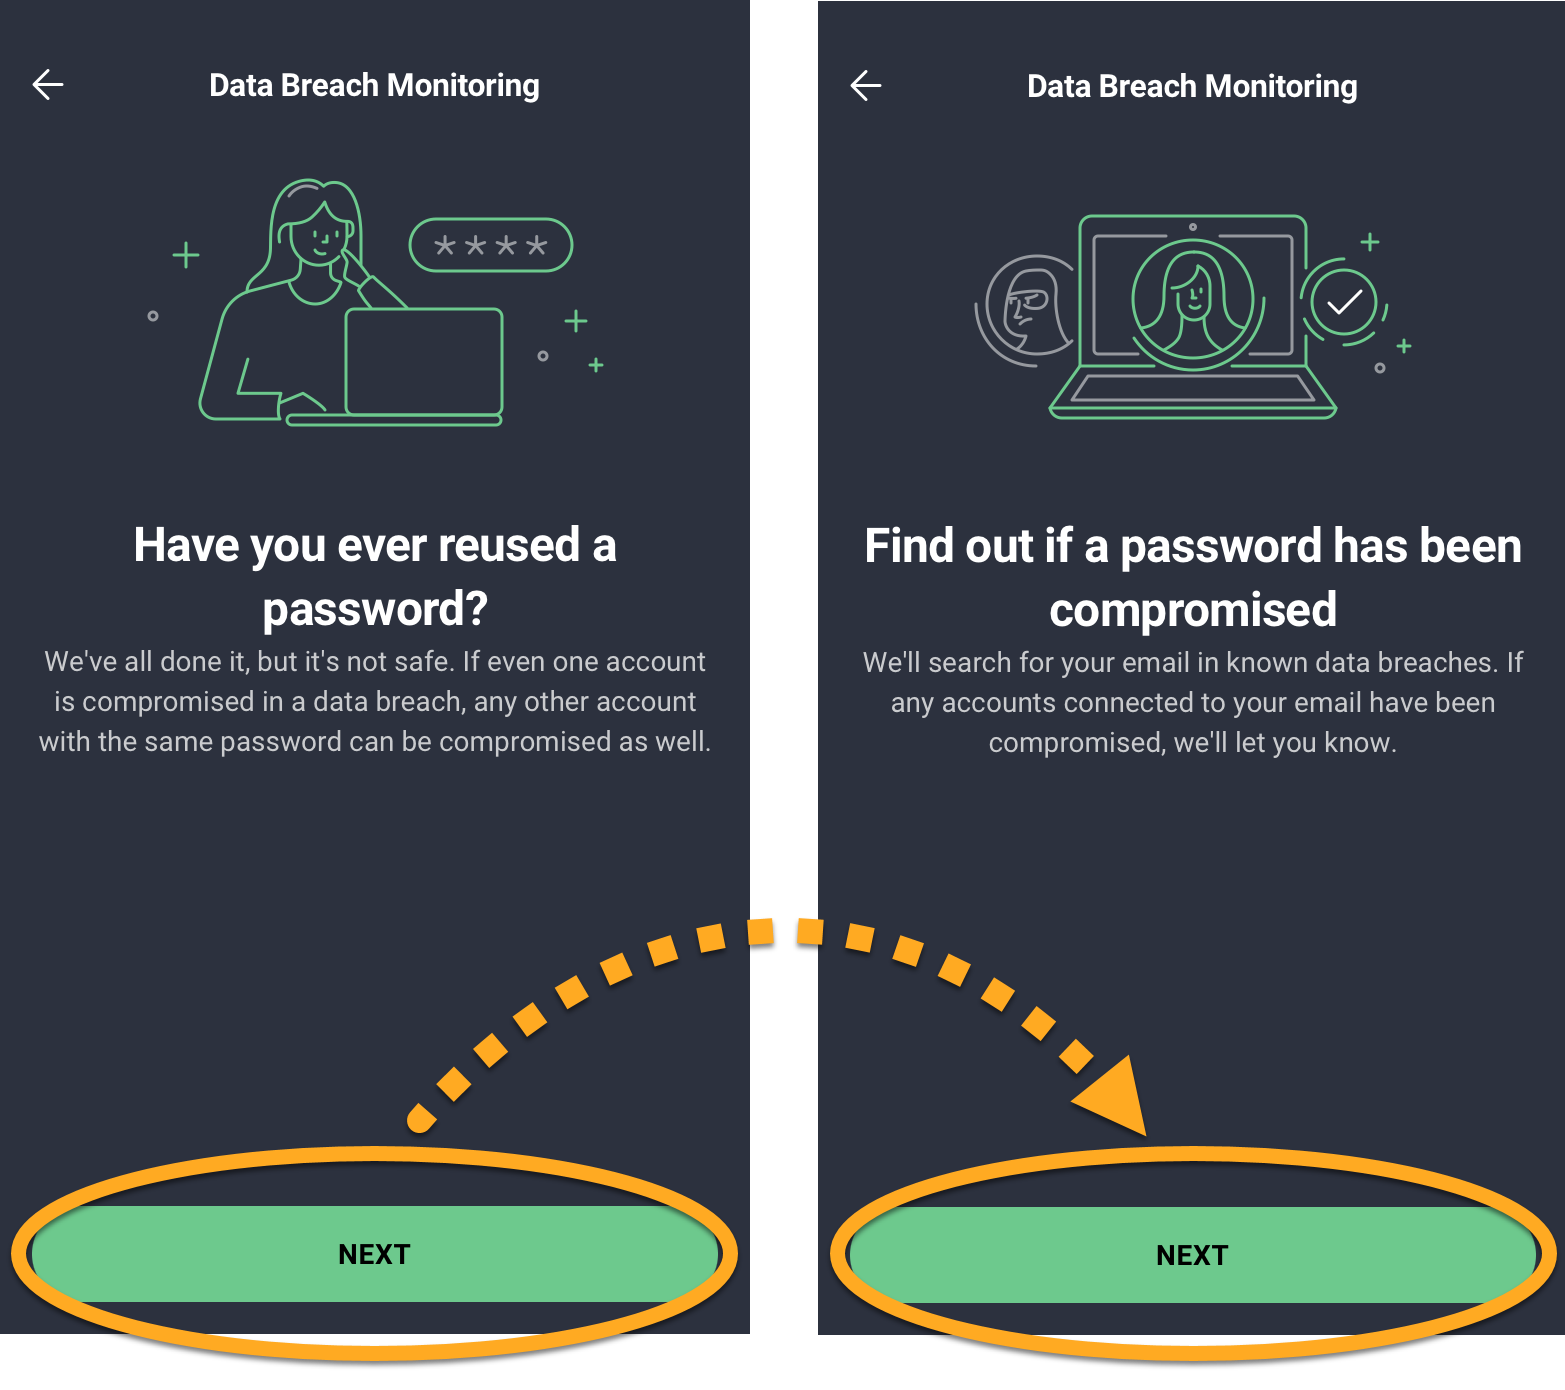
- Tap Next twice.
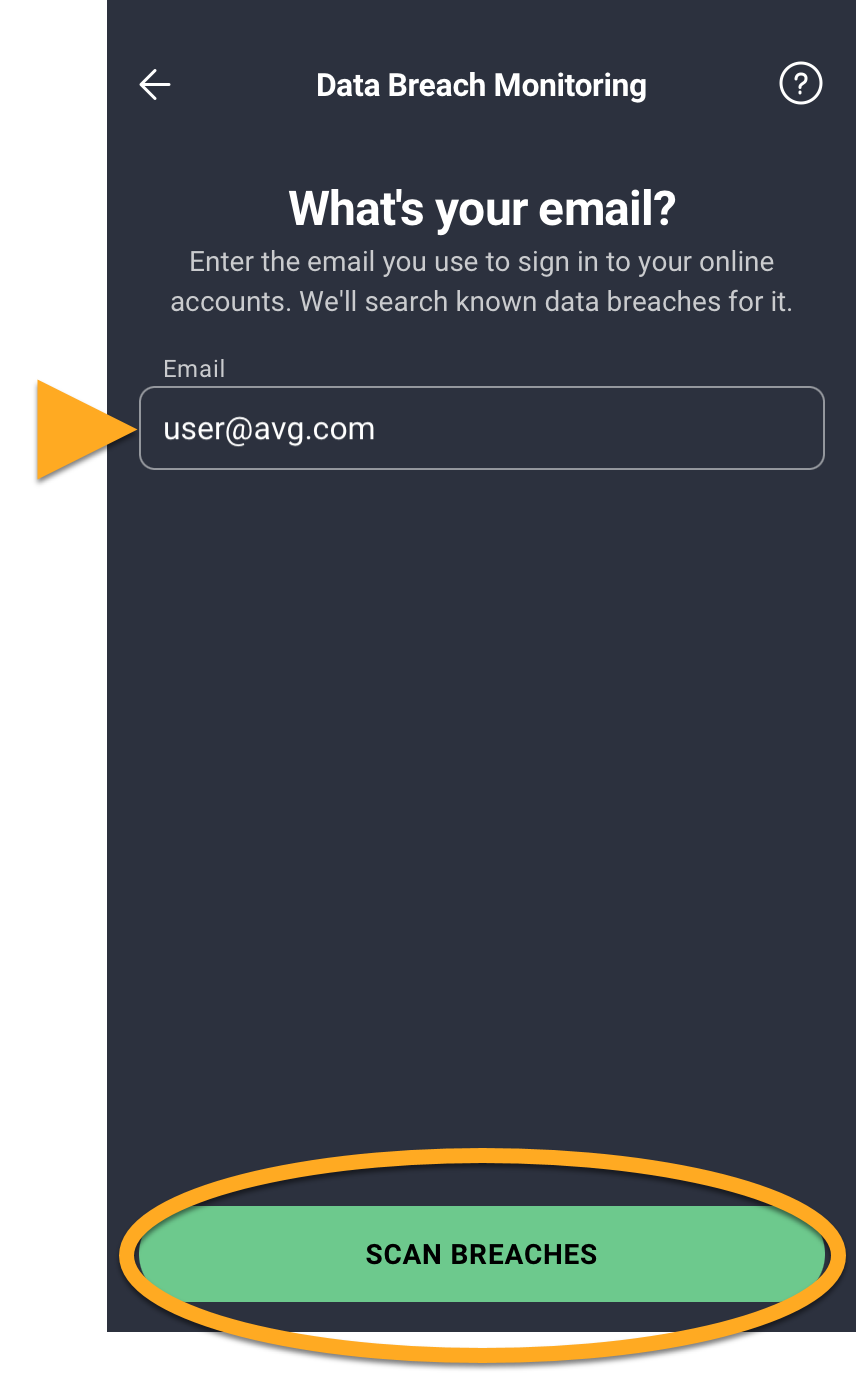
- Enter your email address, then tap Scan breaches.
- After the scan completes, refer to the information below according to the message you see on the results screen:
- No compromised accounts: We have not found any data breaches involving your online accounts.
- Compromised accounts: We have found that at least one of your online accounts has been involved in a data breach. We recommend you immediately change the passwords for all accounts listed under Compromised accounts. Tap a breached account, then tap Change password to follow the on-screen instructions to change the account's password.
- No compromised accounts: We have not found any data breaches involving your online accounts.
- To actively monitor leaked data connected to your email address, tap Turn on breach alerts ▸ OK.
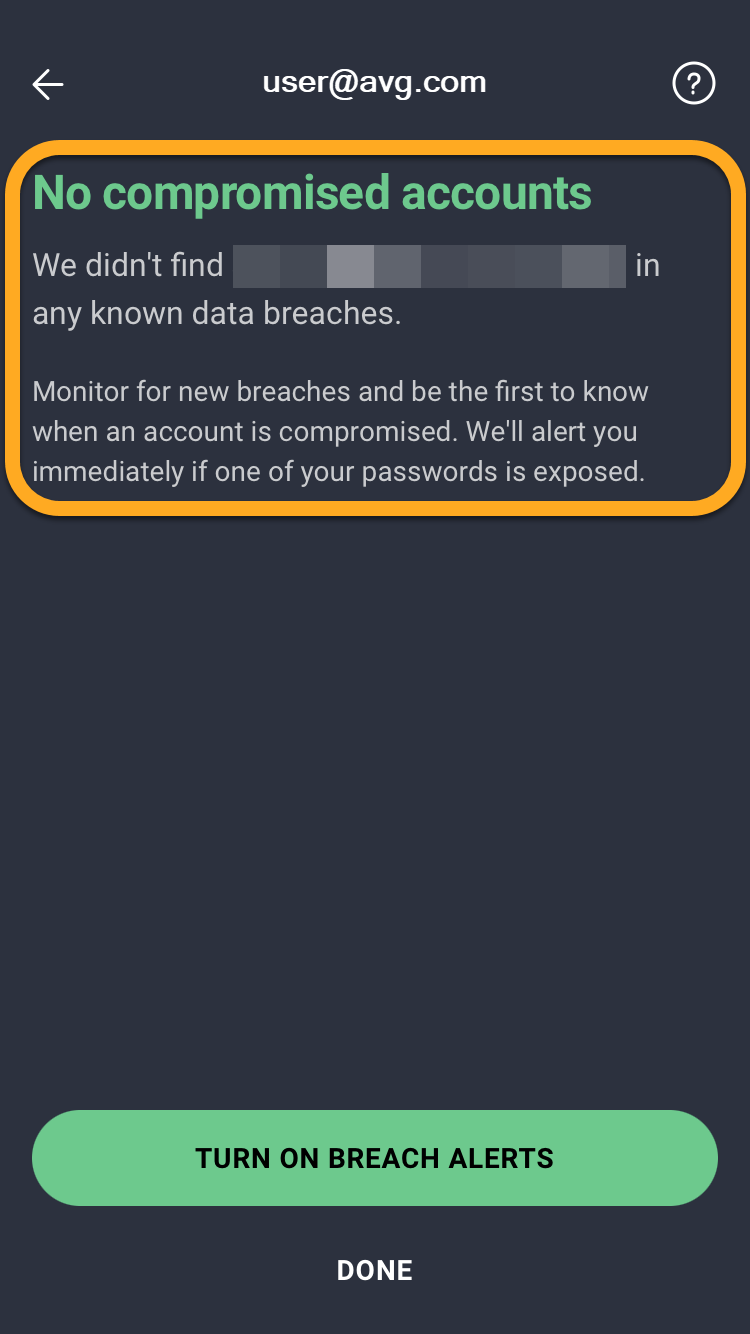

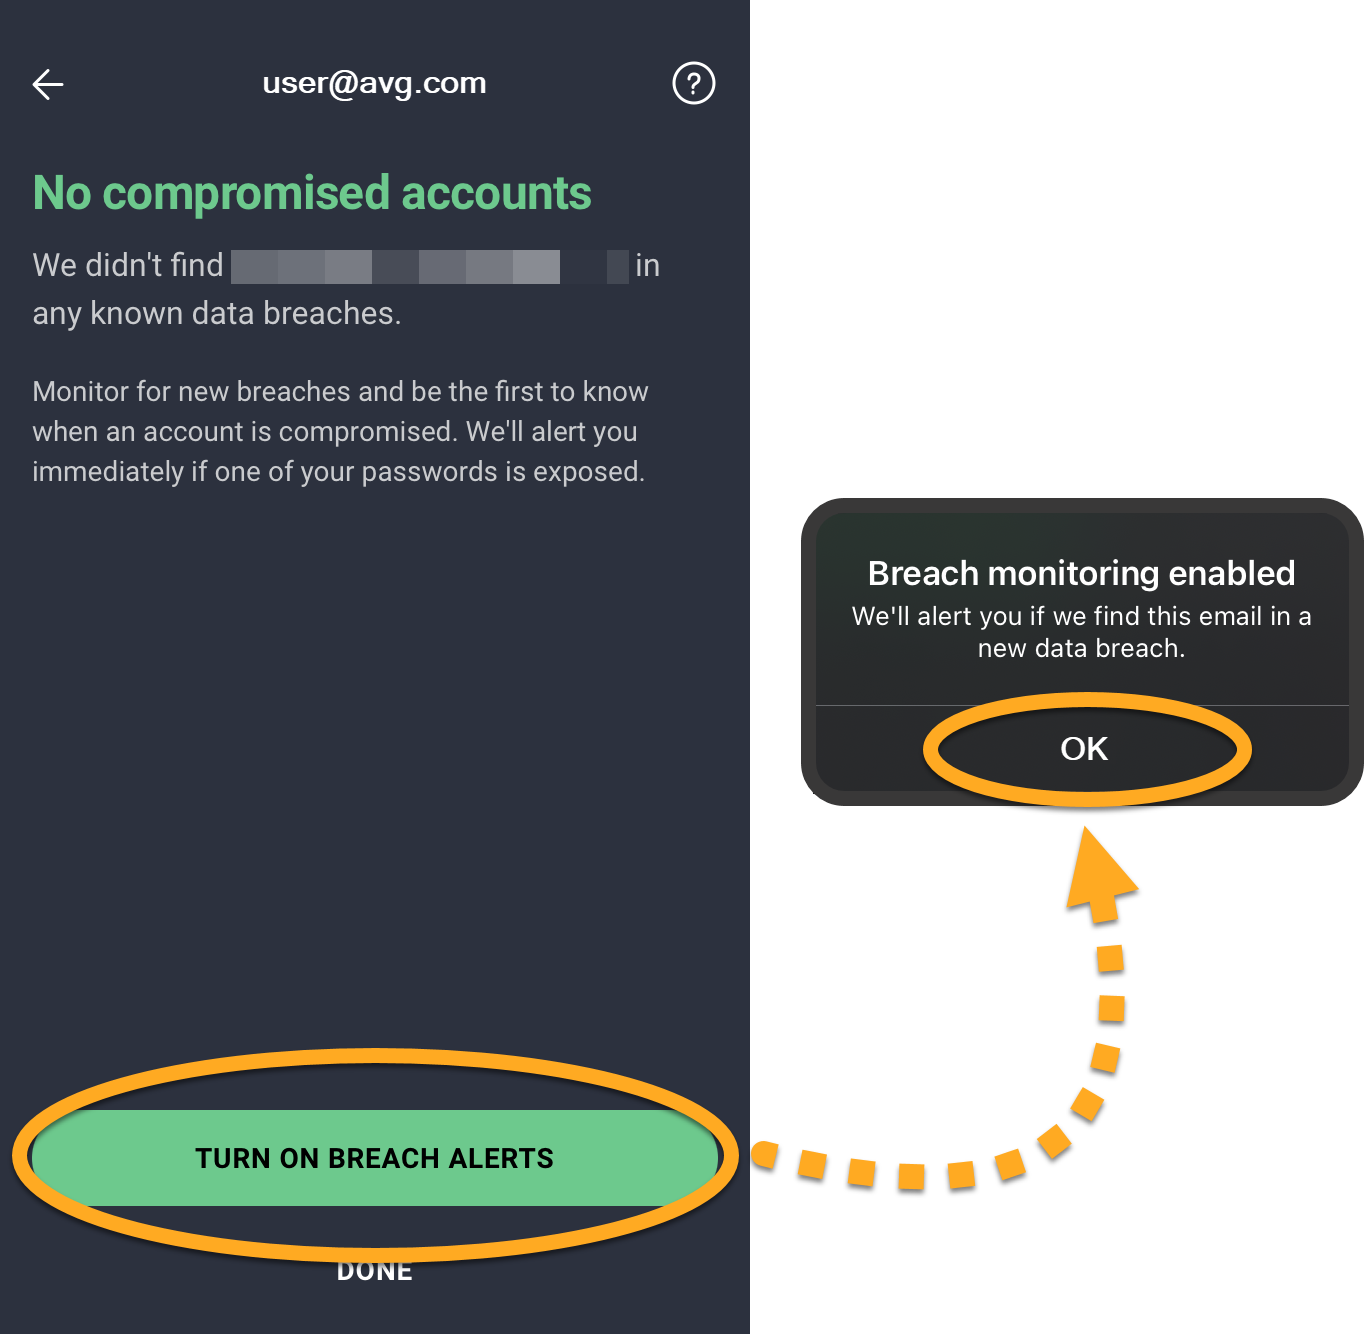
Data Breach Monitoring is now active and continuously checks for new data breaches involving this email address.
If you have AVG Mobile Security Pro, you can use Data Breach Monitoring with multiple email addresses. To add another email address, tap More info ▸ Scan for new email, then follow the instructions above, starting at step 4.
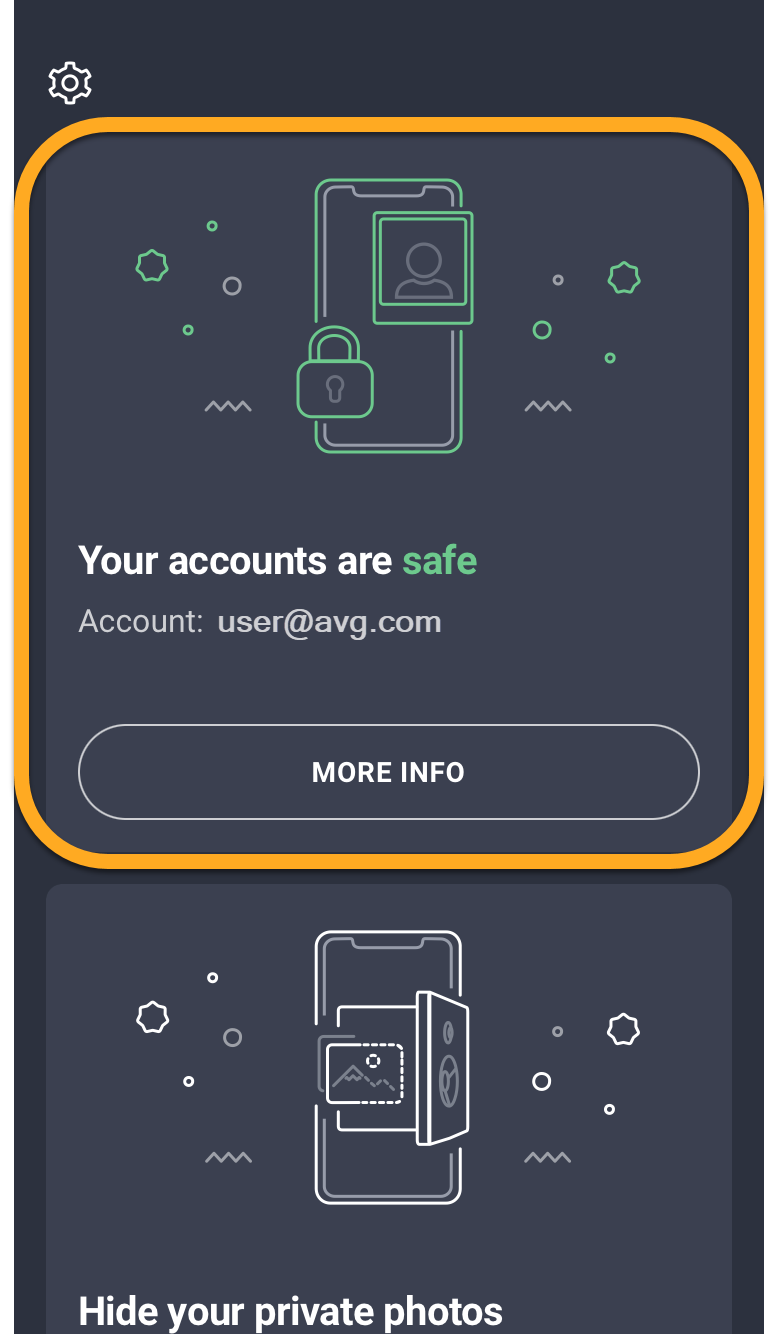
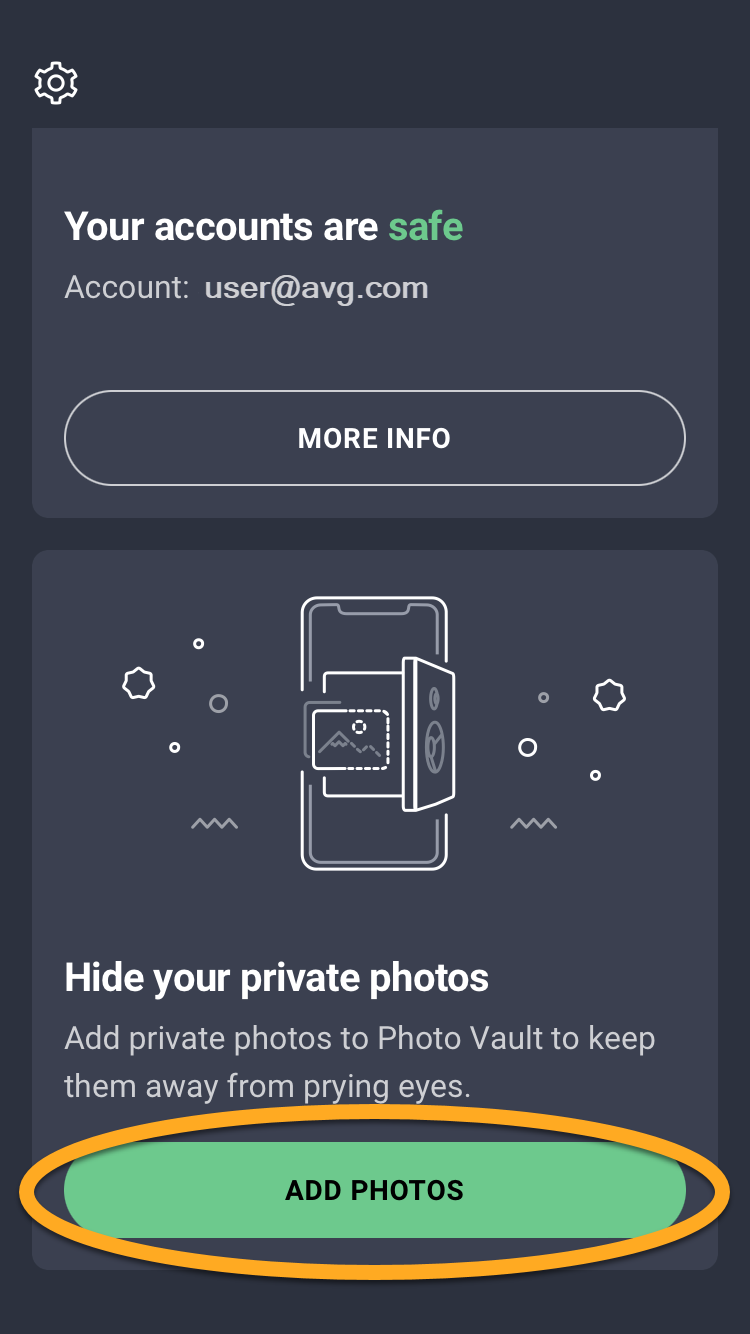
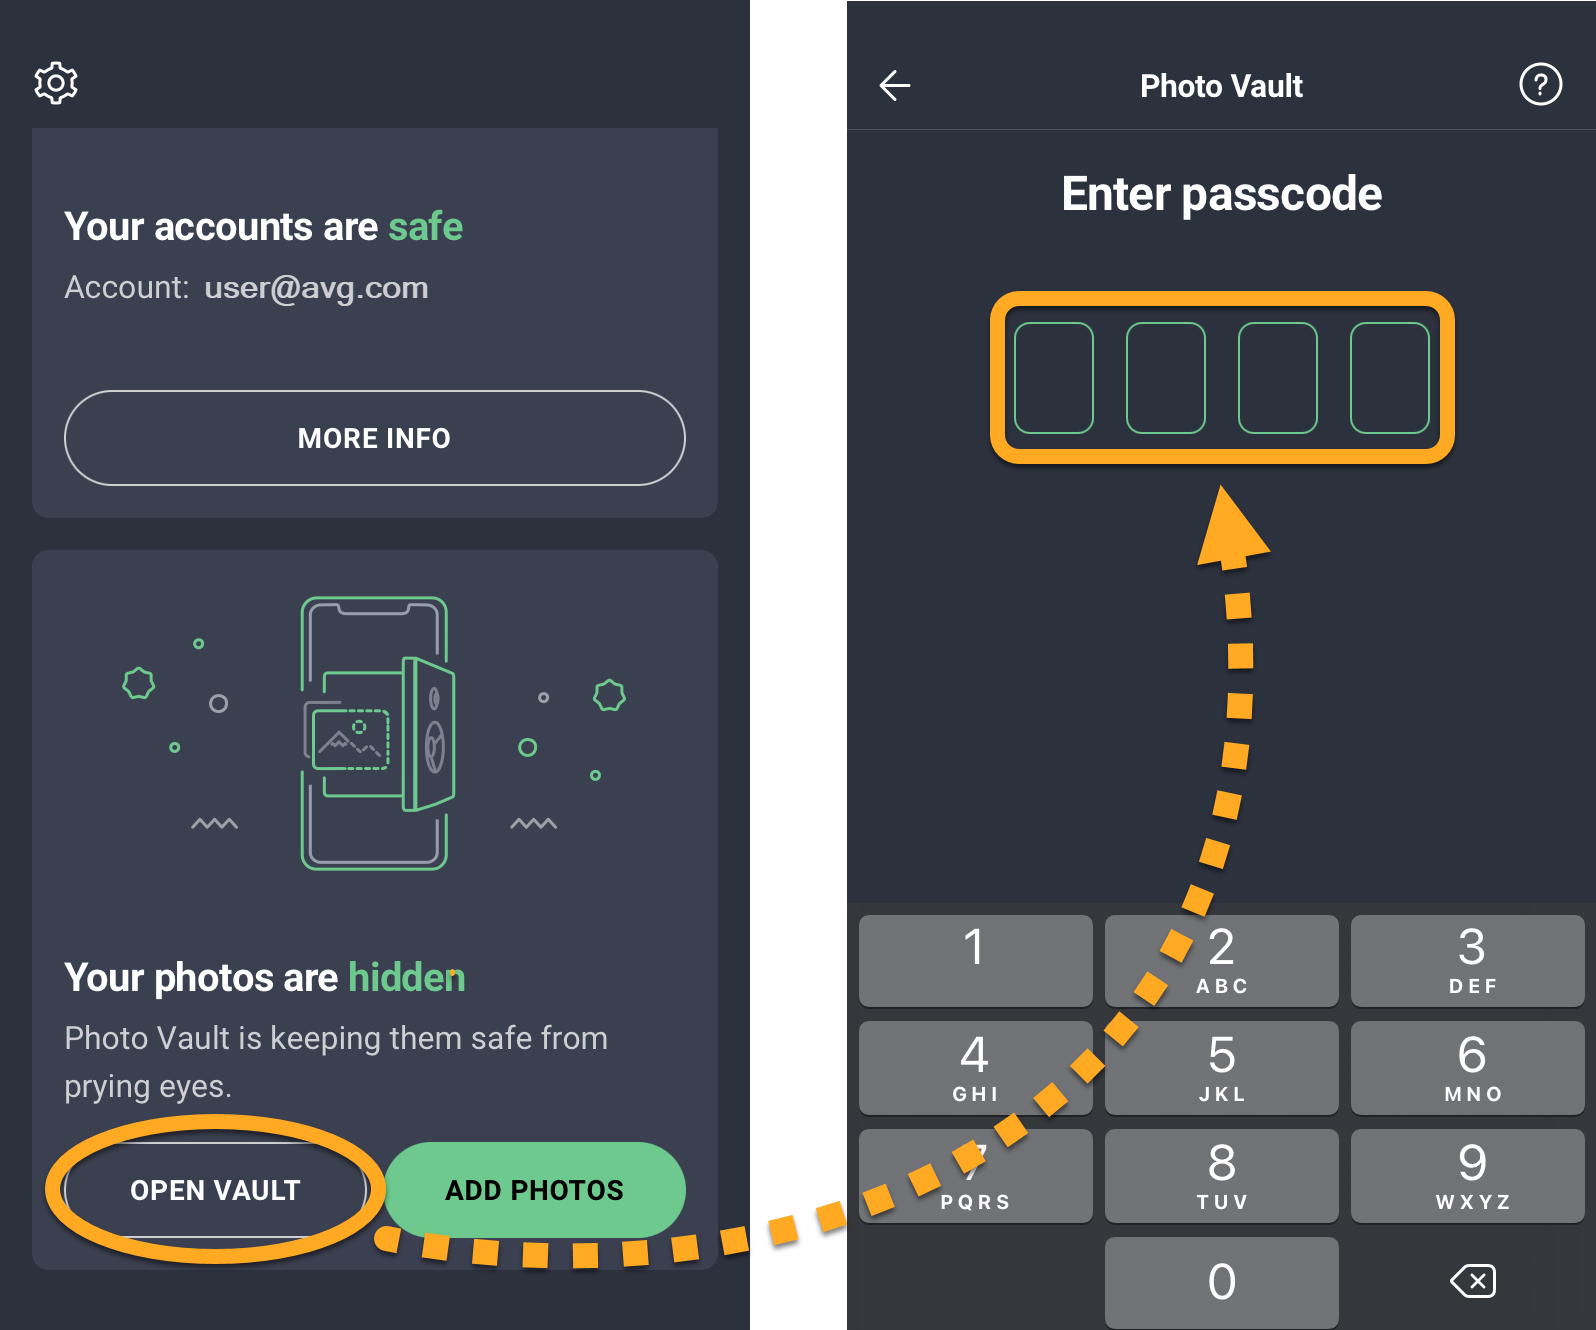
Use Photo Vault
Photo Vault protects your photos by locking them in an encrypted passcode-protected vault. To set up Photo Vault:
- Tap the AVG Mobile Security icon on the Home screen of your device. The app opens.
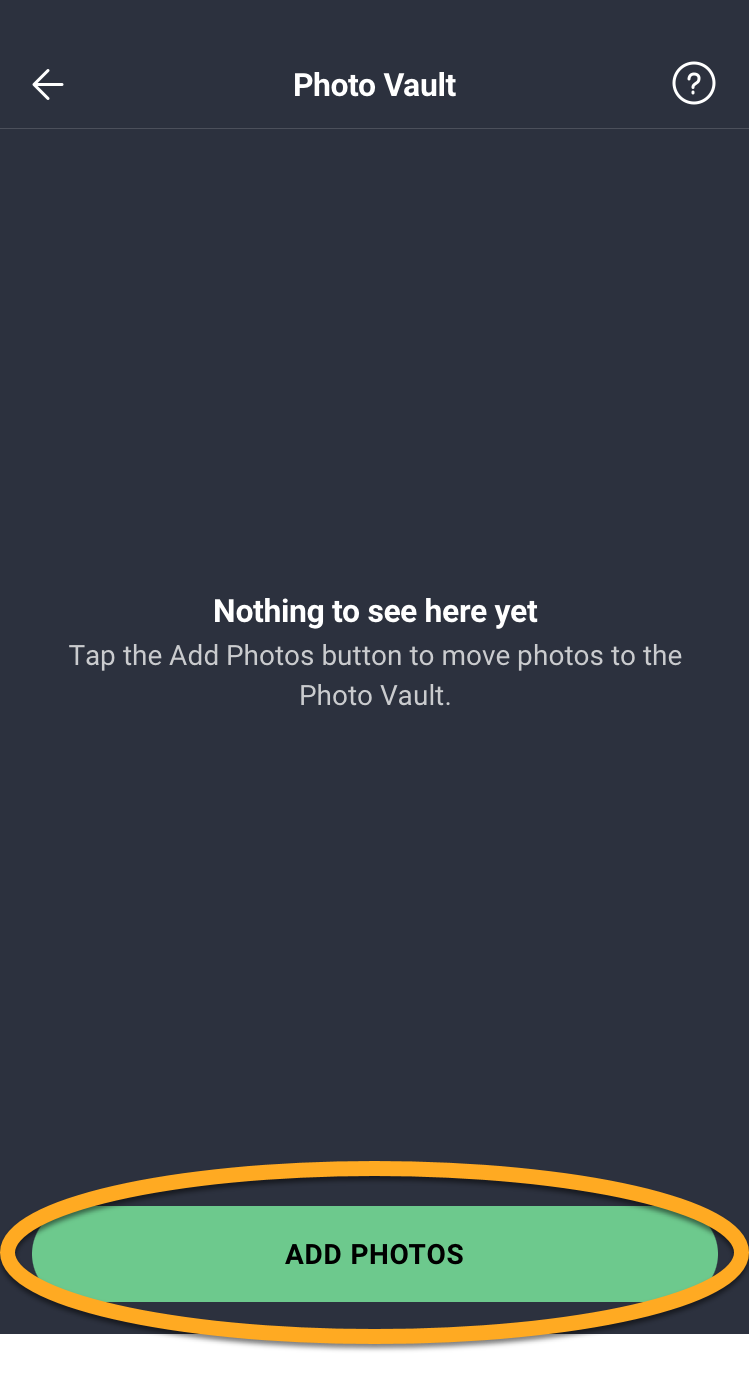
- Under Hide your private photos, tap Add photos.
- Tap Next twice, then tap Enable photo vault.
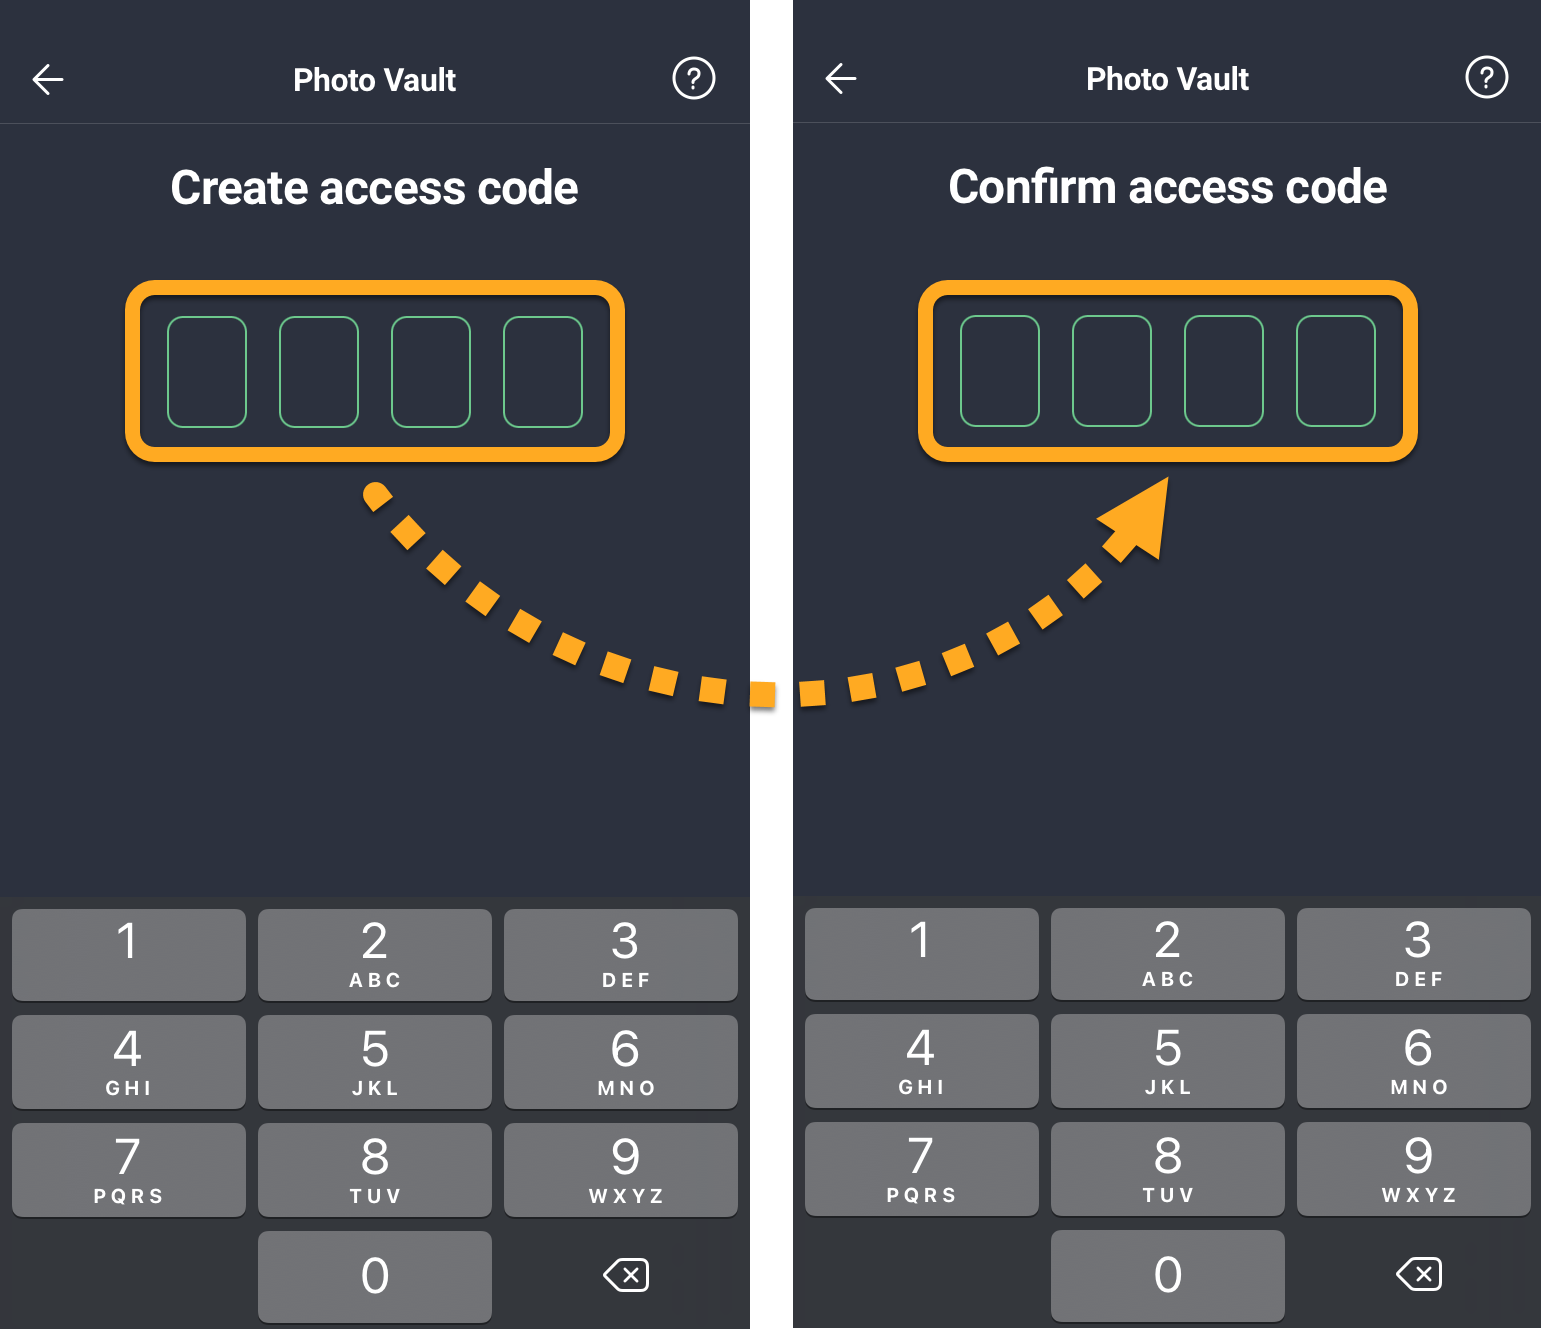
- Create a four digit access code that you will use to sign in to your Photo Vault. Type it twice to confirm.
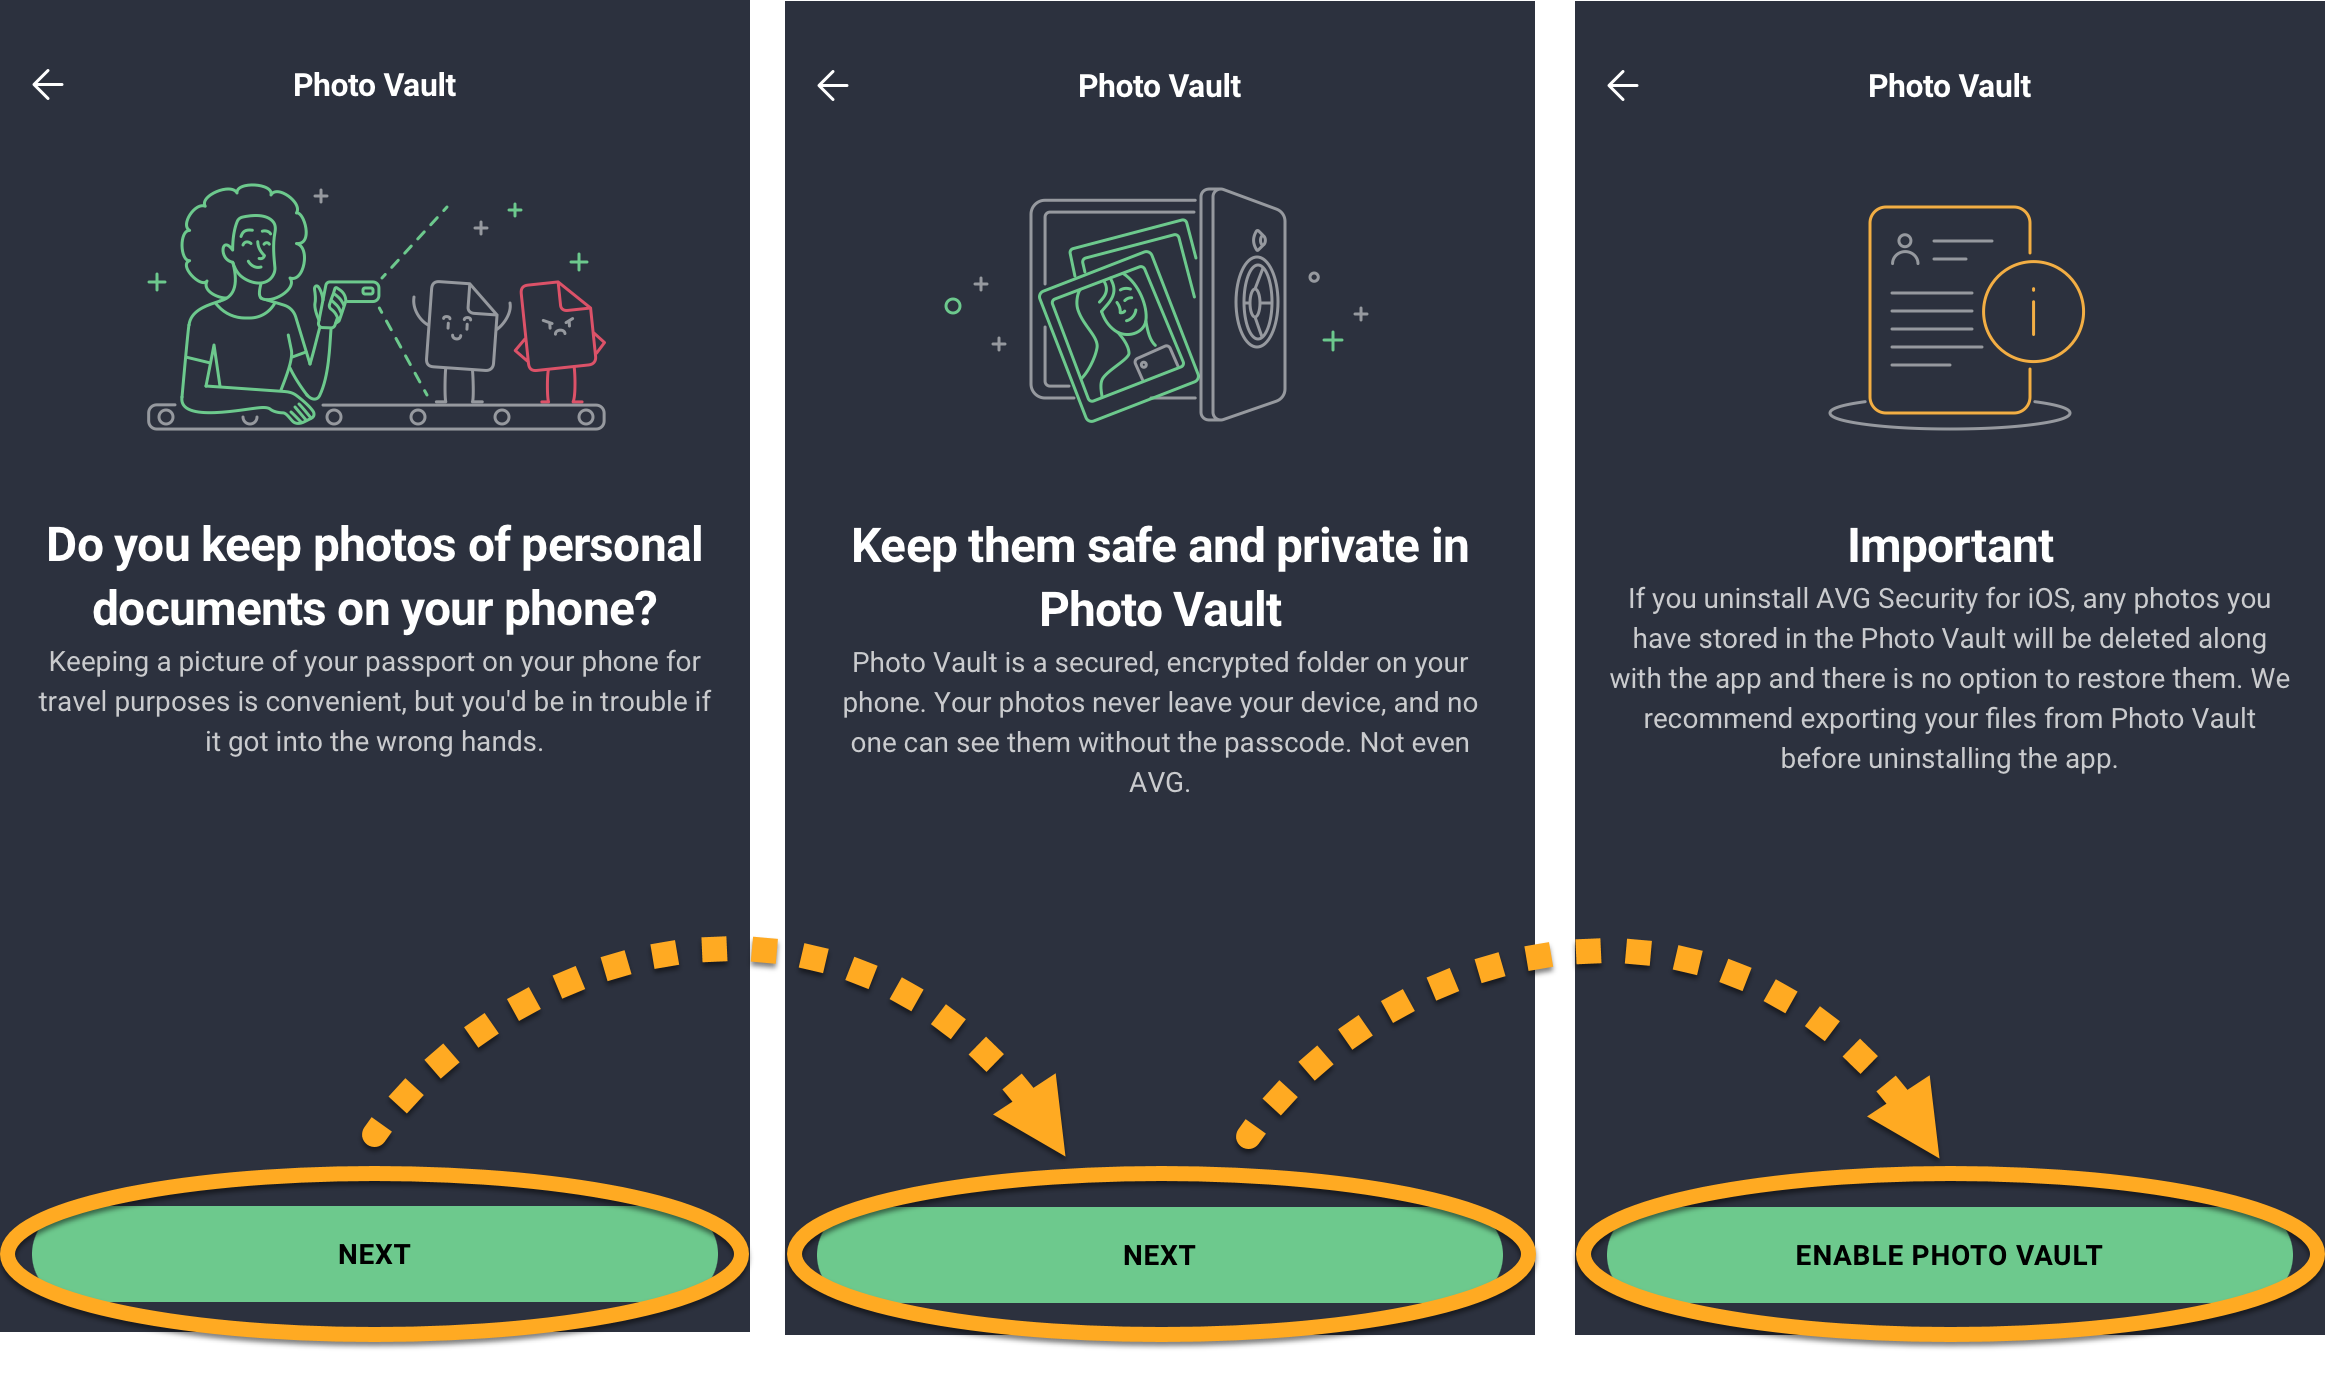
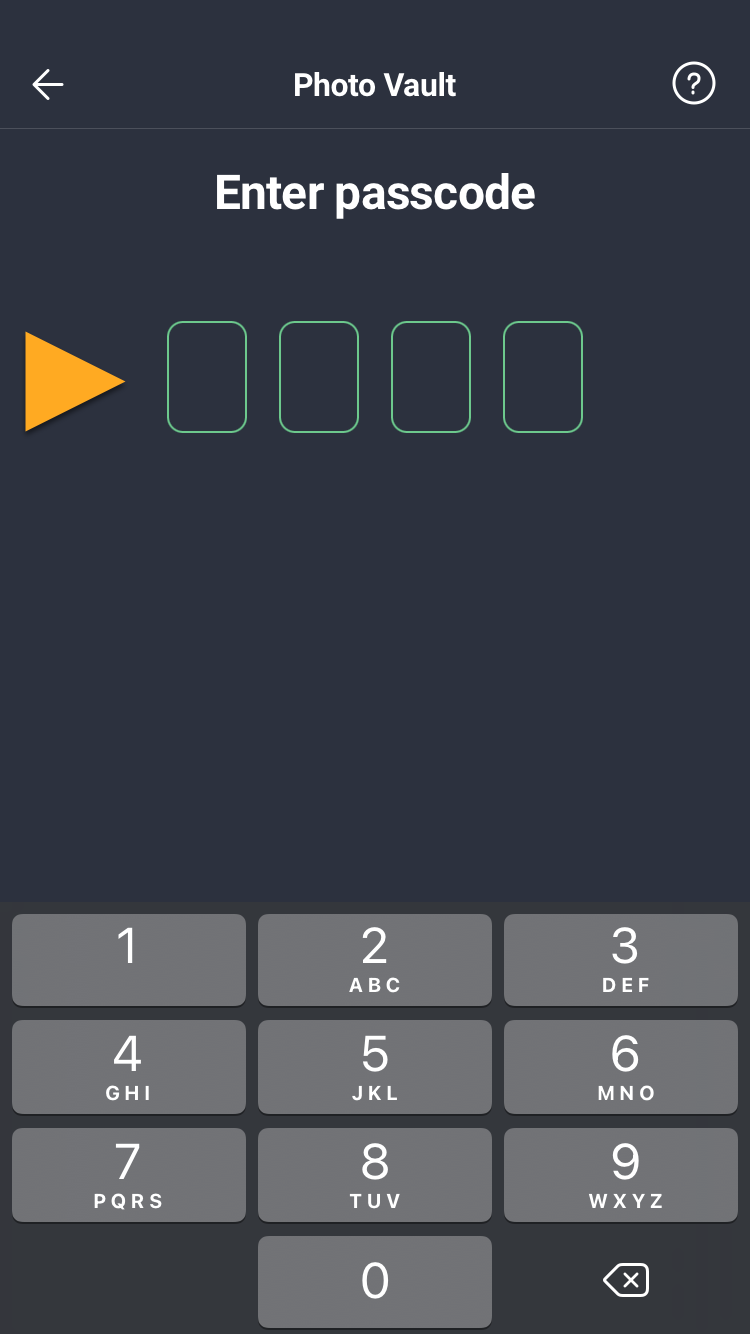
Your passcode is set. Now every time you open Photo Vault you are prompted to enter your passcode to gain access to the vault.
Add photos to Photo Vault
You can add existing images to your Photo Vault from the Photo Library on your device, or use the camera on your device to take a photo and import it directly into your Photo Vault. To add images to Photo Vault:
- Tap the AVG Mobile Security icon on the Home screen of your device. The app opens.
- Under Hide your private photos, tap Add photos.
- Enter your passcode.
- Tap Add photos.
- Select either Photo Library or Camera.

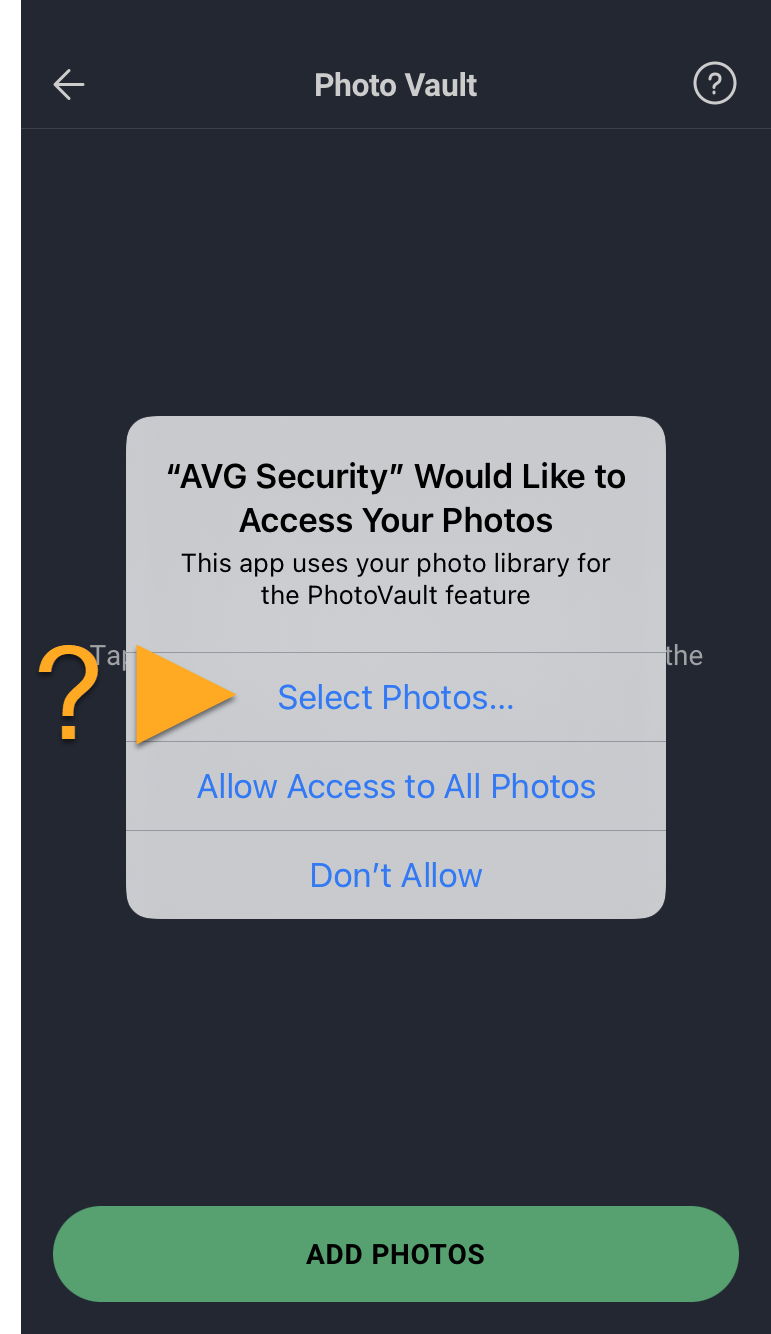
- To give AVG Mobile Security permission to access your Photo Library, tap Select Photos... to manually choose the photos, or tap Allow Access to All Photos.
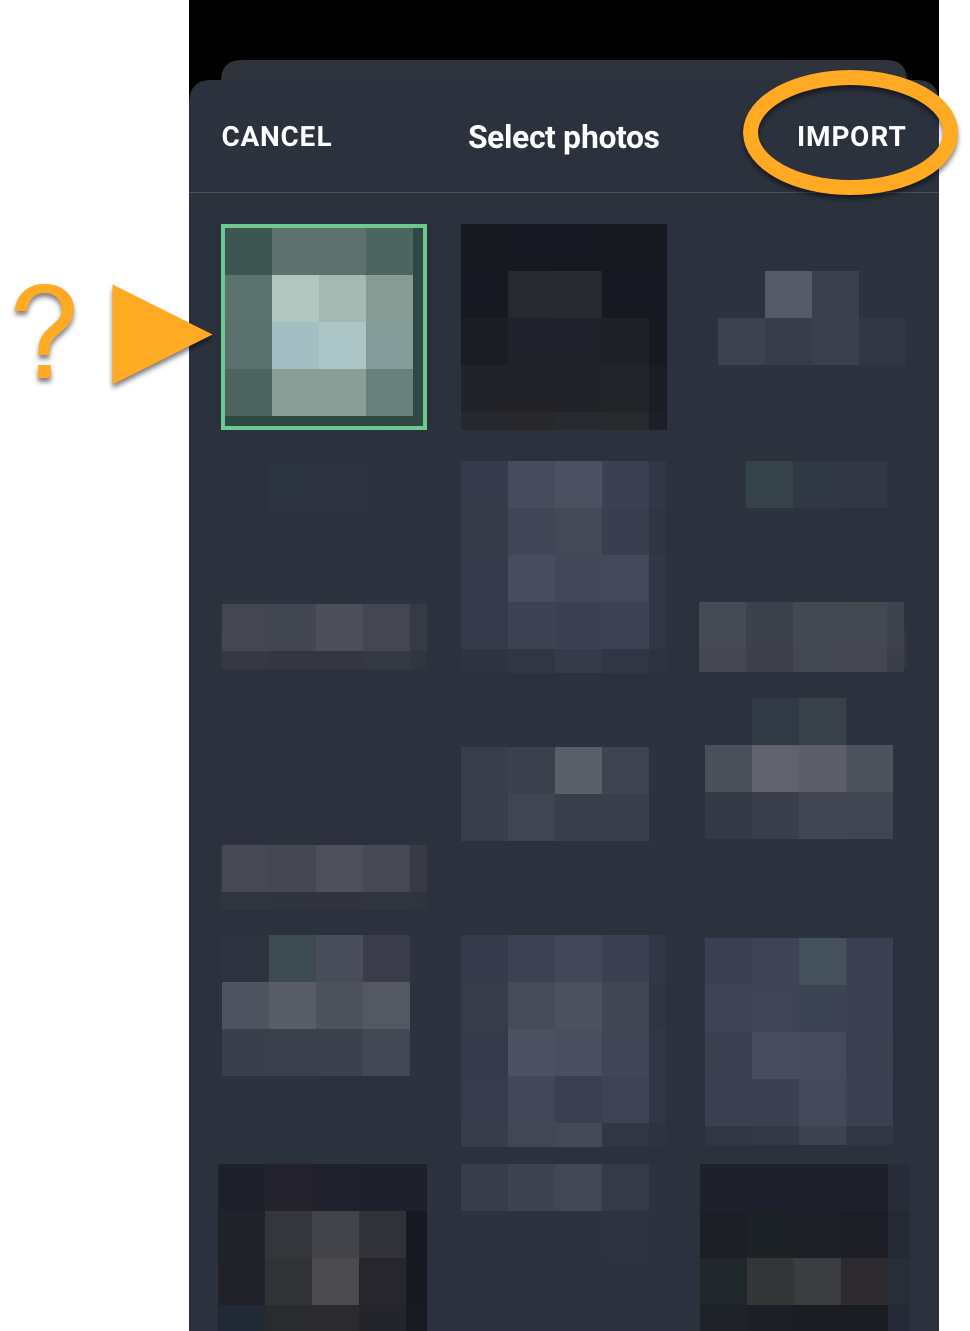
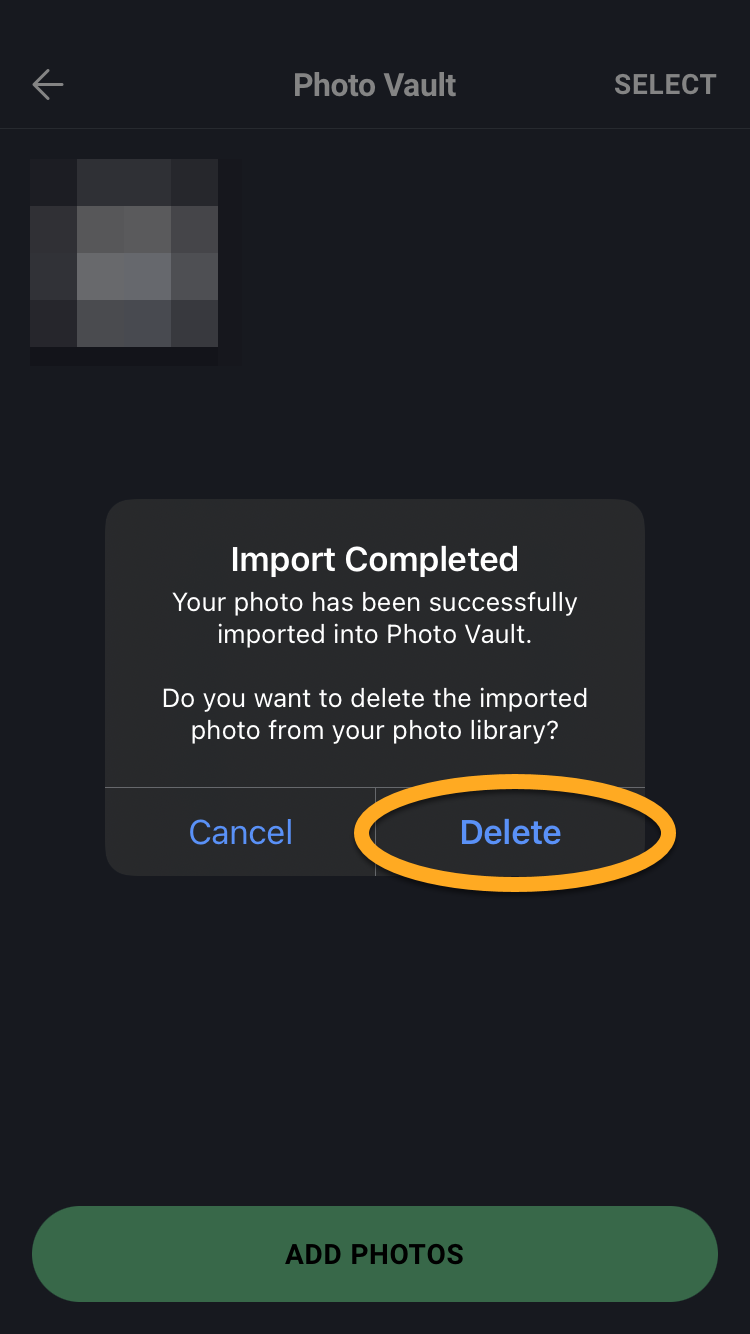
- Tap a photo to select it, then tap Import.
- Optionally, tap Delete to remove the photo from your photo library.
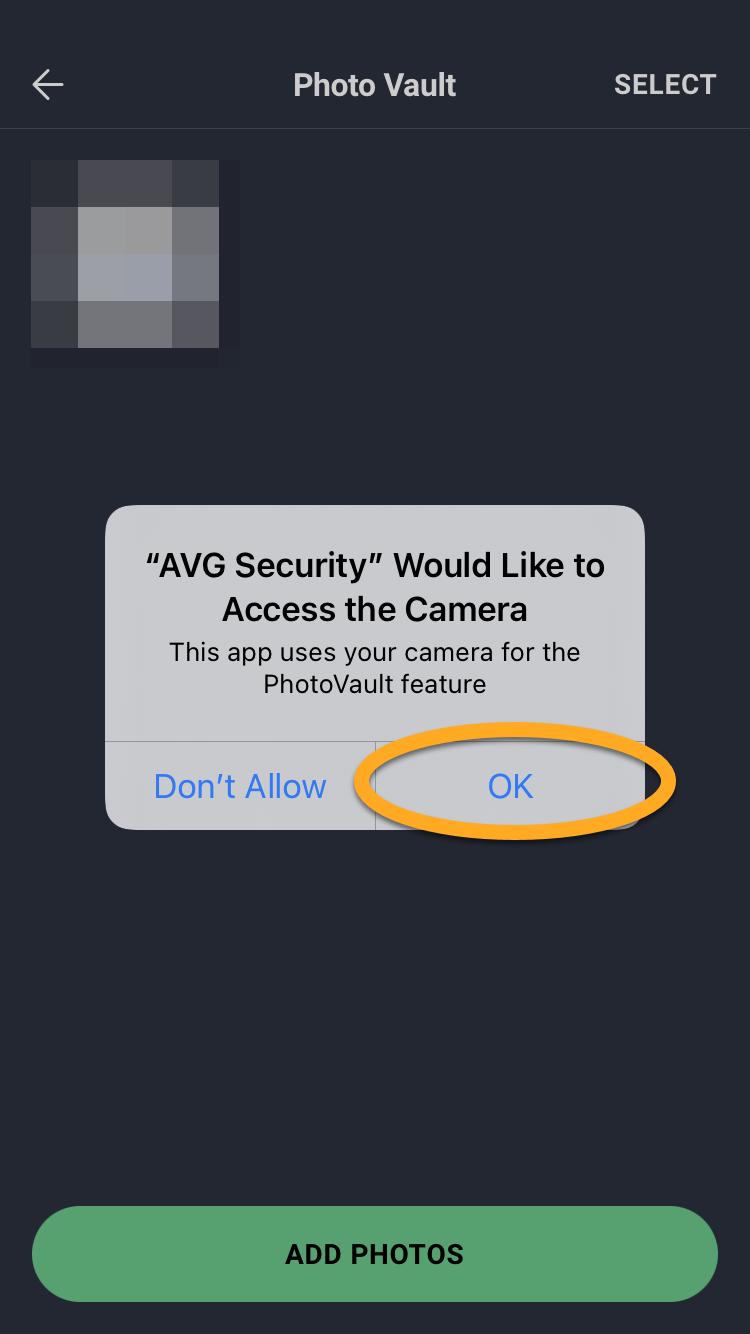
- Tap OK to give AVG Mobile Security permission to access your camera.
- Take a photo, then tap Retake or Use Photo and tap OK.
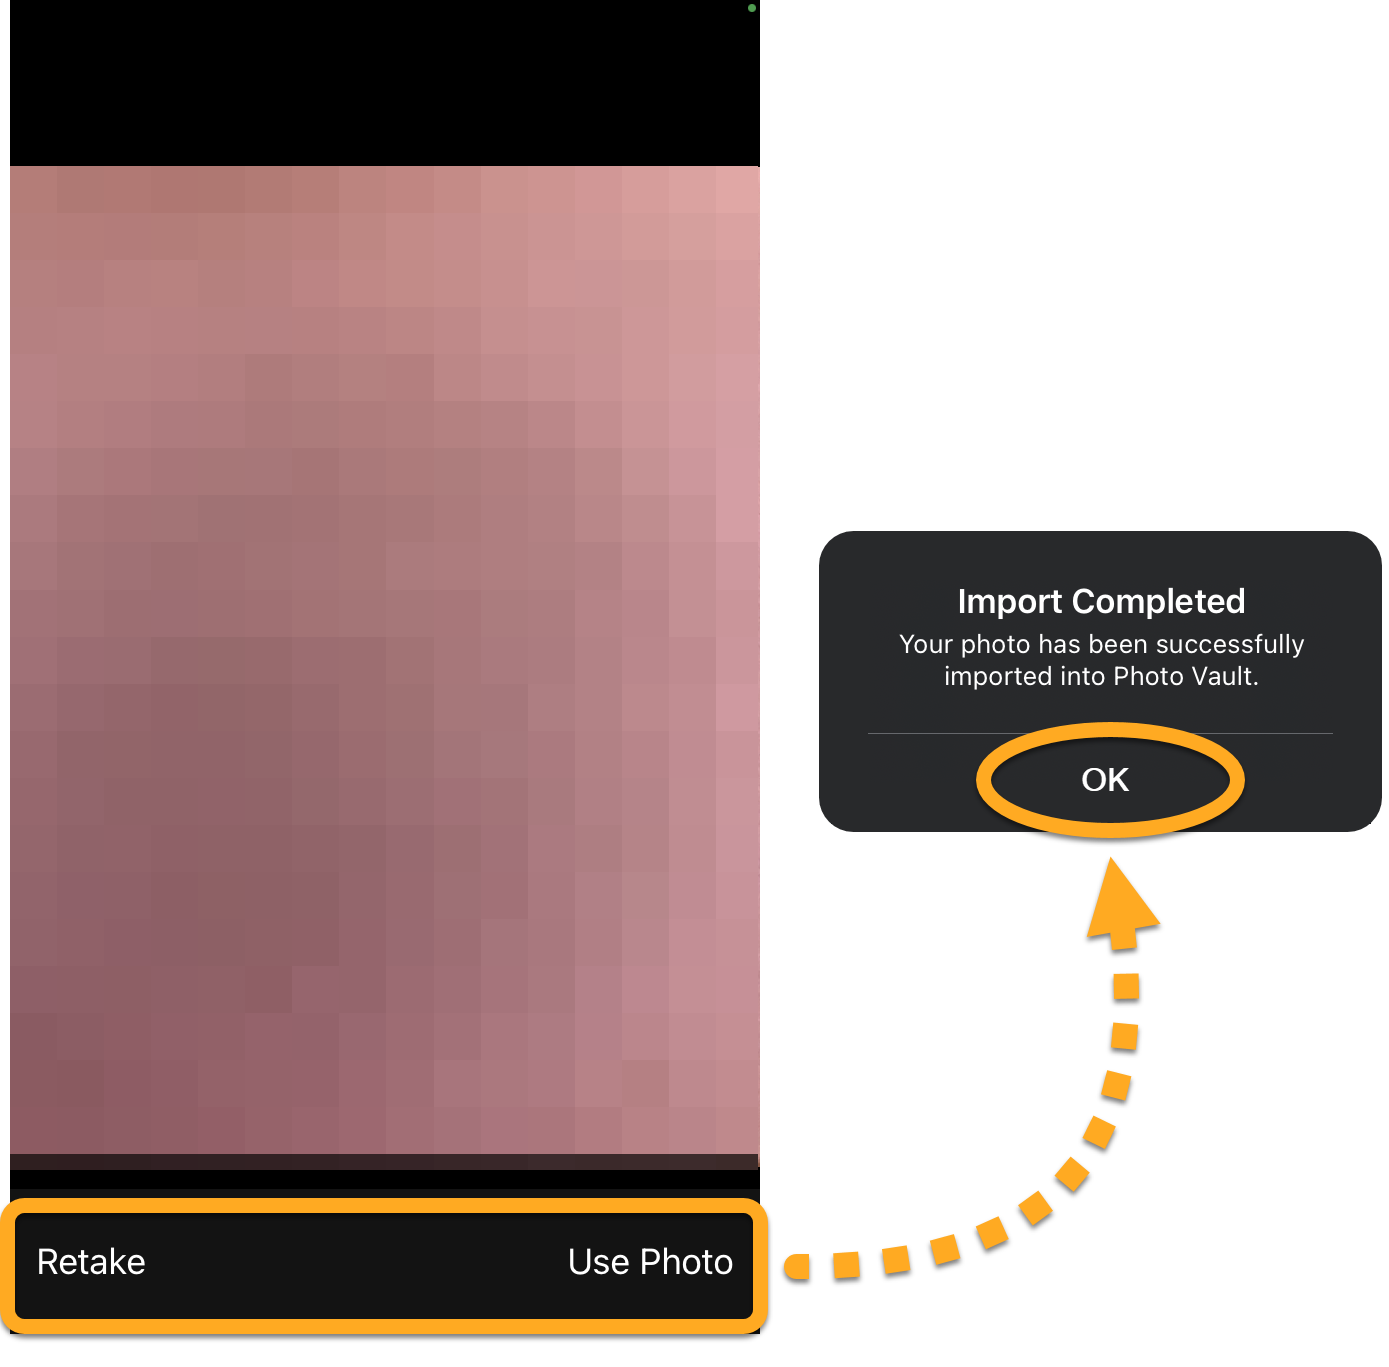
Your photo is imported into Photo Vault.
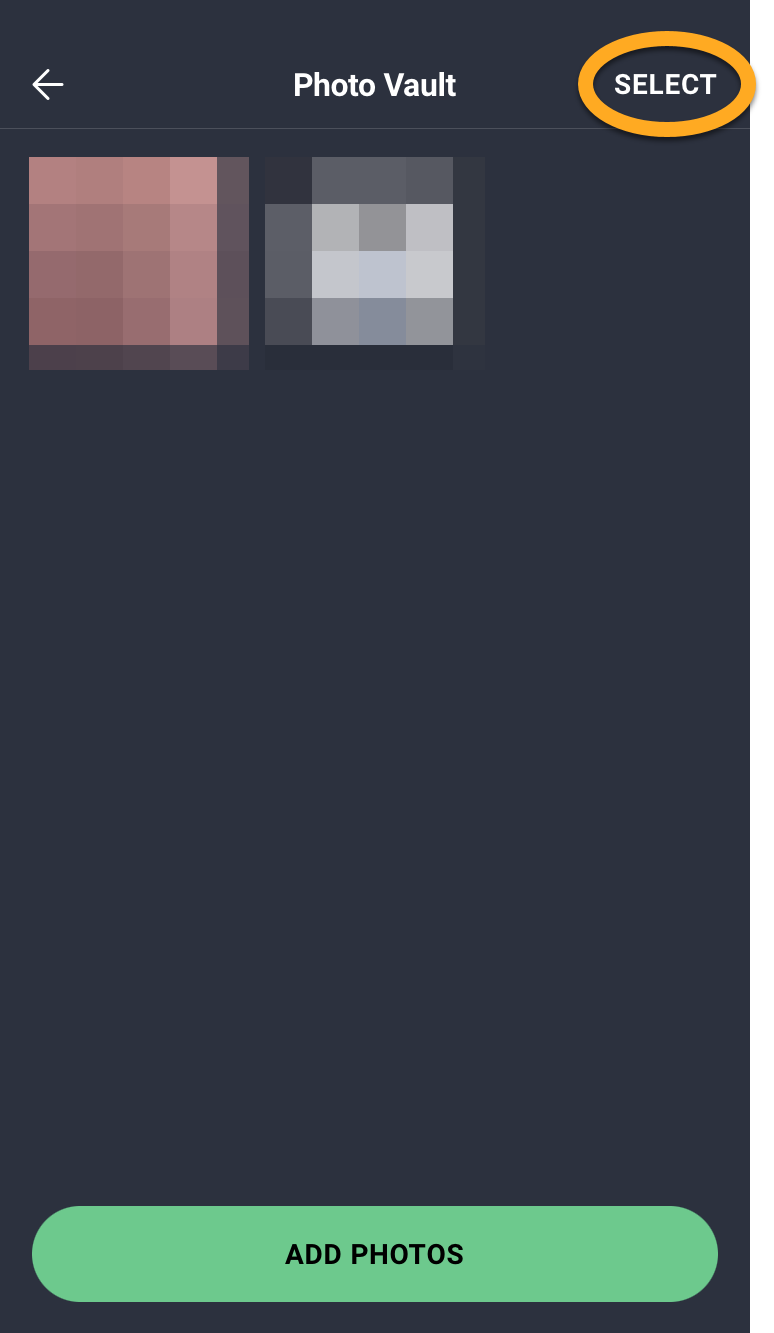
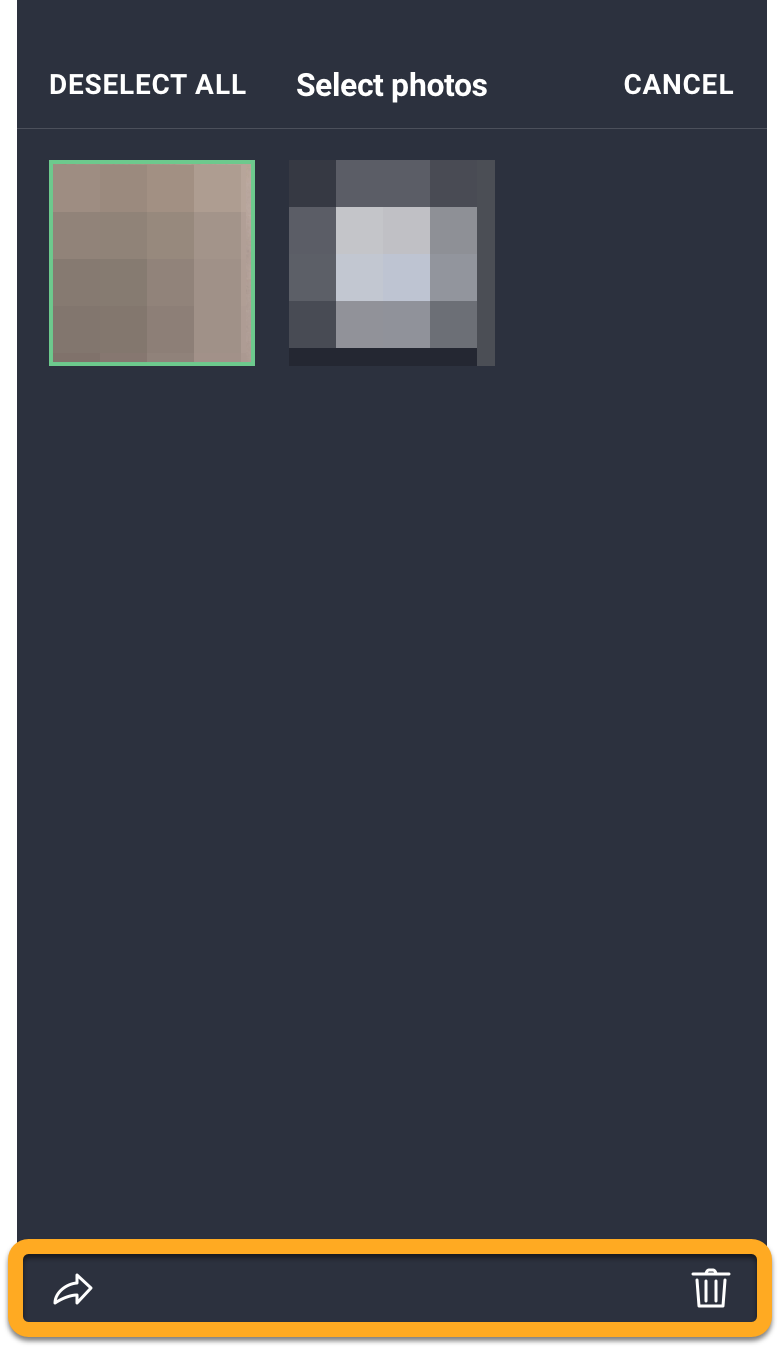
Share or delete files from Photo Vault
- Tap the AVG Mobile Security icon on the Home screen of your device. The app opens.
- Under Your photos are hidden, tap Open vault and enter your passcode.
- Tap Select.
- Tap the photo(s) you want to share or remove from the vault. A green border appears around the selected photo(s).
- Tap the relevant option:
- Share icon: Send the selected file(s) to another location, for example via AirDrop, email, or message.
- Trash icon: Permanently remove the file(s) from Photo Vault.

Export photos from Photo Vault
- Tap Open on the Photo Vault tile.
- Enter your passcode.
- Tap Select.
- Tap the photo(s) you want to export. A green border appears around the selected photo(s).
- Tap Share in the bottom-left corner.
- Select your preferred method for exporting or saving the files and follow the on-screen instructions.
Your photos are now exported from Photo Vault.
Change your Photo Vault passcode
- Tap (the gear icon) in the top-left corner of the main app screen, then select Settings.
- Under Photo Vault, tap Change access code.
- Enter your current passcode.
- Enter a new 4-digit passcode.
- Enter your new passcode again to confirm it.
Your passcode for Photo Vault is now changed.
Further recommendations
For more information about the features available in AVG Mobile Security for iOS, refer to the following article:
- AVG Mobile Security
- AVG Mobile Security Premium
- AVG Mobile Security Ultimate
- iOS