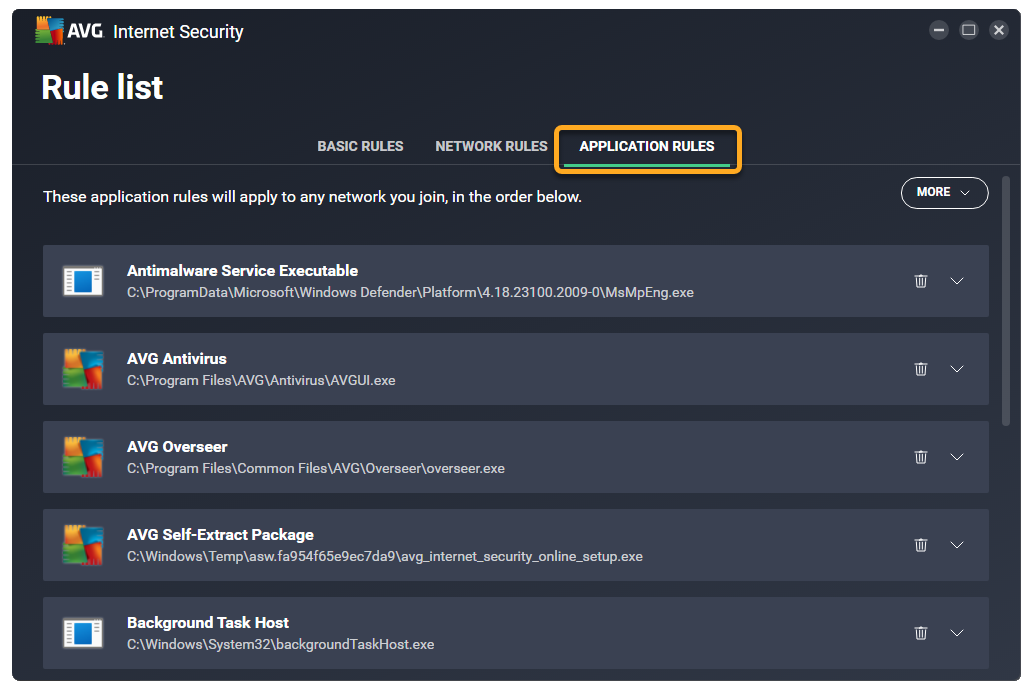
Enhanced Firewall creates application rules each time an application or process starts for the first time. These rules determine how Enhanced Firewall behaves toward each application or process when it connects to the internet or to another network. Advanced users can set connection allowances for each individual app to determine how strictly Enhanced Firewall monitors any incoming or outgoing communication.
Access application rules
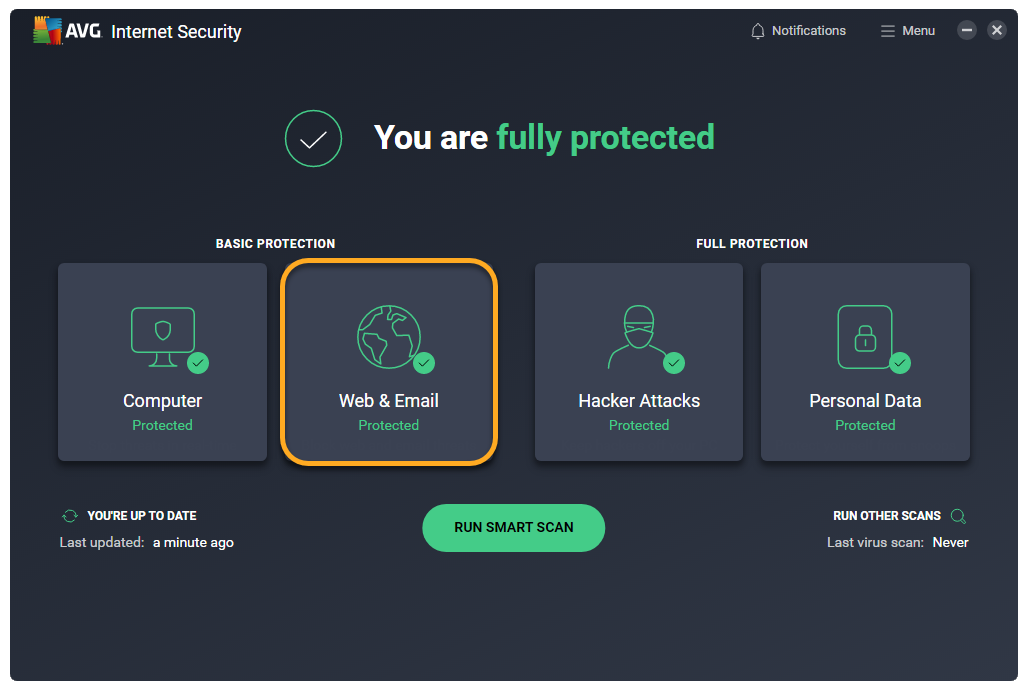
- Open AVG AntiVirus and click the Web & Email tile on the main application screen.

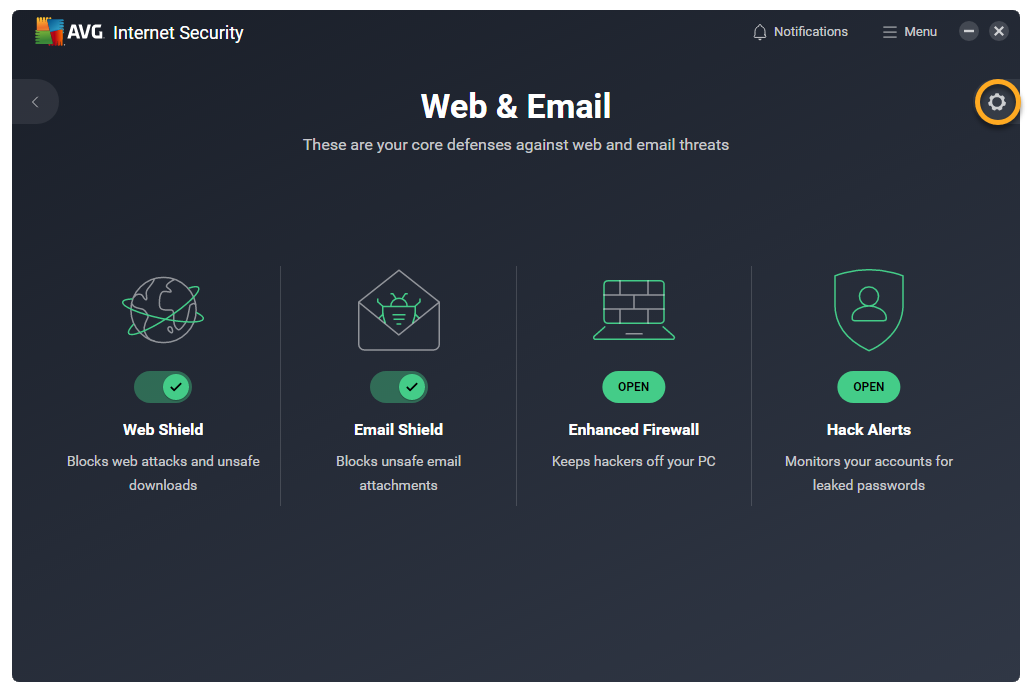
- Click
 Settings (the gear icon) in the top-right corner of the screen.
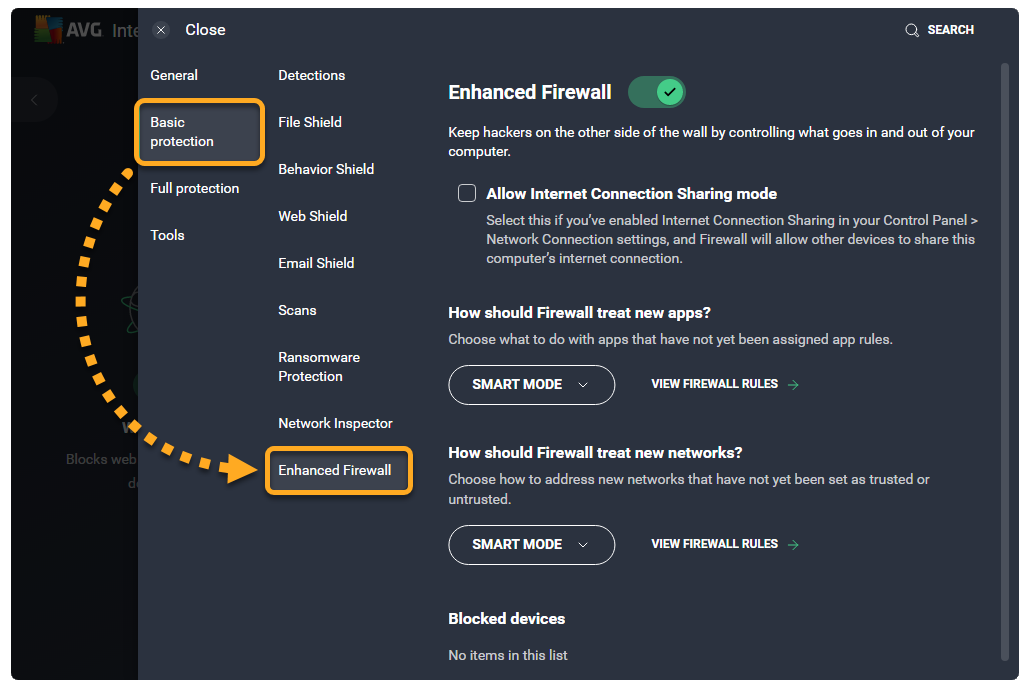
- Click Basic protection ▸ Enhanced Firewall in the left panel.

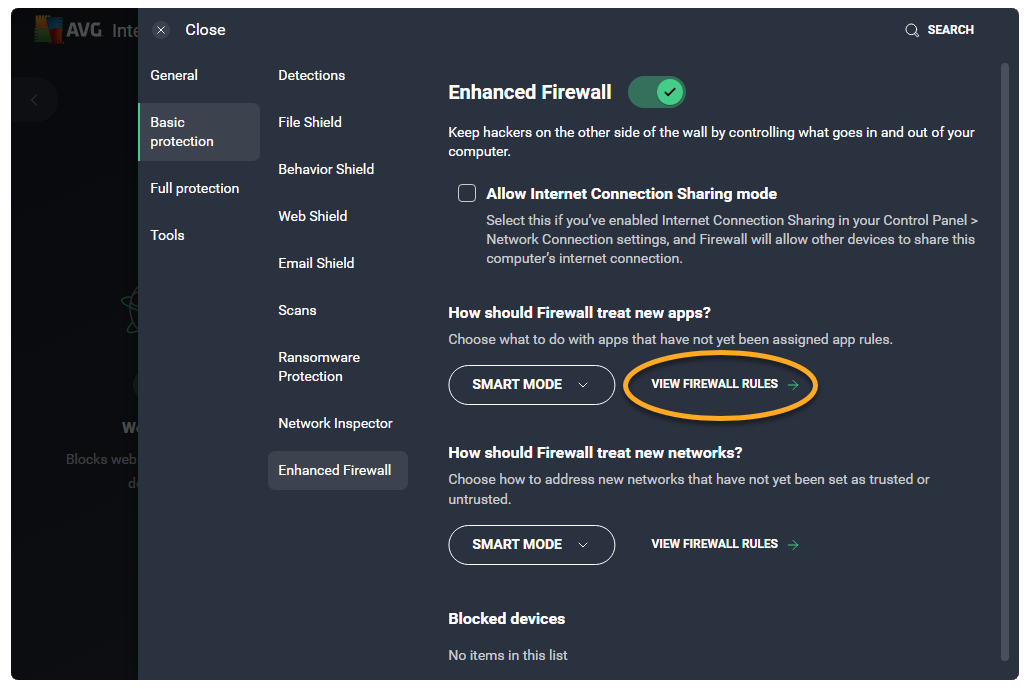
- Click View Firewall rules.

- Select the Application rules tab.

The Application rules screen lists all of your current application rules.
To search for a specific rule, or view only the rules that meet certain criteria, go to More ▸ Filter rules.

You can specify the rules that Enhanced Firewall applies for apps that do not yet have assigned application rules via
☰ Menu ▸ Settings ▸ Basic protection ▸ Enhanced Firewall ▸ How should Firewall treat new apps?.For more information about the the application rule parameters, refer to the Review application rules section. To learn how to modify your existing application rules, or create new application rules, refer to the Configure application rules section.
Review application rules
Default application rules are created when an app tries to connect to the internet or to another network for the first time.
Each rule is defined by the following parameters:
- Name: Displays the name of the rule.
- Action: Indicates the action that Enhanced Firewall takes when this rule is applied. Enhanced Firewall may apply the following actions:
- Smart mode: Enhanced Firewall determines the appropriate action based on the trustworthiness of the app.
- Allow: Enhanced Firewall allows the connection attempt.
- Block: Enhanced Firewall blocks the connection attempt.
- Ask: Enhanced Firewall prompts you to manually allow or deny the connection attempt.
- Protocol: Indicates the network protocol the rule applies to. One protocol may be selected, or All if the rule applies to all protocols.
- Direction: Indicates whether the rule applies to incoming connections (In), outgoing connections (Out), or to connections in both directions (In/Out).
- Address: Indicates the source or destination IP address the rule applies to. The rule may apply to a single IP address, multiple IP addresses (separated by commas), or an IP address range (starting with the lowest IP address and separated with a dash). If the field is blank, the rule applies to all IP addresses.
- Local port: Indicates a network port number on the local IP address of your PC's network interface. The rule may apply for a single port number, multiple ports (separated by commas), or a port range (starting with the lowest port number and separated with a dash). If the field is blank, the rule applies to all local ports.
- Remote port: Indicates a network port number on the remote IP address of the external server or device. The rule may apply for a single port number, multiple ports (separated by commas), or a port range (starting with the lowest port number and separated with a dash). If the field is blank, the rule applies to all remote ports.
An application may need to communicate with a specific remote port in order to function. For example, your internet browser usually needs port 443, as this is the default port used for HTTPS (secure HTTP). To verify the remote port that is required by a particular application, contact the application vendor or refer to the application's support pages.
- ICMP Type: Indicates the control message (represented by a code number) that the rule applies to. The rule may apply to a single code number, or multiple codes (separated by commas). This option is only available for connections based on the Internet Control Message Protocol (ICMP). The code numbers of control messages are listed in the technical specifications of the ICMP (RFC 792).
Configure application rules
Click the down arrow next to an application or process to view its current rules.
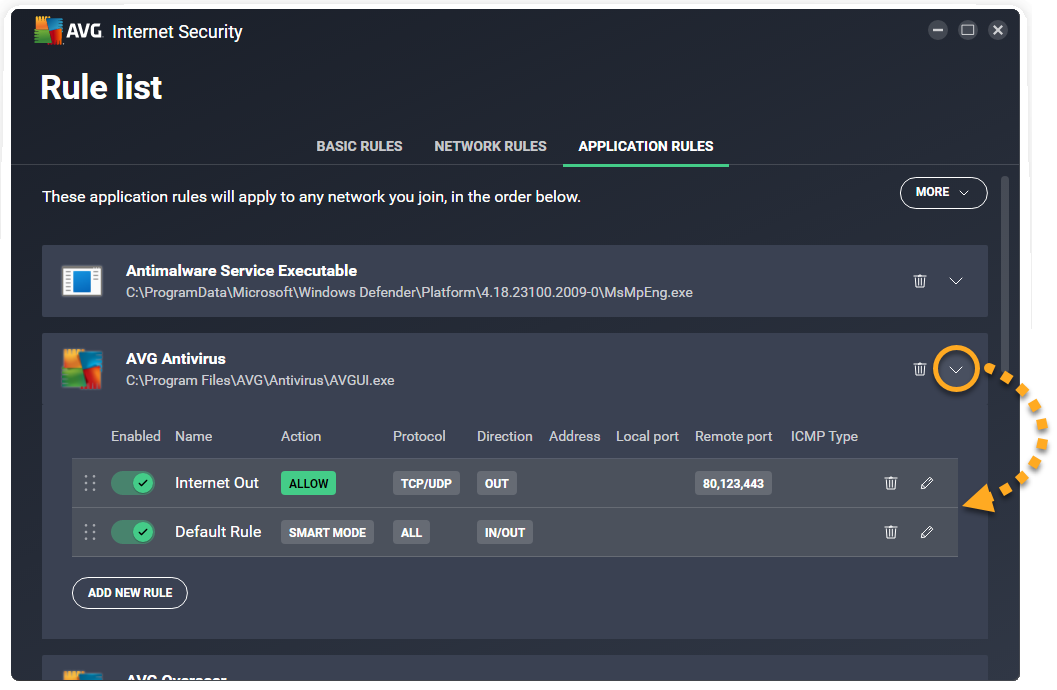
The following options are available for each application or process:
- Disable or enable a rule: Click the slider next to a rule to disable/enable it.
- Delete a rule: Click Remove (the trash icon) next to the relevant rule.
- Edit a rule: Click Edit (the pencil icon) in the panel for the relevant rule. Edit the relevant parameters, then click Save to confirm.
- Change rule priorities: Application rules are listed in order of priority, which means that although multiple rules may relate to one application or process, the rule which appears highest in the table is always applied first. Click and drag the relevant row up or down to adjust the priority of the selected rule.
- Add a new rule: Click the Add new rule button to create a rule that applies for the selected application or process. Define each of the parameters, then click Save to confirm.

- AVG Internet Security 23.x for Windows
- AVG AntiVirus FREE 23.x for Windows
- Microsoft Windows 11 Home / Pro / Enterprise / Education
- Microsoft Windows 10 Home / Pro / Enterprise / Education - 32 / 64-bit
- Microsoft Windows 8.1 / Pro / Enterprise - 32 / 64-bit
- Microsoft Windows 8 / Pro / Enterprise - 32 / 64-bit
- Microsoft Windows 7 Home Basic / Home Premium / Professional / Enterprise / Ultimate - Service Pack 1 with Convenient Rollup Update, 32 / 64-bit
